 VISUAL BASIC
VISUAL BASIC
Visual Basic 6.0 - Download
Here is a Setup of Visual Basic 6.0 - You will need Winzip to Extract it. It comes without Msdn so if it ask you to Install Msdn than Skip it .Jehanzeb.tk wish you a Happy Coding.
Uploaded by the Site Crew Member Jehanzeb
Version: 6.0
Filesize: 80.36 MB
Added on: 30-Jan-2005
Serial : 111 111111
Beginning Visual Basic
This Tutorial was taking from Planet Source Code - From James Dunn
Introduction:
Learning Visual Basic (VB) will be very useful for any computer user ages ranging from 12 to anything really!
What the word ‘Basic’ stands for is, 'Beginner's All-purpose Symbolic Instruction Code'. The reason why the word ‘Visual’ is in front of it is because unlike most programming languages where you would normally have to type coding in to create a command button or a text box, Visual Basic is basically just a "click and drag" method.
You can buy your very own version of Visual Basic 6 from any good computer software store for around £ (research prices).
The minimum system requirements needed to run Visual Basic are as followed:
- A CD-ROM drive;
- More than 24mb of RAM;
- More than 48mb of free hard disk space.
Following the Visual Basic installation process is pretty simple but if you encounter any problems, like most people do, then please feel free to e-mail me at, [email protected]
First Steps:
When you load Visual Basic a pop-up window should appear asking what project you would like to create. Selecting ‘Standard EXE’ is the best choice for the time being.
When the project loads you should see a window saying, “Project1 - Form1 (Form)”. This is what we call a Form. To the left of the form is a window which we call the Tool-Box. To the right is the Properties window and above the Properties window is a Project window.
Now I will explain some of the controls you can use in your Projects to start and build-up your very own applications.
Command Buttons: Command Buttons is very user because it places the user in control of the program so they can tell it what to do.
To insert a Command Button you’ll have to click on the icon and click and drag where you want it to be positioned and then just release the mouse when you are happy with its positioning. You can change the Command Buttons caption by selecting, “Caption” in the Properties and then changing it to suit your needs.
Labels: Labels are used to display text which can’t be edited. For example it might inform the user about something.
To insert a Label you’ll have to click on the icon and click and drag where you want it to be positioned and then just release the mouse when you are happy with its positioning. You can change the Labels caption by selecting, “Caption” in the Properties and then changing it to suit your needs.
Text Boxes: Text boxes are used to display text and edit text during runtime. They can store large amounts of data which can be very useful.
To insert a Text Box you’ll have to click on the icon and click and drag where you want it to be positioned and then just release the mouse when you are happy with its positioning. You can change the Text Boxes text by selecting, “Text” in the Properties and then changing it to suit your needs.
Picture Boxes: Picture boxes can contain images and you can also draw pictures into one.
To insert a Picture Box you’ll have to click on the icon and click and drag where you want it to be positioned and then just release the mouse when you are happy with its positioning. You can change the Pictures Boxes image by selecting, “Picture” in the Properties and then search for the image which you choose to use.
Beginning Visual Basic - Part 2
This Tutorial was taking from Planet Source Code - From James Dunn
Recapping:
In the last tutorial I talk about the installation process of Visual Basic and also told you about some Controls and explained what they can do. In this PART 02 tutorial I will be adding some still code to them controls I explained in the PART 01 tutorial. Enjoy…
Command Buttons and
Labels: Here I will be using both the Command Button and the Label to create this code. The code I will be creating is very simple and very easy to follow, all it is, is when the user clicks on the Command Button the Label will change it’s positioning.
- Coding: Private Sub Command1_Click()
Label1.Move (0)
Label1.Caption = “My positioning has changed!!!”
End Sub
- Explained: Basically the ‘Private Sub Command1_Click()’ means that when Command1 (the Command Button) is click on by the user then it goes to the next line down. This line is the ‘Label1.Move (0)’ and this is the command the computer will do if the user clicks the Command1 (Command Button) as explained above but this little command will tell the computer to move (see the .Move) the Label to the left hand side of the form (see the (0)). The third line of coding changes the Labels Caption to say, “My positioning has changed!!!”, but you can edit this anyway you like just make sure you start it will quotation marks and end it will quotation marks. The fourth line of coding just tells the computer that it is the end of that command for that Command Button.
Command Buttons and
Text Boxes: Here I will be using both the Command Button (again) and a Text Box to create this code. The code I will be creating is very simple and very easy to follow, all it is, is when the user clicks on the Command Button a MsgBox will appear telling the user the number of characters in the Text Box.
- Coding: Private Sub Command1_Click()
MsgBox (“Characters: “ & Str$(Len(Text1.Text)) & “.”)
End Sub
- Explained: Basically the ‘Private Sub Command1_Click()’ means that when Command1 (the Command Button) is click on by the user then it goes to the next line down. This line is the ‘MsgBox (“Characters: “ & Str$(Len(Text1.Text)) & “.”)’ and this is the command the computer will do if the user clicks the Command1 (Command Button) as explained above but this command will tell the computer to display a MsgBox (MsgBox(“”)) displaying the message, “Characters: “ and then the number of characters in Text1 (Text Box), it does this by making the length (Len) of Text1 into a String (Str$) and then adds it to the MsgBox. The third line of coding just tells the computer that it is the end of that command for that Command Button.
Command Buttons,
Labels and Text Boxes: Here I will be using the Command Button, a Label and a Text Box to create this code. The code I will be creating is very simple and very easy to follow, all it is, is when the user has entered two numbers in Text1 and Text2 and then has clicked the Command1 it will show what the two numbers equal when added together and this answer will be displayed in Label1.
- Coding: Private Sub Command1_Click()
Label1.Caption = Str(Val(Text1.Text) + Val(Text2.Text))
End Sub
- Explained: Basically the ‘Private Sub Command1_Click()’ means that when Command1 (the Command Button) is click on by the user then it goes to the next line down. This line is the ‘Label1.Caption = Str(Val(Text1.Text) + Val(Text2.Text))’ and this is the command the computer will do if the user clicks the Command1 (Command Button) as explained above but this command will tell the computer to display what Text1 and Text2 equal when added together (+). It does this my making Text1 and Text2 into a string (strings are explained above) and then converts that string into a Value (Val) so that the computer understands that it is dealing with numbers. The third line of coding just tells the computer that it is the end of that command for that Command Button.
Different Data Types:
String: This is a sequence of up to around 2 billion characters.
Integer: This is a whole number from -32,768 to 32,767.
Long: This is a whole number from -2,147,483,648 to 2,147,483,647.
Single: A floating point data type which holds positive or negative numbers up to around 3.4 E38.
Double: A floating-point data type like single but holding positive or numbers to around 1.8 E308.
Currency: This data type is called a scaled integer because it deals with fixed-point numbers that have 15 digits to the left of the decimal point and 4 digits to the right. This is more accurate than floating-point numbers for currency values.
Date: Holds dates from January 1st, 100 to December 31st, 9999. Time information is also stored.
Boolean: This is the simplest data type. It has just two possible values, True and False.
Byte: This data type holds positive numbers from 0 to 255.
Object: The object data type stores Visual Basic objects. These can also be automation objects from other applications.
Yahoo! Packet Sniffing and Coding
-I made this Tutorial because I got asked for it. If you learn from it and / or use it than please do so in a Educational way only. For more help to this Visit our Forums and Post your Question in the Programming / Vb Section. I made this from my own Experience so don't Copy that and bring it into your Site without Permission!
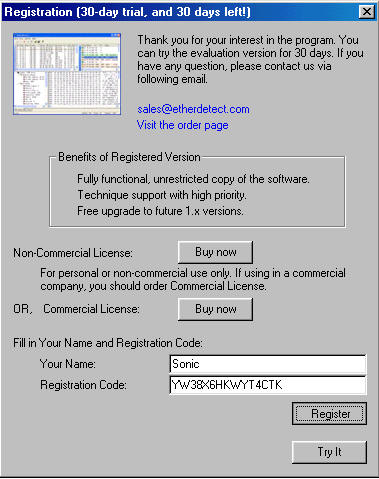
-Okay we start with Sniffing a Package for that I use Ether Detect Packet Sniffer V 1.2 . If you do not have it you can Download it here. I put the Serial with in so you do not need to Pay for It!
Click Here to Download Ether Detect Packet Sniffer V 1.2 + Serial !
-Okay once you got the Packet Sniffer run the Setup Etc. If it asked you to run the WinPcap v.3.1 beta3 Setup click Yes!
-Once Installed open it and Enter the Name and Serial that Comes with the Download and click Register!
-Now that we have the
Packet Sniffer Let us Start to Sniff a Yahoo Packet. I logged into my Yahoo
Messenger now to send someone a Buzz so i can get the Packet for it.I Start a
Packet Sniffer and Send my Friend a Buzz.After I Send a Buzz to another Id i
Checked the Packet Sniffer and it looked like this.
-The Difficult thing is you need to get the Server Port like you see it is the 3rd by me. Once you Clicked on the Server Port The Packages will be Shown on the Right Site. The Blue Arrow are Outgoing Packages that i Send. The Orange/Yellow arrows are what i Recieved. I Clicked on the First Packet and you can See the Packet. This Packet appeared after I buzzed the Yahoo Id sonic_da_boot_bot9.If you click down on Data you will see the Data like this
Okay this was just for your Information now we can start.
- Okay as you can see the Data looks like this here
YMSG.....T..ZUªV¦“Ø.1À€tareq_n_eumannÀ€5À€sonic_da_boot_bot9À€14À€<ding>À€97À€1À€63À€;0À€64À€0À€206À€1À€
Now this here is the Header that we Do not Need! YMSG.....T..ZUªV¦“Ø.
So what you need to have is this 1tareq_n_eumann5sonic_da_boot_bot914<ding>97163;06402061<This is your Packet
Now I gonna tell you only what you need to Know to Read all of this stuff good so you won't make any Mistakes. Just for these that do not know , What you see here is a Buzz Pm. My Yahoo id was tareq_n_eumann and i send a Buzz to sonic_da_boot_bot9 . the <ding> is the Buzz. At this Point i Start Coding the Packet.I open my Visual Basic 6.0 and Open a Standard Exe and than a new Module.

So here we Start i write this in my Module
Public Function Buzz(From As String, Victim As String)As String
End Function
Now I enter the Packet into It like this.For these who Forgot this is our Packet
1tareq_n_eumann5sonic_da_boot_bot914<ding>97163;06402061
This looks like this in my Module.

Now we Code it a Little.
Dim Pck As Strink
Pck = "" [ This should Looking like this]

Now comes the Difficult Part for Newbies. We need to Figure out what the Header is. For that i go Back to my Packet Sniffer and look at my Packet.Now do like I did.The header Starts with 4D I Click on the Y from YMSG
I Made it so i can see where the header Starts you can see the 4D after the 59.
YM = Hex 4D then you go to the Next 11 Characters on Hex
53 = 2 Character
47 = 3 Character
00 = 4 Character
0C = 5 Character
00 = 6 Character
00 = 7 Character
54 = 8 Character
00 = 9 Character
06 = 10 Character
57 = 11 Character (this is the Header Type)
Did you Understand that? If not let me try again. Count 10 Characters next from the 4D. 11 Characters with the 4D.When you did it you get the Header my Header is 06.
I hope you Understand this now the 06 is our Header that we need to finish the Packet. Now i know that my Header is 06 i go back to my Module. This is what I add on the end of the Packet,
Buzz
= Header("06", Pck)
Debug.Print Buzz
This all looks like this now

Now lets Finish the Packet
Now i Brake the Packet with From and Victim.

Did you see what i did here? Easy, Huh - So now this is a 95% Packet now we need to change the Rest.As i told you i was tareq_n_eumann and i did send sonic_da_boot_bot9 a Buzz pm. So we need to Changed tareq_n_eumann to From and sonic_da_boot_bot9 to Victim. This all looks like this.

So we did it our Packet Completed. Yup its that Easy :D. You can check it out now.
Do it like this
Winsock1.SendData Buzz(Text1, Text3)
Text1 is the Bot you Logged in and Text 3 the Victim.
-Okay this is It! I hope i could help you out with this. Don't forget Jehanzeb.tk is the Only site who got this art of Tutorial so if you see a Copy let us Know.
Tutorial by _
Jehanzeb_ - Copyright Jehanzeb.tk