 |
 |
 |
| Backrest Installation |
| Adjustable Rest-A-Bak ( Drivers Backrest ) by Custom Fabrication |
| Click on image for larger view |
| Click on image for larger view |
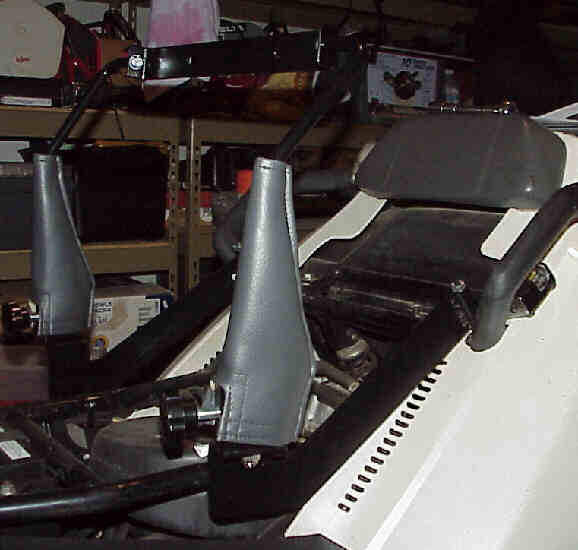
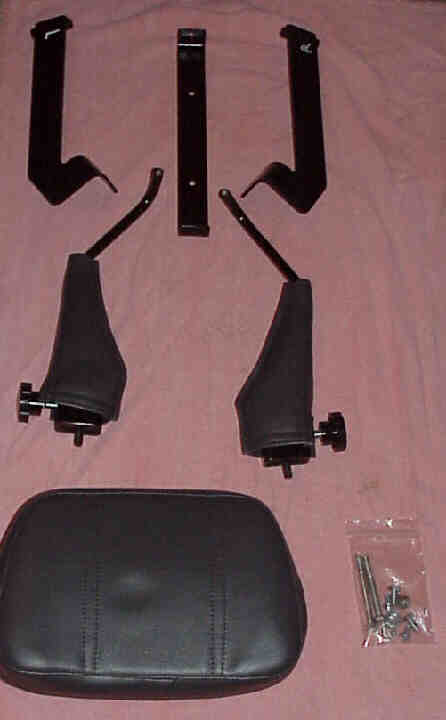
| FIGURE 1 |
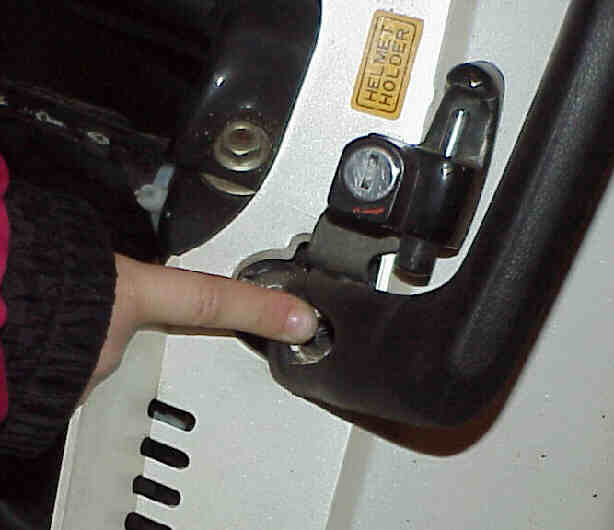
| FIGURE 2 |
| Click on image for larger view |
| FIGURE 3 |
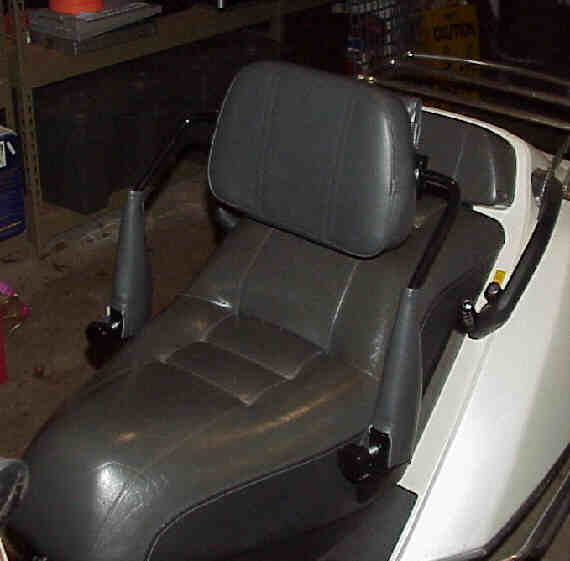 |
| FIGURE 4 |
| Click on image for larger view |
| This is what it looks like before it is put together. In the instructions is a part list. As with anything else that comes in part and make sure you have everything before you start. (Figure 1) |
| Tools needed: Allen wrench, 13 & 14 mm wrenches, Phillips Screw driver |
| 1. Remove the front bolts from the side handle grips (Figure 2 ) |
| 2. Mount the side adapters to the Helix using the 8X1.5X3 hex head bolts with the flat side of the mounting hole against the seat ( Do not tighten yet ) |
| Assemble everything loose before tighning anything down. |
| 3. Put the bases on the adapters with the 3/8-16 lock nuts ( Do not tighten yet) The adjusting knobs should be to the front. (Figure 3) |
| 4. Put supports in bases using the 1/4 x 1 clevis pins and spring pins. The hole at the top of the supports should be at the back. ( Figure 3 ) |
| 5. Slide extentions into the supports and snug the 1/4-20 x 1/4 brass round head screwsdown to the highest position. |
| 6. Bolt back pad to the extensions with the 5/16 - 18x3/4 hexhead bolts. |
| 7. Fasten the pad to the back bar with the 1/4-20x3/4 flat head screws. |
| 8. Now set the height and angle of the pad. |
| 9. Go back and tighten bases in a position that allows the back pad to fold forward and back freely. |
| 10. Check and tighten all bolts and screws. Recheck them periodically |
| 11. Adjust black knobs to your satisfaction. |
| 12. Your Done (Figure 4) |
| May sound hard but it's really not once you start it's easy. |