My MadCatz Light & Magnifier modifications
performed by: zakaron
I have just recently gotten into the GBA scene and think its a great system with very strong support, but just as everyone else I had my concerns about lighting. That's one thing I do miss about my Lynx, I could take that system anywhere without concern for lighting thanks to its bright backlit screen (however it sucked 6 batteries dry in about 5 hrs!!). Ok, I realize there's always a trade off for comfort/lighting vs. power consumption which is why I found this site so good. I have gotten many ideas from gbalight.com and so I decided to give back my results of what I have done. So after determining there is no *perfect* store bought solution (hurry up portablemonopoly!), I embarked on my own mission and set several goals that I wanted with my setup:
- I wanted an "external" power source because of the 3V / 5V issue with the expansion plug (bad for LEDs)
- But I still wanted everything powered by my PowerPak EX rechargable to keep from using batteries like my Lynx did
- And I really wanted a dual lamp setup
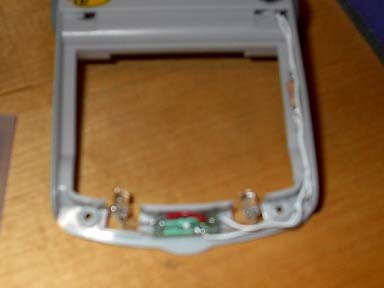
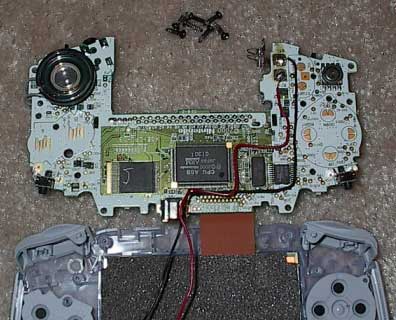
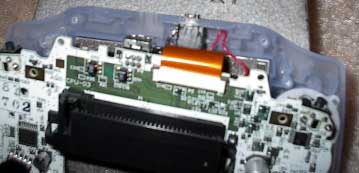
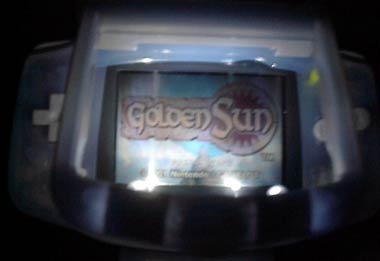
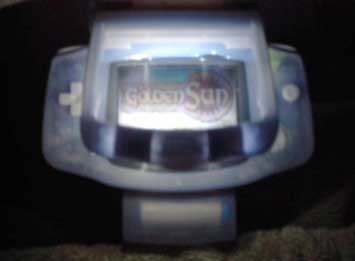
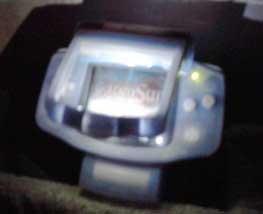
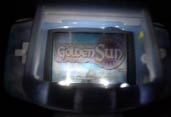
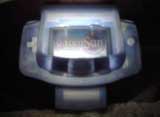
After visiting several stores I decided on the MadCatz unit at Walmart for a whopping $8 because it had dual lighting and looked easily moddable. I didn't care much for a magnifier but it came with the unit anyways (easily removed). Just to see what the out-of-box experience was like I hooked it up as-is and immediately knew that from the results posted from others here I needed to start right away. Lighting was mediocre and left 2 nice glares on the screen. I found that by moving the lid down halfway between its upright locked position and closed position it would put the glare at the bottom black strip on the GBA and now I could look straight thru at the screen and if held properly the glare would be covered by the bottom of the lid. But first things first, the LEDs, which were the standard 276-230 Radio Shack units. 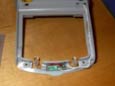 After removing the 2 screws from the bottom of the lid, the top came off and gave me access to the 2 incadecent bulbs and wiring. Those were promptly unsoldered and the 2 new LEDs were bent and soldered in place. Important note: The negative is connected to the prong on the LED with the luminecent material (by looking inside the LED). If your unsure, then hook up a 3 volt source and test your connection before soldering everything up. You'll also note in the picture is a small resistor (33 ohm) tucked neatly along the side track; I determined that value based this on calculation: R=(V-1.7)*1000/mA and I used a voltage value of 3 and since each LED is 20mA I used mA = 40 (because they are in parallel). This will supply proper current to the LEDs. After testing with a pair of alkalines, everything seemed ok and on the right track, so I proceeded to modify the GBA to supply me with the power I needed. After removing the 2 screws from the bottom of the lid, the top came off and gave me access to the 2 incadecent bulbs and wiring. Those were promptly unsoldered and the 2 new LEDs were bent and soldered in place. Important note: The negative is connected to the prong on the LED with the luminecent material (by looking inside the LED). If your unsure, then hook up a 3 volt source and test your connection before soldering everything up. You'll also note in the picture is a small resistor (33 ohm) tucked neatly along the side track; I determined that value based this on calculation: R=(V-1.7)*1000/mA and I used a voltage value of 3 and since each LED is 20mA I used mA = 40 (because they are in parallel). This will supply proper current to the LEDs. After testing with a pair of alkalines, everything seemed ok and on the right track, so I proceeded to modify the GBA to supply me with the power I needed.  As you can see I tapped the battery terminal solder points for this, using red for + and black for -. Also note the black philips head screws, they were from an old gamepad that are now used to hold the GBA together 'cause I hated them triple Y screws originally used. So this brings me to my next dilema... how to connect the light and GBA cleanly. As you can see I tapped the battery terminal solder points for this, using red for + and black for -. Also note the black philips head screws, they were from an old gamepad that are now used to hold the GBA together 'cause I hated them triple Y screws originally used. So this brings me to my next dilema... how to connect the light and GBA cleanly. 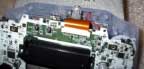 I could have had wires hanging out, but not wanting to be messy I went back to Radio Shack and found a small submini 3/32" stereo phone jack (274-245) and plug (274-289C). I thought I was in over my head, but with some cutting, grinding and bodging, I somehow managed to fit the jack inside (you gotta love that Dremmel) right in front of the gold ribbon cable. I then soldered a pair of wires coming from the light to the submini plug that will fit into the new jack. I could have had wires hanging out, but not wanting to be messy I went back to Radio Shack and found a small submini 3/32" stereo phone jack (274-245) and plug (274-289C). I thought I was in over my head, but with some cutting, grinding and bodging, I somehow managed to fit the jack inside (you gotta love that Dremmel) right in front of the gold ribbon cable. I then soldered a pair of wires coming from the light to the submini plug that will fit into the new jack. 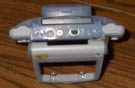 I also had to make a nice little hole in the top of the L&M casing so I can get the plug in. You can see the new plug fit in quite nicely next to the expansion port in this pic. So now I'm ready to test it all out, and the good news is it works, but boy what a dissapointment! The light was so dim it was hardly worth using. Where did I go wrong?? I figured this LED solution wasn't going to work, so I removed them and tried a pair of mag light bulbs instead. Wow, talk about bright! And talk about drain; not only could I play in total darkness I could illuminate my entire bedroom, but as soon as I turned it on the GBA power LED started flashing red / green. Hmmmm, back to the drawing board. It finally occurs to me that rechargables put out less voltage then alkalines, so I test voltage and sure enough I only get 2.6V from the battery pack. Doh! Now what? Well after some more brainstorming I decide to series in another rechargable that will sit in the L&M battery casing and will supply the extra voltage needed. So I rewire the switch and battery terminal inside the L&M so that when the switch is on the single AAA rechargable is put in series with the incoming voltage from the GBA and now supplying enough to power the LEDs. So basically my circuit does this: the incoming positive from the GBA source is connected to the 1st prong on switch and the 2nd prong goes to the negative on the battery. Then the positive on the battery is sent to the LEDs. From there the negative on the LEDs is sent straight thru back to the GBA to complete the circuit. Now powered at a steady 3.9V, the LEDs are nice and bright and work VERY well. I should probably go back and replace the 33 ohm resistor with a 55 because of the extra battery, but the LEDs seem to be doing fine for now. And the final mod was to go back to my orginal idea of moving the L&M lid down some to prevent glare, so I drilled new holes between the closed and open position to create an inbetween which works well at reducing direct glare and lets me look nearly straight at the screen thru the opening. So now I have a bright dual LED system all powered on rechargables (powerpak EX and 1 AAA) with minimal glare. The bottom pics are of the complete setup in total darkness with only the LEDs as light. I also had to make a nice little hole in the top of the L&M casing so I can get the plug in. You can see the new plug fit in quite nicely next to the expansion port in this pic. So now I'm ready to test it all out, and the good news is it works, but boy what a dissapointment! The light was so dim it was hardly worth using. Where did I go wrong?? I figured this LED solution wasn't going to work, so I removed them and tried a pair of mag light bulbs instead. Wow, talk about bright! And talk about drain; not only could I play in total darkness I could illuminate my entire bedroom, but as soon as I turned it on the GBA power LED started flashing red / green. Hmmmm, back to the drawing board. It finally occurs to me that rechargables put out less voltage then alkalines, so I test voltage and sure enough I only get 2.6V from the battery pack. Doh! Now what? Well after some more brainstorming I decide to series in another rechargable that will sit in the L&M battery casing and will supply the extra voltage needed. So I rewire the switch and battery terminal inside the L&M so that when the switch is on the single AAA rechargable is put in series with the incoming voltage from the GBA and now supplying enough to power the LEDs. So basically my circuit does this: the incoming positive from the GBA source is connected to the 1st prong on switch and the 2nd prong goes to the negative on the battery. Then the positive on the battery is sent to the LEDs. From there the negative on the LEDs is sent straight thru back to the GBA to complete the circuit. Now powered at a steady 3.9V, the LEDs are nice and bright and work VERY well. I should probably go back and replace the 33 ohm resistor with a 55 because of the extra battery, but the LEDs seem to be doing fine for now. And the final mod was to go back to my orginal idea of moving the L&M lid down some to prevent glare, so I drilled new holes between the closed and open position to create an inbetween which works well at reducing direct glare and lets me look nearly straight at the screen thru the opening. So now I have a bright dual LED system all powered on rechargables (powerpak EX and 1 AAA) with minimal glare. The bottom pics are of the complete setup in total darkness with only the LEDs as light.
Final thoughts: Well, I guess in the end I accomplished what I wanted, so I must say overall it was a success. However, would I do it again if I had too? That's a tough question, because this was quite a challenge (and tense, cause I could have destroyed a good GBA), but I have yet to think of another way of doing what I wanted. So if anyone needs help or has questions with what I've done or just want to tell me I'm crazy, feel free to email me at [email protected]
-zakaron
|
 Contributors