
TABLE LESSON NO 1
Lets make it look more like a table and give it a border.
<TABLE BORDER=3>
<TR>
<TD><img src="https://www.geocities.ws/bkbrat/tools/referee.gif" WIDTH=110 HEIGHT=123"></TD>
</TR>
</TABLE>
 |
Specifying a Table size was pretty simple. Width can be specified as a percentage of the available screen size or as an absolute. Height could be specified as a percentage. However, as you have seen, the Table will expand vertically to accommodate the data so its not necessary so assign a height unless you have a visual reason to do so as shown below.
<TABLE BORDER=3 width=200 HEIGHT=200>
<TR>
<TD><IMG SRC="referee.gif" WIDTH=110 HEIGHT=123></TD>
</TR>
</TABLE>
|
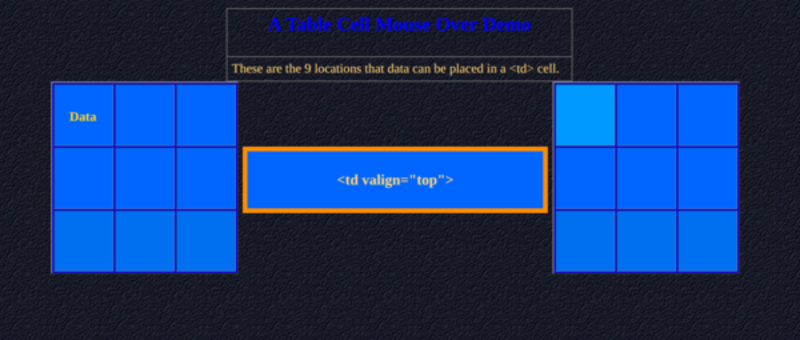
Lets look at the NINE Table alignments. For simplicity, we will only use the <TD> and</TD> tags.
| 1 | 2 | 3 |
| 4 | 5 | 6 |
| 7 | 8 | 9 |
Here is a Interactive Presentation of the nine locations in a TD cell.
I will take a second now to show you something else. Images can manipulated in a table data cell. The Professor just happens to have a little ape handy.
<TABLE BORDER=3 WIDTH=100 HEIGHT=100>
<TR>
<TD ALIGN=RIGHT><IMG SRC="ape.gif" WIDTH=120 HEIGHT=82></TD>
</TR>
</TABLE>
 |
As you can see the ape lined up in the middle.(--The default alignment, if a vertical alignment is not specified.--)
I suppose that now is also a good time to stress that it is good practice to include size attributes with all your image tags. Doing so makes it easier for the browser to format the space required, and avoids any nasty little surprises.
