|
|
| This article is taken from the ARPT's
basic training manual. This section was written by Rasheya Jasmin
Luis, an alumni and former president of ARPT. During her stay in
ARPT, she rose to the top ranks of Philippine rifle shooting, both in air
and small-bore events. She currently holds several Philippine records
including the record for UIT Ladies Air Rifle (396/400).
I. STANCE
A. FEET As a result of a very small floor area covered, rifle
shooting requires a properly balanced body and weapon positioning.
It is very important to find the right body position such that the
rifle would point naturally to the target. Therefore, the feet should
be parallel to each other and perpendicular to the receiver string.
The distance between them approximately corresponds to the width of the
shoulders.
B. TRUNK POSITION The shooter leans his body slightly backwards to
the right, assuming a right-handed shooter, in order to balance the weight
of the weapon. As the body is leaned back slightly, the hip is thrust
forward a little, serving as a support for the elbow. The amount
by which the hip is moved forward and the body moved backward would depend
on the build of the shooter. An athletic person with wide shoulders
and narrow hips would move further back than a person with very slim shoulders
and equally slim hips(e.g. a girl) whose different bone structure makes
an upright posture in this position much easier.
C. ARMS, SHOULDERS AND HANDS The right shoulder is not raised consciously and
it should be replaced so as not to produce a reaction when the shot is
fired. The right hand holds the gunstock securely from one shot to
the next. The grip should be firm but not too tense.
D. HEAD The head should be as comfortable as possible.
It is advisable that a downward motion be applied when positioning the
head on the cheekpiece. Too much pressure to the right would cause
the rifle to jerk leftward when the shot is released.
II. MOTION OF SHOOTING A. TAKING UP THE RIFLE There are 5 contact points between the rifle and the body. 1. The first is the butt plate
and the shoulder joint. Make sure it does not slip off.
The above four points must be checked before the fifth. Relax the all body parts that are supposed to be relaxed, to see whether there is something that needs adjustment. 5. The fifth contact point is between the trigger
finger and the trigger blade. Premature placement of the finger on
the trigger might cause an accidental firing of the gun so one must always
remember to do this last.
B. BREATHING The movements of the diaphragm, ribcage and shoulders during inhalation cause the the shooter to move. Therefore breathing must cease during the aiming and firing processes. Before raising the rifle to the aiming position, breathe in and out a number of times normally. Enforced breathing will cause the pulse rate to increase. Slowly exhale while lowering the rifle to the aiming position. Once most of the air is release from the lungs the position must be held without any more ex- or inhalatory movements. If the shot has not fired in 8 seconds lower the weapon and start the process again. C. AIMING As you peep through your sights, you would see three
circles: The rear sight, the front sight mount
D. SQEEZING AND FOLLOW-THROUGH Once the sights have stabilized, pressure must be
applied to the trigger to release the shot. The trigger actuation be slow
and even and the distance traveled by the trigger upon release must be
almost imperceptible. This is to insure that the squeeze does not
jolt the sight picture sending the pellet away from the center. If
one is unable to squeeze in 8 seconds abort the shot,
III. EXCERCISES It is very helpful to limber up and loosen the muscles before starting to shoot. Each suggested exercise must be maintained at least 10 seconds. 1. neck rotation
Another type of exercise for rifle shooting is dry-firing.
one goes through the motions of shooting from the stance until the follow-through.
The only difference would be the absence of a pellet in the firing chamber.
For starters it would be advisable to dry-fire for about 10 minutes just
before shooting.
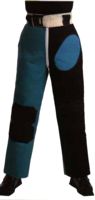
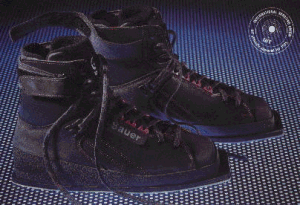
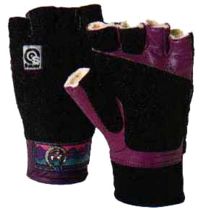
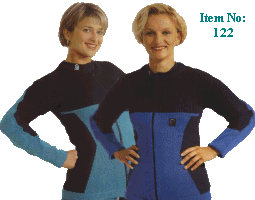
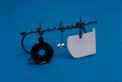
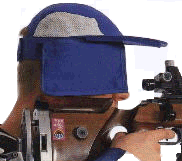
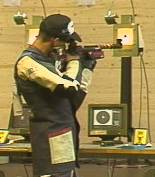
ATTIRE AND EQUIPMENT Beginning rifle shooters are advised to wear comfortable flat soled shoes, preferably sneakers or rubber shoes. One should wear jeans, a shirt and possibly a sweatshirt. These articles of clothing provide padding between the shoulder and the buttplate. A small hand towel would be very useful to pad the contact between the fist and the bottom of the rifle, not to mention the more obvious use of wiping off sweat during a day's training. The "experienced" shooters and more advanced rifle shooters wear more specific and specialized clothing but these are not recommended for beginners. A blinder would also be helpful for covering the non-aiming eye. As rifle shooters become more advanced in the art, there is a need to
use specialized equipment. The followinf equipment is used by world-classs
shooters..
Equipment such as these are produced by many different companies around
the world such as Kurt Thune, Sauer, Marksman House, etc.
|