von Taus encampment at Sacred Stone’s Baronial Birthday
Much like the Miscellaneous page of this site, this page contains items that do not stand out enough on their own, but when combined create our encampment.
The single most important medieval identifier of encampments, or subdivisions there of, was the heraldry of the occupants. Just like the necessity of identifying participants in battle, encampments needed to be recognizable. After all, burning and plundering your own men in the dept of night is never good, but then again, neither is letting your enemy get a good nights rest.
As my Lady’s heraldry has not yet pass, only mine adorns our encampment. You will have likely noticed the von Taus heraldry by now. If you haven’t, is it as written: “Per bend sinister sable and gules, a boar's head erased close Or”.
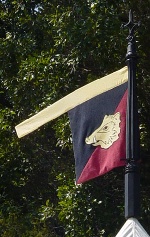
Banner - Germanic
|
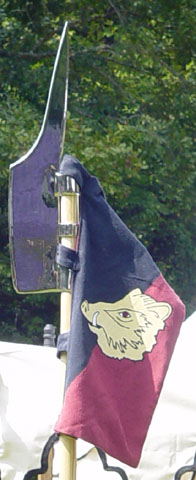
Pennant (2:1 western European)
|
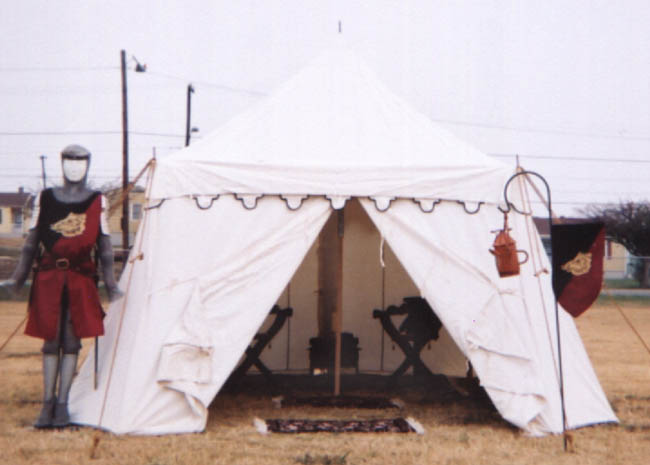
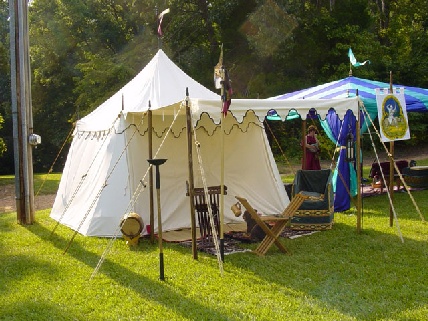
Currently, two additional heraldic flags exist to designate the von Taus encampment both of which are hung from their top edge. One is a ‘heavy weapons shield” size and shaped banner, the other is an elongated shield-shaped pennant approximately 12” x 18” in size. The later may be seen below in the center-left of the Pavilion pic.
In our attempts eliminate non-period pieces from our use, we have found lighting to be an issue. The use of candles is quite effective, however transporting them requires more care and space then we prefer to provide. During transport they are dented and marred; on exceptionally hot days they soften and even after we “return” to the 21st century, our storage space remains at a premium.
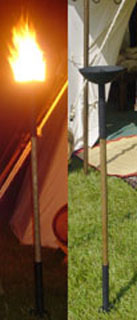
One proposal to this dilemma is oil lamps, but then you swap out denting and marring for breakage. Another is a torch or two. Both of these methods have drawbacks as well as the fact of just using a torch to begin with. I will elaborate after each description.
Torches are a wonderful source of (mobile) light, but they have the potential to be extremely messy. There are two preferred ways to make period torches and/or torch fuel. One is melting animal fat and wax together, saturating strips of natural fiber rags then wrapping them around a stick prior to their cooling. What this you end up with using this method is basically a glorified candle on a sick. It is susceptible to melting in the sun like normal candles, but can be more so if the wax is not layered properly. There is also the side effect of barbeque smell when torches of this type are burnt. Heaven forbid you use bee’s wax and bacon grease/fat in your recipe. Every animal, and hungry fighter for that matter, for miles will be waiting just out of sight to raid your encampment after the lights go out. You may wake up the next morning to hear or say, “Gee hun, I could have sworn we packed more then one torch…”
The second method is significantly more messy, but doe not melt in the mid day heat. Basically you hyper saturate clean, untreated saw dust with some form of vegetable oil, smear the applesauce-looking fuel over natural fiber strips of cloth, then wrap them around a stick. Here you end up with a sticky mess that makes those old memories of ice cream melting all down your hand and arm seem like merely a candy sprinkle or two falling down. Transporting these @$%#&% things requires a resealable bag you can keep ½ a wild boar in if you pre-make them or a fair amount of hot water and soap if you make then on site. If you don’t do primitive sights, that may not be a problem, but we do and it is.
The solution we ended up with was to use a few candles, some plastic oil lamps that will be hidden from view when placed and…
a brazier!!!
|
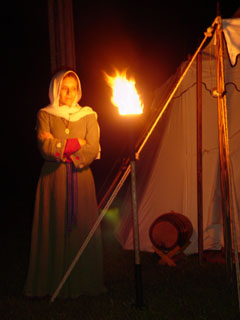
Lady Louise listens to the bardic circle across the field.
|
I designed this brazier to function as both a pole mount “torch” or a “mini-fire pit”. It is constructed in three sections for transport and change of configuration. The base is composed of three spikes around a tube. The spikes are hammered into the ground until the tube bottoms out. The pole section, an ash pole with a metal collar, is then slid into the base (collar up). Lastly, the bowl is placed via a pin that slides down into the collar on the pole. This setup is obviously the pole mount. To convert it to a mini-fire pit, simply lift the bowl off the pole, remove the pole and place the bowl pin into the base. The bowl is approximately fourteen inches above the ground in this configuration. The best part of my design is that you can perform a “hot-swap” between configurations while the brazier is burning.
The brazier is fueled with the same mixture as the oil-torch, but because of its girth and liqu-tight bowl, dry “wicks” can be made ahead of time and for clean transport. Quite simply I’ll sew a long pouch of muslin the fill it about 1/8” thick with sawdust and that’s it. Fifteen or so minutes before I’m ready to use the brazier, I wrap the bowl’s core pin with the pouch, open the “unbreakable plastic” vegetable oil bottle and saturate the wrap. Any oil that is not absorbed by the pouch pools in the bowl and is wicked up and used by the flames.
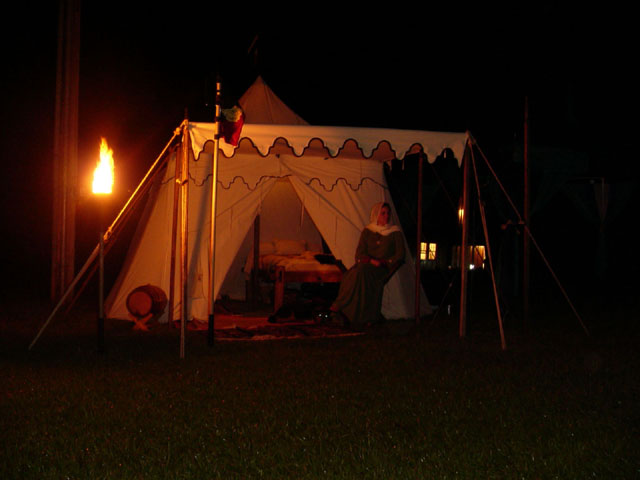
As you can see, the use of six candles, one oil lamp, and a brazier can produce quite a bit of light.
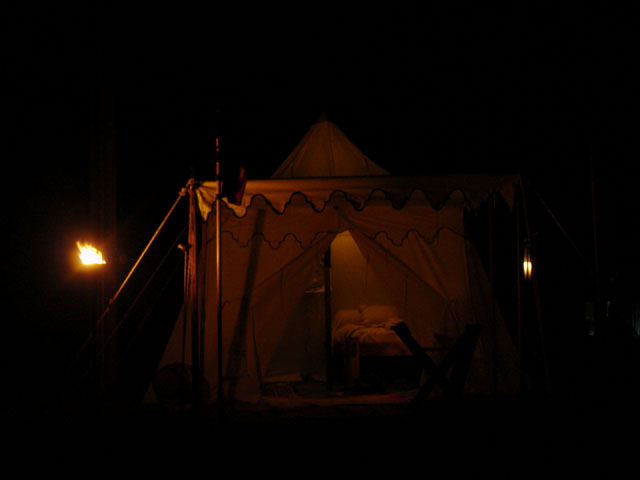
Lit Encampment.
Even without the brazier the pavilion is very well illuminated. There is plenty of light for any projects or activities you may wish to engage in.
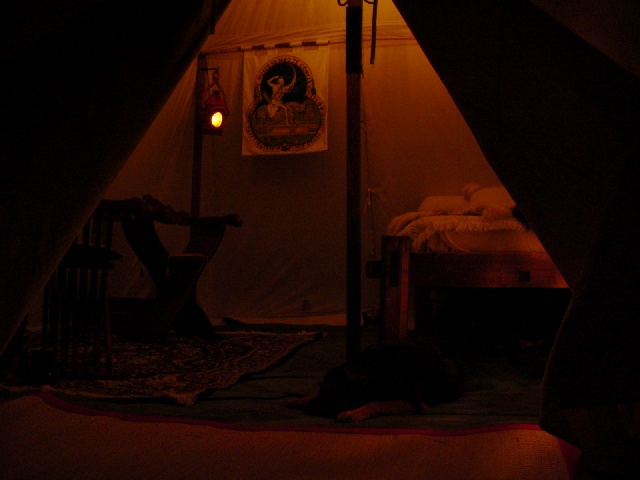
Lit Pavilion
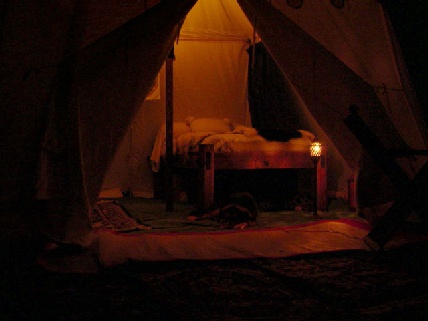
A different perspective.
Although I seem to be known as a “Jack of all trades”, there are numerous things I either do not have the time to learn or are that are simply not practical to make for my self. It is for these reasons we have made a few purchases and acquisitions. Well that and to help keep our encampment feeling more period as well as cozy.
Regent Pavilion: 8’x8’ (the walls extend outward
to produce a 12’x12’ footprint).
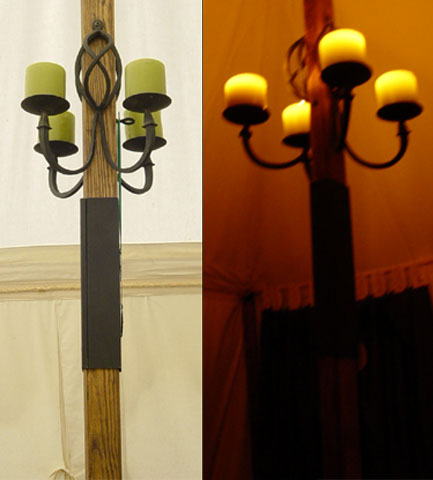
Sconces: two wrought iron forms holding four candles.
(Mounted on pavilion center pole.)
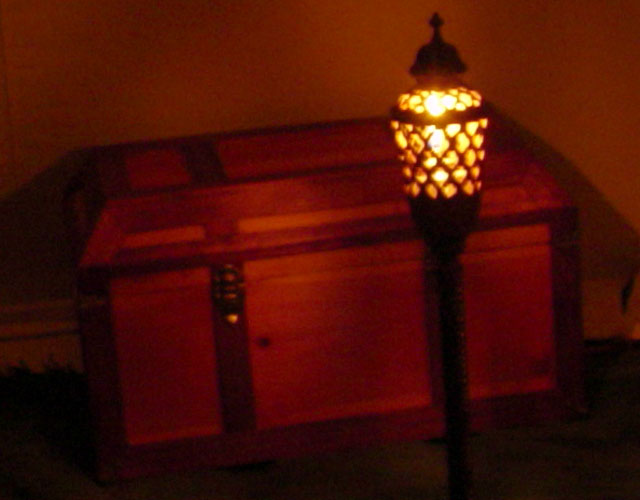
Chests: one standard (pictured here), one hideaway
(hard side) cooler within (see next image).
|
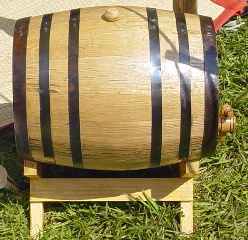
Cask & stand: 5 gallon (20 liter)
charred oak barrel.
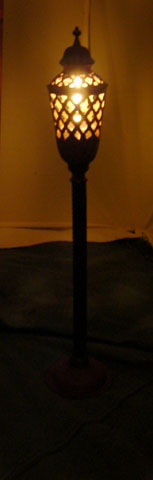
Lamp: perforated metal
freestanding oil lamp.
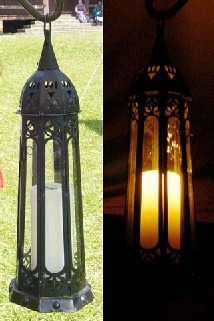
Lantern: metal and glass with candle.
|
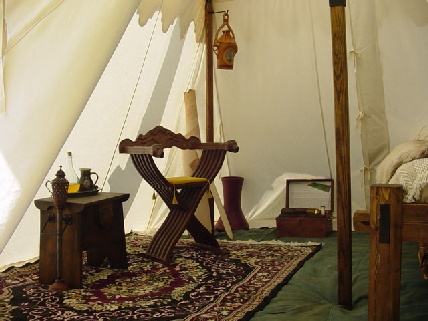
Chairs: collapse nearly flat for transport. Pull up to remove the back rest
then lift by the arms to “scissor” over an axle through the seat laths.
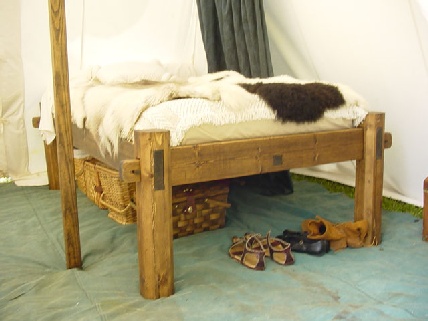
Pelts: Reindeer & Arabic sheep.
All in all, our encampment is shaping up rather nicely. There are still a few more additions we wish to make, such as a folding table. Mostly our work will focus on simplifying transport and condensing. Things like liner bags for the chest so we can use it to haul fragile items. Once they are set up, we can simply drop the liner bag with our clothing and such into the chest. In essence this creates two chests from one.
One last photo before breaking the encampment down.

Copyright Terms,
Copyright Wolfram von Taus © 2007
