
|
Socket Modding Guide
Originating from a few Chinese speaking forums, the following mod has
become quite widespread lately. It allows to run a Tualatin CPU in an
FCPGA socket. Naturally I couldn't resist. With this page I would like to
document the way I have done it, which may be different from other
implementations. The intention is not to claim to have invented the mod -
which I have not. A good reference for English speakers is here.
|
The Plan
Before describing the mod in more detail, let us revisit the 0.13µm FCPGA2
pinout for a minute.
According to my experience it makes sense to do the mod in separate steps.
Not all the steps are required in every setup.
The very first thing is for safety only. Get a multimeter and check the
resistance between the two blue socket pins (VID25mV and Vss). If the
resistance is not zero, you will most likely have to bridge these two
pins later on, in order to protect your CPU from too high a voltage. The
exception is if your slotkey or your board has a manual voltage selection and
you are using it, too. In any case, the first thing after a successful boot
should be to head into the BIOS setup and check the voltage reading...
According to the data sheets by intel and VIA, this should not happen as pin
AK36 is defined as Vss prior to Tualatin. However, as it turns out, some
motherboards route the vid4 signal from the VRM to this pin. This signal is used
to select voltages above 2.05V.
The first step of the mod is to interrupt the three red pins. Interrupting
means, to make sure there is no connection between the CPU and the socket. This
is not optional and basically rectifies the pinout changes introduced by intel
to prevent a Tualatin from running in an older socket. In the case of my Asus
S370-DL slotkey operating on an AOpen AX6BC Pro motherboard, this was all that
was needed. So check whether your CPU runs after these changes. If it does,
remember to check the core voltage! If the core voltage is above 2.05V, you
must immediately shut down and implement the bridge between the two blue
pins.
If the machine does not POST, try implementing the green bridge, between AK26
and AK4. This was necessary to get the CPU to POST on my Asus CUBX. Note, the
connection has to be made from AK26 (either CPU or socket) to the CPU pin AK4.
Some people report that this bridge improves stability and overclockability even
if the CPU POSTs without it. I cannot confirm that with the Asus slotkey on the
AOpen motherboard. The machine was perfectly stable and overclocking well
without the bridge.
Remember, when the machine POSTs, go immediately and check the core voltage.
I was lucky to do that in time, since my Asus CUBX is one of those motherboards
that will provide 2.3V without the blue bridge. At the time I had simply placed
the heatsink on top of the CPU, without fixing the clip, and without plugging in
the fan. Needless to say, it got pretty hot pretty quickly...
As a last point, when everything is working fine, you might consider the
classical vid pin mod to increase the default core voltage. To that end you
focus on the purple pins. They either need to be connected to Vss or
interrupted, depending on the current default voltage and the target. For a CPU
with 1.475 default voltage, the most simple options are:
| Mod
| Resulting core voltage
|
| none
| 1.45V
|
| Vid2 connected to Vss
| 1.65V
|
| Vid3 connected to Vss
| 1.85V |
On my Asus CUBX I have implemented the second option (1.65V).
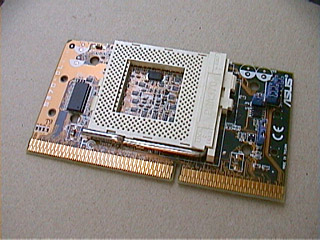
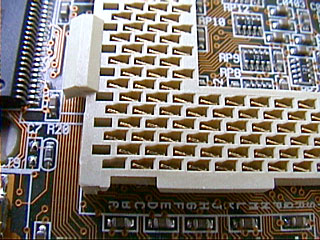
Picture Book
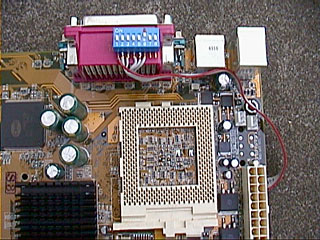
This is the Asus slotkey before the mod.
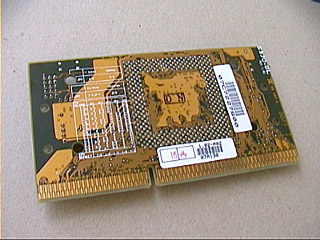
The back of the slot key:
By inserting a small screwdriver in two of the corner slits we can pop off
the top.
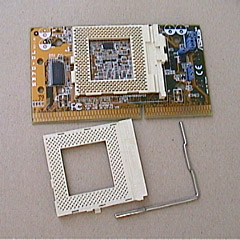
A close-up.
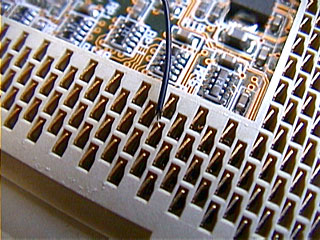
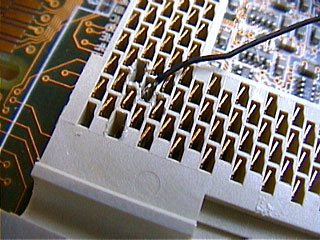
By carefully bending the pins back and forth with a tiny screw driver we can
break them off. This takes about 5 to 10 minutes each. If you feel uneasy about
breaking pins off, you can try and insulate them somehow.
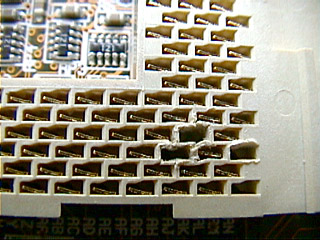
The socket after removing the three red pins.
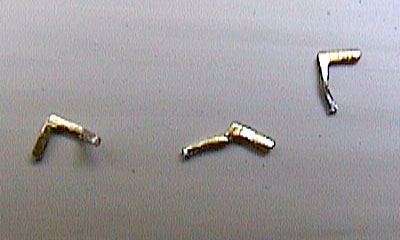
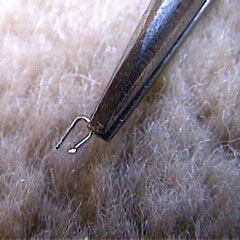
This is how I constructed the bridge. I show this on the Asus slotkey for
demonstration purposes, as I needed it for the CUBX motherboard only.

Pin AK26:
Pin AK4:
This is the bridge from Vid2 to Vid25mV which I used on the Asus CUBX. It has
another bridge from Vid25mV to Vss (the blue pins) which is not shown on these
images.
After inserting the bridges you put the top of the socket back on, and if no
holes are blocked you can put in the CPU and lock it in place. However, the
whole process sounds easier than it is. Inserting bridges can be very fiddly,
particularly when you are crouched over an open case in a dark corner. And there
is always the possibility of blocking holes. Make sure you do not apply force
when inserting the CPU. If it does not go in, you have to disassemble the socket
and try again, ad infinitum.
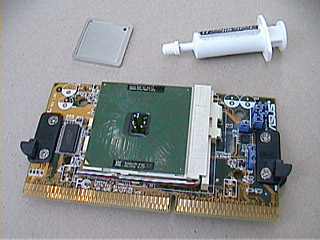
Finally, with everything working, I decided to pop off the integrated heat
spreader (IHS).
Note the mirror image on the back of the silicon core. The white speckles on
the core are the reflections of the sky shining through a tree. Maybe it is
better to recognize on this picture:

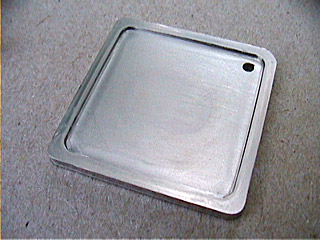
Finally a picture of the IHS itself. You can almost sense the thickness and
the weight of it.
Removing the IHS did not result in a massive temperature drop. I did not
measure it specifically, but it is probably in the region of 4 degrees under
load. That is about half of what I achieved with Coppermines by removing the
plastic coating. It seems that the IHS is superior to the Coppermine coating in
every aspect.
As you can see on the picture before the last, the CPU is a Celeron 1000A
(SL5ZF). After removing the IHS I got it up to 150 FSB at 1.8V. However, it was
not completely stable, so I am now back at 140 FSB and 1.65V - for the time
being.
So, we have come to the end of my report. If someone had told me two years
ago that one day I would break socket pins out of my expensive new Asus CUBX, I
would have declared the person nuts. Now I am not so sure anymore who is nuts
here...
Martin
Addendum
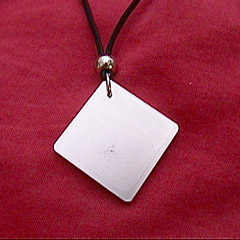
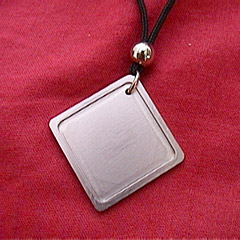
Well, first of all a couple of pictures showing what to do with the IHS,
since it makes a beautiful amulet:
However, I don't recommend taking the IHS off anymore. Reason being that the
temperature drop is less than stellar, and I had to learn the Tualatin is more
fragile than a lapped Coppermine. What happened is, I did some more
experimenting with my Asus CUBX, and when attaching the Alpha heatsink I
crunched two corners of my Celery 1000A. I confess, it was the first time ever
for me. Luckily the CPU is still working allright. ;-)
Under optimal conditions (working at a desk and fixing CPU and heatsink on a
slotkey) it is probably not so much of a problem, but when attaching it to a
socket mobo inside a case it can be difficult. The surface area of the Tualatin
core is smaller and the shape is long and thin. That makes it harder to keep the
heatsink level at all times.
Anyway, I was trying to see whether the AK4-AK26 bridge was really required.
I found that the system booted, but it was sort of unstable without the bridge.
Even at 1000 MHz. I had freezes, spontaneous reboots, and sometimes a sirene
sound out of the speaker upon switching on. Maybe you just need to pull the pin
to Vtt to prevent it from floating, but I decided that putting the bridge back
is the best option.
While I was at it I created a cold boot voltage selector for the CUBX. For
details, click
here or click on the picture:
The reason for the voltage selector was that I wanted to get away with using
less voltage. I had to use 1.65V simply because it is the lowest voltage above
1.45 that you can achieve with the wire wrapping method. Unfortunately, in the
end it turned out that my machine wasn't even stable at 1.65V anymore - 30
minutes burnp6 tipped it over the edge, with temperatures reported around 60
degrees. I had to raise the voltage to 1.7V at 140 FSB. It could be related to
the high temperatures today (mid 30s and very humid)...
Anyway, c'est la vie,
Martin