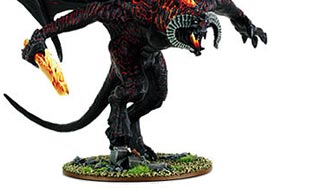
THE BALROGHere, we explain how 'Eavy Metal team painted the mighty Balrog! Be sure to click on each image for a larger version! |
|
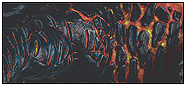
Balrog painted by Martin Footitt. |
 |
ASSEMBLING THE MODEL
 After
cleaning up the model by removing any flash lines and filing them smooth,
the fit of all the parts was tested before starting to assemble the
model. First, the wings were pinned together and then pinned to the body.
As the assembled model is quite heavy, it is a good idea to pin it to a
base. The separate components were then glued into place and any gaps
were filled with green stuff. A small amount of shaping the green stuff
to resemble cracked skin was required in some places. Finally, the model
was given an undercoat spray with Chaos
Black, followed by painting slightly watered-down Chaos Black over
any areas that the spray had missed.
After
cleaning up the model by removing any flash lines and filing them smooth,
the fit of all the parts was tested before starting to assemble the
model. First, the wings were pinned together and then pinned to the body.
As the assembled model is quite heavy, it is a good idea to pin it to a
base. The separate components were then glued into place and any gaps
were filled with green stuff. A small amount of shaping the green stuff
to resemble cracked skin was required in some places. Finally, the model
was given an undercoat spray with Chaos
Black, followed by painting slightly watered-down Chaos Black over
any areas that the spray had missed.
PAINTING THE MODEL
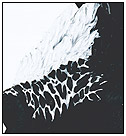 Any
sections of the model that were going to be painted with a fiery flame
effect, such as the sword and mane, were now painted Skull
White. The recesses between the cracked skin and on the wings were
also painted with Skull White. There was inevitably a small amount of
paint overlap, but any mistakes were rectified at a later stage.
Any
sections of the model that were going to be painted with a fiery flame
effect, such as the sword and mane, were now painted Skull
White. The recesses between the cracked skin and on the wings were
also painted with Skull White. There was inevitably a small amount of
paint overlap, but any mistakes were rectified at a later stage.
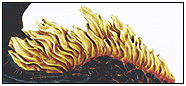
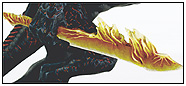
An equal parts mix of Fiery Orange and Orange Ink was then painted over the Skull White, followed by shading with a slightly watered-down mix of Fiery Orange and Red Ink. Red Gore was then added to the mix and applied as an ink wash to the flames on the sword and mane. A mix of two parts Golden Yellow to one part Skull White was painted on to highlight these sections, as well as the larger cracks in the skin. Skull White was then added to this mix for successive highlight stages. The flames were then given a glaze with a watered-down Yellow Ink. Any areas where the paint had overlapped onto the wing or scales had to be carefully repainted with Chaos Black.
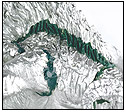
Two parts Chaos Black to one part Codex Grey was mixed together. This was then stippled onto the fleshy areas, such as the belly and arms.
Codex Grey was then added to the mix until it was roughly equal parts, and then this too was stippled on as a highlight stage. Bleached Bone was added to this mix for the final stipple highlights.
FINE DETAIL
|
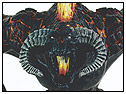
The horns were given a basecoat of equal parts Chaos Black, Bubonic Brown and Codex Grey. Bubonic Brown and Bleached Bone were added to the mix for the first highlight stage, followed by adding Bleached Bone for each successive highlight. The Balrog’s cracked skin was painted with a basecoat mix of two parts Chaos Black to one part Codex Grey. The first highlight stage was done by adding Codex Grey to the mix until the two colors were in roughly equal quantities. Final highlights were made by adding more Codex Grey until the mix was now roughly two parts Codex Grey to one part Chaos Black. |
 |
FINISHING TOUCHES
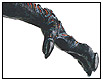 A
small amount of Codex Grey was mixed in with some Chaos Black and
painted onto the tips and edges of the claws. Once the model had been
varnished, these parts were then given a few coats of Gloss Varnish.
A
small amount of Codex Grey was mixed in with some Chaos Black and
painted onto the tips and edges of the claws. Once the model had been
varnished, these parts were then given a few coats of Gloss Varnish.
Sand was glued onto the base with PVA or white glue and then, once dry, given a Brown Ink wash. This was drybrushed with a mix of Snakebite Leather and Fortress Grey, and then flocked with static grass.
The
stones on the base were painted Chaos Black, and then Skull White was
added and drybrushed on in successive stages. The handle of the axe was
painted with Scorched
Brown, followed by adding Bestial
Brown for the first highlight stage and then a small amount of
Bleached Bone for the final highlights. The metal was painted with Boltgun
Metal, then highlighted with Chainmail
and Mithril
Silver before applying a thinned down Brown Ink wash.