Please support my sponsor, PayPal. I use their service all the time for Internet payments, and it works flawlessly.
Perspective Correction with Adobe PhotoDeluxe
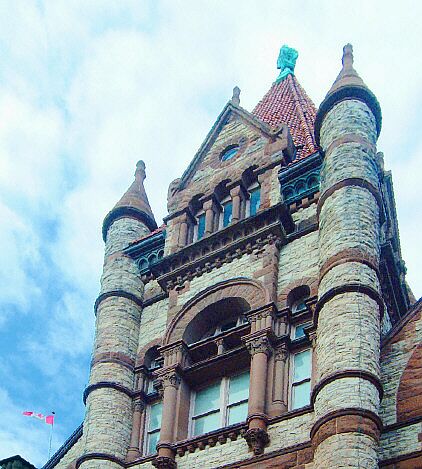
When we look upwards to see the top of a tall building, our brains automatically compensate for the fact that the distant top appears smaller. However, when the same thing appears in a two dimensional photograph, the building looks odd, as if it is leaning over backwards. The ideal would be to take the photo by locating the camera at a height half way up the building, but this is usually not possible. One way to eliminate this problem is a view camera with a tilting front, or a perspective correction shift lens on a 35mm camera. These perspective correction lenses cost $1000 and up, and for Pentax they are no longer even in production, and very hard to find.
I was amazed to discover that even the elementary software that came bundled with my Fuji 4700 digital camera does a good job correcting for this.
You simply go to the "size" option on the menu bar, and then choose "perspective" within that menu. This gives you a box where you can compress the bottom edge of the picture to whatever degree you want. You simply do it over again until you get the desired amount of correction. The picture you now have has slanted edges, and you trim it to get it back to a rectangular shape. You will end up with a picture in which the whole building is as narrow as the top was previously. This may strike you as being too narrow. In that case, you just go back to the "photo size" option, and stretch the picture horizontally (you do this by unchecking the "constrain proportions" box).
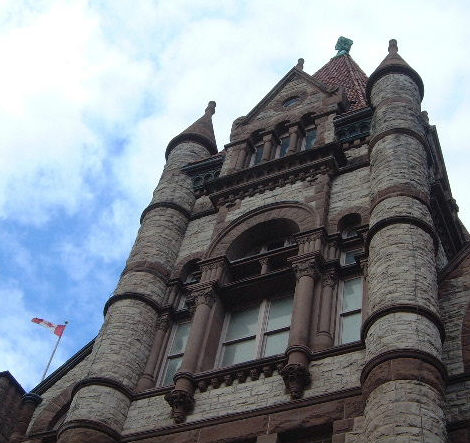
In the before and after examples below (Victoria College, Toronto) the building was backlit, and in an ordinary picture it would be impossible to make the building bright enough without making the sky look washed out. With PhotoDeluxe, however, you just use the "color wand" choice to very easily isolate the building as a separate layer, whose brightness can then be adjusted. Once I had it like that, I couldn't resist tampering further, and I also boosted the color saturation. How much of that you want is a matter of taste. It is neither realistic nor unrealistic -- how much color you see in real life depends on the kind of light, and that is changing all the time.
(The original of this picture was an 1800K file, with lots of detail. The examples below have been shrunk to 90K for faster web loading.)
If you have questions or comments, please send me mail at [email protected]
For more discussion on the merits of film versus digital photography, click here..
Return to my Photography
Page.