Once you have your area set up and get all the pieces if the kit laid out. You can begin the disassemble the carb.
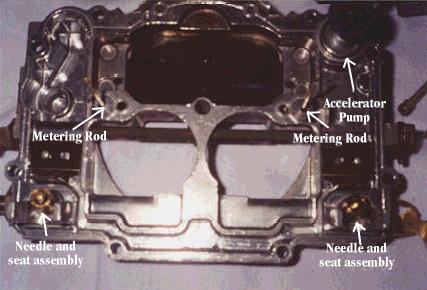
You start by loosening all the top bolts that hold down the air horn. I believe there are eight total. Carefully pry apart the top from the body assembly. You don't want to bend you rods. Lay the air horn top down. And the body assembly top up. This will allow you to see all the key areas. The above picture shows you the air horn laying top down with serveral areas noted. One area is the accelerator pump. The kit includes the parts needed to rebuild the pump. I however chose to order a new pump. Then there is the needle and seat assembly's. They are located at the rear of the carb. They are activated by the level of the float assembly (which have been removed in this picture). Also there |