Hello, and welcome to my Stationery Backgrounds page!
For those of you who would like to use some of these
Stationery Backgrounds,
but wonder how to make them work
in their Outlook Express,
I decided to outline the steps needed.
1. First, make sure you have an unzipping program installed.
I am using WinZip.
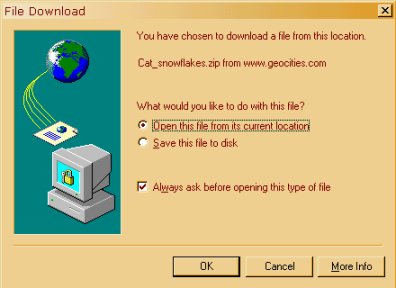
2. As you find a Stationery Background you like,
click on it; make sure you check the option
as you see below, then click OK.
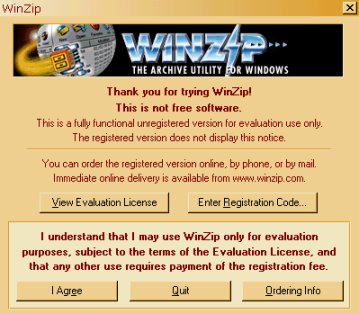
 3. When the WinZip screen pops up,
check on "I Agree"
3. When the WinZip screen pops up,
check on "I Agree"
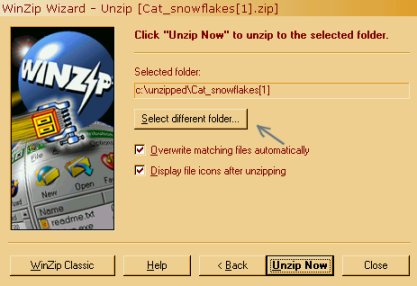
 4. Click "Next", then "Next" again. When you see the screen below,
click on "Select different folder"
4. Click "Next", then "Next" again. When you see the screen below,
click on "Select different folder"
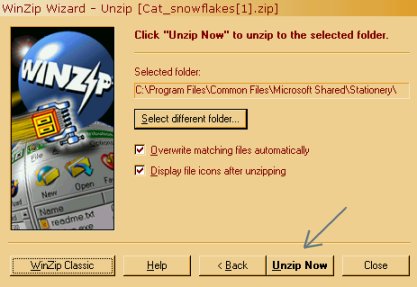
 5. Open your hard drive, by clicking on [C:] >
go to the Program Files folder, and click on it >
go to the Common Files folder, and click on it >
go to the Microsoft Shared folder, and click on it >
scroll down till you see the Stationery folder,
and click on it, then click OK.
6. Click on "Unzip Now", as noted below.
5. Open your hard drive, by clicking on [C:] >
go to the Program Files folder, and click on it >
go to the Common Files folder, and click on it >
go to the Microsoft Shared folder, and click on it >
scroll down till you see the Stationery folder,
and click on it, then click OK.
6. Click on "Unzip Now", as noted below.
 7. The Stationery Background will immediately
unzip in your Stationery folder.
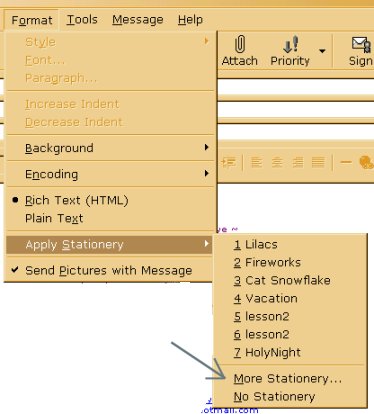
8. Open your Outlook Express. Open a New Mail screen.
Go to Format > Apply Stationery > More Stationery,
as seen below.
7. The Stationery Background will immediately
unzip in your Stationery folder.
8. Open your Outlook Express. Open a New Mail screen.
Go to Format > Apply Stationery > More Stationery,
as seen below.
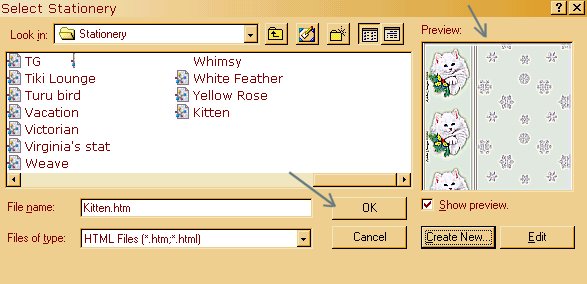
 9. When the Select Stationery screen opens,
click on Create New, which opens the Stationery Wizard,
then click on Next.
10. In the screen that appears, choose Browse, and
find the file you downloaded; click on it, then Open.
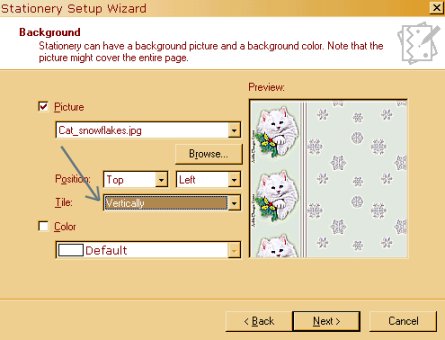
11. Choose Tile > Vertically, then click on Next.
9. When the Select Stationery screen opens,
click on Create New, which opens the Stationery Wizard,
then click on Next.
10. In the screen that appears, choose Browse, and
find the file you downloaded; click on it, then Open.
11. Choose Tile > Vertically, then click on Next.
 12. Choose the Font, Size, and Color, then click on Next.
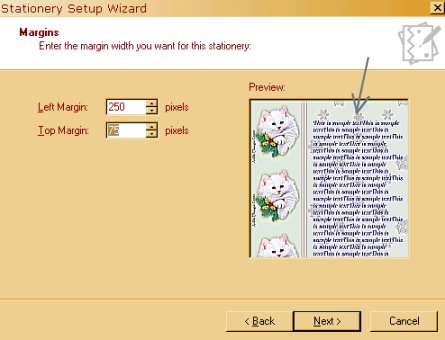
13. Choose your margins according to the
Stationery Background you are using, making sure
the writing does not cover your graphic image.
12. Choose the Font, Size, and Color, then click on Next.
13. Choose your margins according to the
Stationery Background you are using, making sure
the writing does not cover your graphic image.
 14. Name your newly created Stationery, then click Finish.
15. The Stationery you created will be in the Preview screen.
Click OK.
14. Name your newly created Stationery, then click Finish.
15. The Stationery you created will be in the Preview screen.
Click OK.
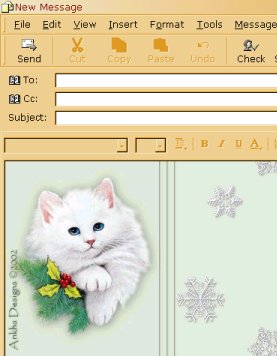
 16. The Stationery will appear in your New Mail screen,
and you can continue in writing your message
16. The Stationery will appear in your New Mail screen,
and you can continue in writing your message
 I hope this Tutorial was of help to you.
If you have any questions, please Email me.
I hope this Tutorial was of help to you.
If you have any questions, please Email me.
|Stationery Backgrounds Index|
|Ankhs Wings of Dreams|Contact Ankhs|Guestbook|

Created December 26, 2002