I had an odd charging issue one spring, and an autoX class in two weeks. Id didn't want to try to figure out where the issue was in the stock alternator, regulator or its related wiring, so I figured swapping in a GM alternator would be the easiest, fastest, and possibly the cheapest fix.
The GM swap, and the alternator location swap have been covered before in other sites, but this is my version.
The advantage to this change is the loss of the external voltage regulator, and its related wiring under the hood. The 2nd is ease of service and parts availability. The GM alts are everywhere, and pretty cheap.
My instructions and descriptions are intentionally simplistic to aid the novice mechanic (like myself)
Charging Basics really basic
The stock wiring takes power from the amp, goes through the ammeter in the dash, and on to the starter, and charges up the big cable to the battery. (more or less)
The voltage regulator tells the amp when it needs to charge. The GM has it own regulator built in.
The GM alt is commonly refered to as a "1-wire alternator", well, it actually has 4 wires connected to it (including a ground wire), of which we are going to use 3. Confused yet- just keep reading.
The GM Swap
This swap commonly is done by bypassing the original wiring, and running the amp output directly to the battery. This will make the ammeter not work, and require the addition of an aftermarket volt gauge.
In the high windshield car (padded dash), the Ammeter is in the multi gauge cluster in the dash, and not a stand alone gauge. The flat dash cars have a seperate gauge that can be swapped out for a volt gauge. Most people with a flat dash would wire the alternator directly to the battery, remove the stock ammeter and instal a volt gauge in its place.
I wanted the factory gauge to work, so my wiring was done by going through the factory harness. The 30A fuse is installed after the amp out, and is there to protect the factory wiring from being cooked by too much power.
Needed Parts
- GM Alternator and wiring plug.
- Smog pump bracketry
- 30A inline fuse
- A few odds/ends in wires
I walked into NAPA and asked for a 60 amp alternator for an 81 Camaro with a 305.
Here I was, no mullet with a wimpy 305 in my otherwise Bitchin' Camaro.
The guy behind the counter scoffed at me, but I told him it had T-tops
Then he thought I was cool.
A rebuilt model with a 3 year warranty was in stock for $35 + $11 core charge. The plug was a few extra bucks.
The smog pump bracketry I got from another Roadster owner for free.
The 30A fuse holder fits a "Maxi" fuse. Your normal 2-prong auto fuse, but larger.
Any of the images link to 800x600 photos.
 |
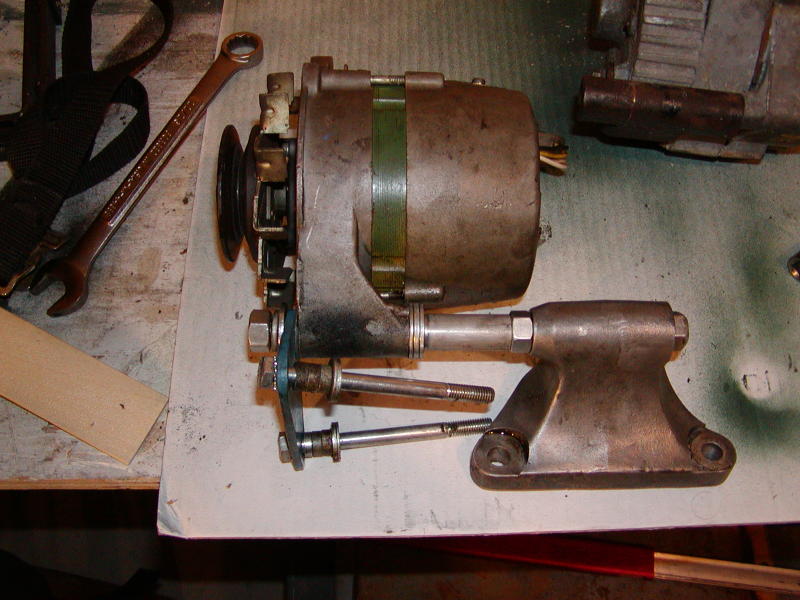
This is my modification of the smog bracket to hold the alt. This threaded rod required me to drill out the bracket for it to fit, and to enlarge both the factory and GM alternator mount hole slightly. Not the best in retrospect. The nut on the back end is held on by JB weld, the spacer is a aluminum tube I had that fit, and the large washers are for fine tuning the bracket to line up the belt. |
 |
This is the required bracketry for the swap, holding the stock alternator. You have to have the steel plate to do this. If you just have the smog mount, that is a very bad idea. The steel plate is held in place with the bolts used to hold the timing cover on. The spacers I used for this are bicyle chainring spacers, and a few washers. |
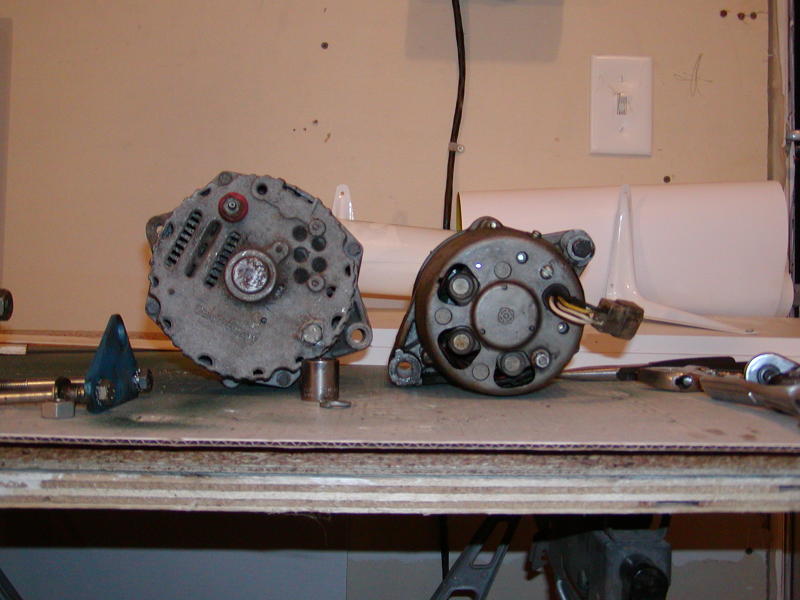 |
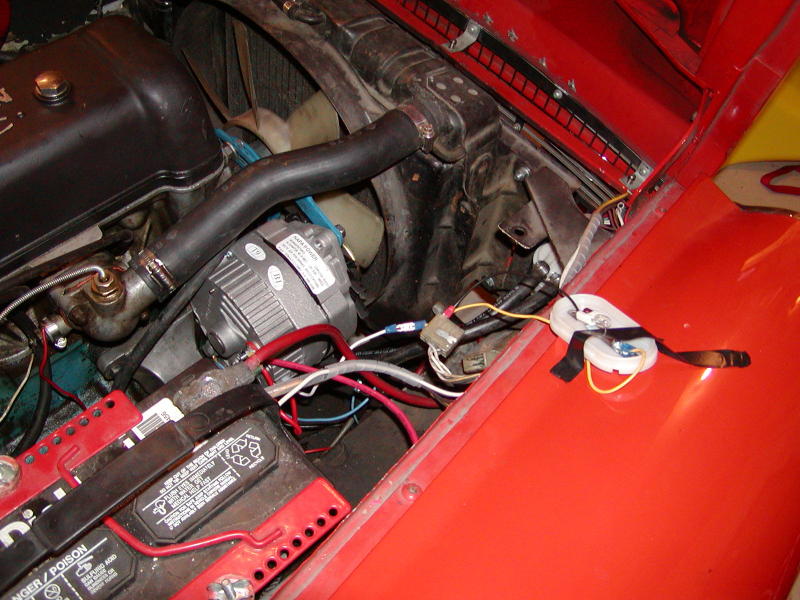
This shows the back view of a junkyard GM alt (left) and the factory alt. The steel plate bracket is the blue thing in the left. The GM is larger but it fits fine. |
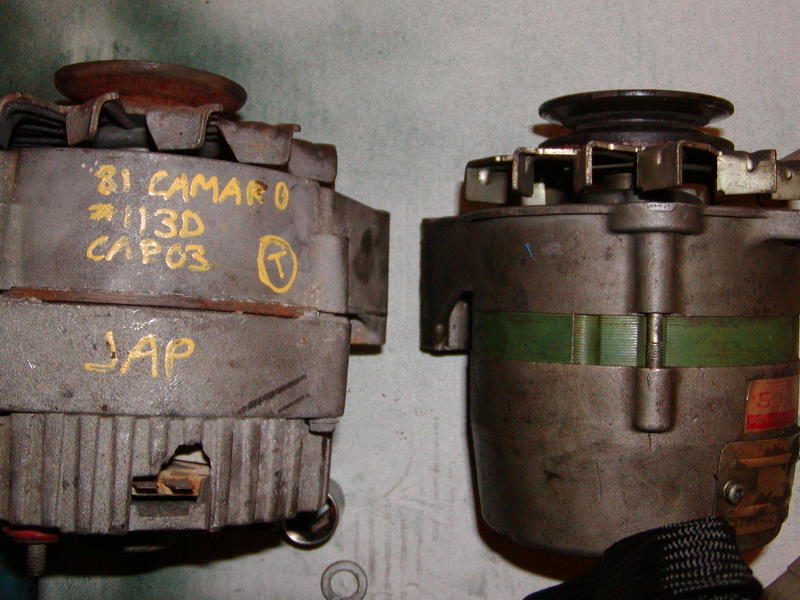 |
This shows that there is only a slight difference in the mount for the GM and Datsun alt. So if you already have done the location swap with the factory items, the GM will nearly bolt right in. |
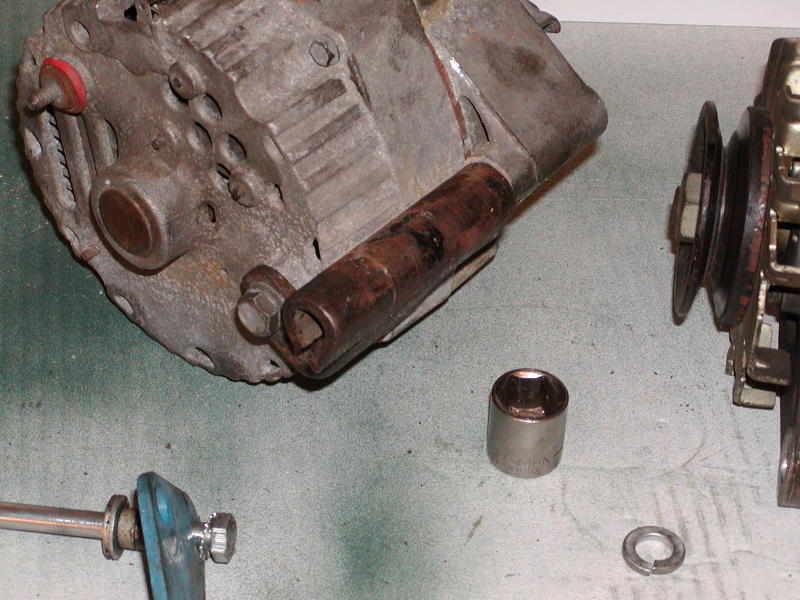 |
This is the factory GM bracket that came with my junkyard alternator, This could have been used in place of the spacers I used, but it would have to be cut down a bit. |
Easy.
- Ground. The largest bolt in the back of the GM alt where you hook up a gound wire.
- Power. You have 2 choices
- The threaded stud hooks into the factory wiring using the same white wire that came off the factory setup. Use a 30A fuse on this wire
- The threaded stud leads directly to the battery positive with a 10ga or larger wire. The original factory wire must be taped off well, as it is a live wire. Your factory ammeter will not work with this option.
- The GM 2-wire plug.
- The large red wire hooks directly to the alternator output stud.
- The white wire doesn't need to be hooked up.
- You don't actually need the plug, you can just use a female spade connector on the #2 terminal, and connect it to the outupt stud. Using the GM plug eliminates the confusion of which is #1 or #2. This is a problem I had.
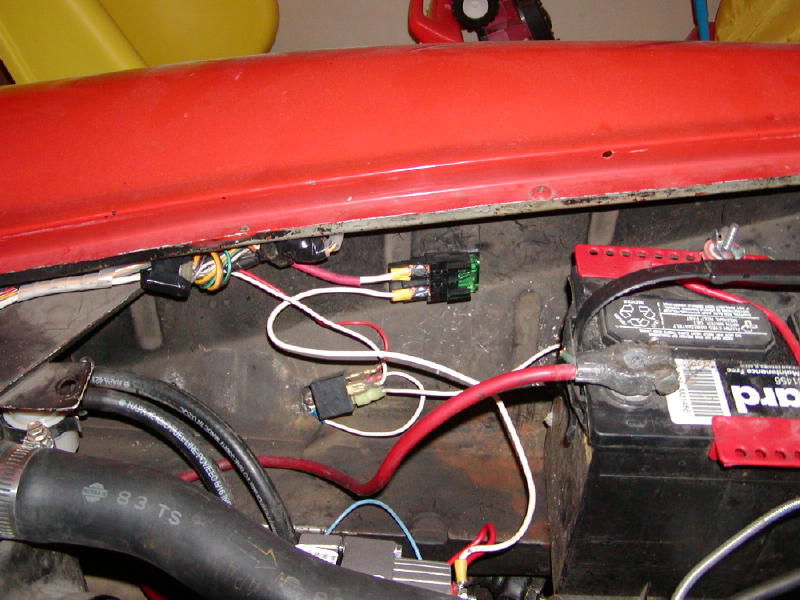 |
30A fuse protecting the harness from the alternator output. This is a Maxi type fuse. |
 |
This is all you really need to do wire it up. Jump the #2 terminal to the alternator output. Note the black marks on my new alternator. This served as a good reminder to unhook the battery before messing around with wiring. No harm done, but it scared the sh*t out of me. |
 |
This is how I tested the "idiot light" function of the 2nd wire on the alt. That is a clearance marker light I had in a junk bin. I hooked it up to a swtiched wire on the old voltage regulator plug, and then to the #1 terminal on my alt. Worked like a charm. I ended up skipping the idiot light because it only takes the slightest blip to get the alternator charging. |
Start it up, give the throttle a quick blip, and the ammeter will go positive. I also installed an aftermarket volt gauge just so I can really see what is happening.
Don't want to blip the throttle?
The GM idiot light is what starts the amp charging right away. If you want an idiot light, and the resulting immediate charging, here is how. Hook this wire up to a bulb somewhere on the dash, then hook the bulb up to a switched 12v power source. This light should come on, when you turn the key to "on" When you start the car, the light will come on briefly, then the alt will start charging, the light goes out. Like magic.
How does it hold up
As of the creation of this page, I have driven the car about 120 miles and did one AtuoX with the new setup and had no problems.