Aprilia Falco Brake Line Installation
I think the stock
lines on the Falco are pretty good, but after riding a Mille-R
I knew they could be firmer. I normally make my own lines out
of kit parts from Earl's Supply (WM Engineering), but my dealer
was ordering some kits from Fren Tubo, so I ordered a set
from him. I believe the kit was around $220 (includes front and
rear brakes and clutch). As a reference point, it usually costs
me about $40 to build a line for one caliper.
|
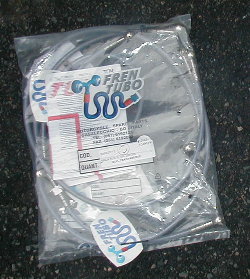
This braided steel kit by Fren Tubo is part number
320037-1. The fittings are plated aluminum,
and the lines are plastic coated with a very subtle
purple tint (?) It contains aluminum banjo bolts and
crush washers. Unlike most kits I've seen, the front
lines are a one-into-two (T) like the stock lines, not
two separate lines from caliper to master cylinder. The
lines are DOT approved, which I believe means they were
pressure-tested.
|
Basic Front Line Installation Procedure.
-
1. Cover all your paint with towels. Put a rag over your
wheels too. Brake fluid is going to leak and it will damage
paint pretty quickly.
-
2. Siphon out the master cylinder reservoir. I have a
Mitivac siphon unit, but I actually prefer my homemade
siphon jar and good old lung action.
-
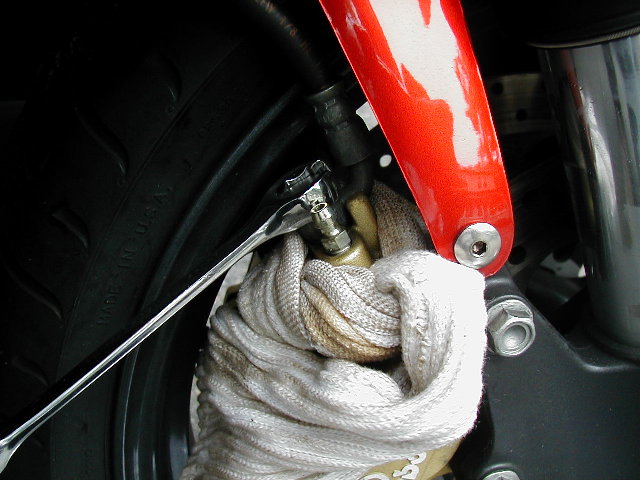
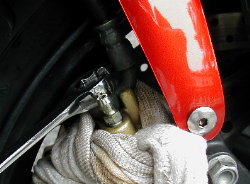
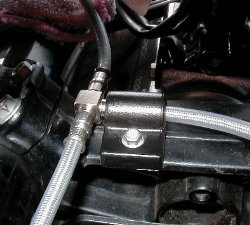
3. Remove the lower banjo bolts (on the calipers) and let
them drain.
|
The sock is to soak up the inevitable fluid spill.
Always use a closed end or at least a flare nut wrench on
the banjos.
|
|
-
4. Remove (or at least slide down) the air dam to gain
access to the line junction (three 8mm headed bolts).
Remove the junction holddown too (7mm).
-
5. Place a few rags under the upper banjo bolt and remove
it from the master cylinder.
-
6. Wrap bags over the ends of the lines and seal with tape.
Remove the lines.
|
If you take this opportunity to wrap the threads of
the bleed screws with teflon tape, no air bubbles will
leak by them while you bleed the brakes.
|
-
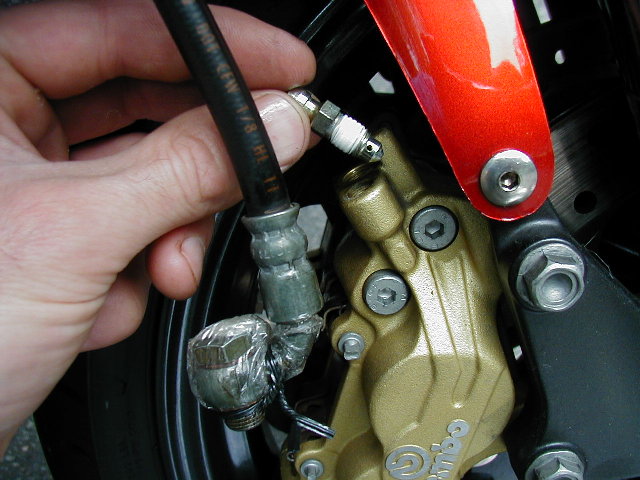
7. Feed the new brake lines into position. Fren Tubo lines
come with grommets for the air dam, but the Galfers I put
on my RS250 didn't. You can remove the grommets from the
old line and slip them onto the new line. The longer line
is for the left caliper (furthest from the master
cylinder). Roughly position the banjos and feed a few
threads of the bolts to hold everything in place.
|
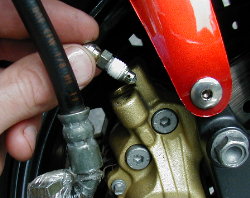
The Fren Tubo lines have a junction like the OEM
lines. Others makes (such as Galfer) run individual lines
from each caliper to a double-length banjo bolt at the
master cylinder. With either setup, you can feed the far
line through the junction holddown.
|
|
-
8. When you are satisfied that the lines aren't twisted,
place a new crush washer on either side of the fitting and
tighten the upper banjo snugly onto the master cylinder.
Don't completely tighten it, just good enough not to leak.
-
9. Place the crush washers on either side of the lower
fittings and begin to feed them into the calipers. On the
left side (furthest from the master cylinder), snug the
fitting finger tight. Leave the right side loose and tie a
rag around it.
-
10. Fill the master cylinder with new DOT4 brake fluid.
Castrol LMA works well for me but I have to hunt around to
find it. Allow gravity to take the fluid down the lines,
making sure the master cylinder doesn't run dry. In a few
minutes, the right side line will start leaking fluid. When
it does, snug it down.
-
11. Loosen the left side line and wait for it to gravity
bleed. Don't allow the master cylinder to run dry. When
fluid starts leaking out, snug down the left side fitting.
-
12. Now properly bleed the brakes, starting at the caliper
furthest from the master cylinder. A siphon jar is nice,
but sometimes you can force the most bubbles out by pumping
the brake lever. Tap the lines and caliper periodically and
you should see more bubbles. If you are using a siphon
device to bleed the brakes and the bubbles never seem to
end, its likely air is leaking around the bleed screw
threads. Continue to the other caliper, never letting the
master cylinder run dry.
-
13. Finally, bleed the line at the master cylinder fitting.
Most times I do this by wrapping a rag around the fitting
and cracking the banjo bolt loose as I squeeze the brake
lever. Be careful--brake fluid will spray out so wrap it
with a rag. On the Falco, there's a bleed screw on the
front brake master cylinder and this worked well.
-
14. The brakes should be quite firm now. Tighten down the
upper banjo a little, making sure the line doesn't
interfere with the steering from lock to lock. When you are
satisfied with the routing, snug it down tightly (no more
than 15 N-m).
-
15. Position the lower banjos so that the lines aren't
rubbing on the fenders. There should be a loop of line to
the back so that the line will fold nicely when the forks
compress. When you are satisfied with the routing, tighten
down the banjos.
-
16. You may want to bleed the brakes one last time now, or
if the lever feels firm, wait until you've ridden the bike
a while.
-
17. Top off the master cylinder and replace the cover.
Clutch Line
Installation Procedure. The clutch line is very similar to the
brake lines, with a few exceptions.
-
You will need to remove the shift lever and countershaft
cover to get at the clutch slave cylinder. If you are
building your own line, you can probably snake the line
though the original routing and put the end on the line
afterwards. If you are installing premade lines, you'll
want to remove the left lower fairing and loosen the top
mount to the oil tank to feed the line through.

|
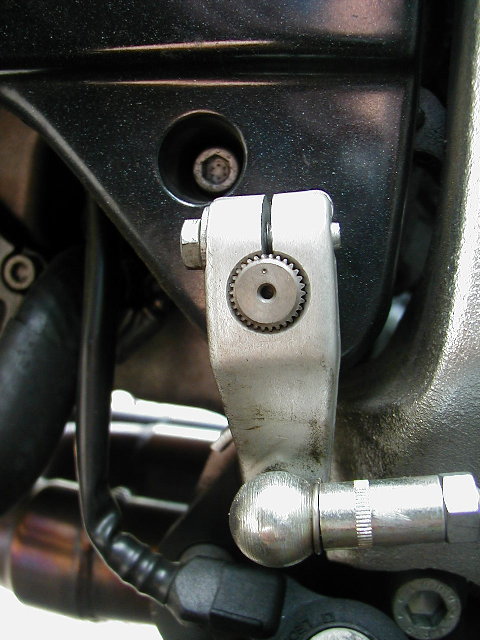
Use a center punch to mark your favorite spline
position on the shift lever.
|
-
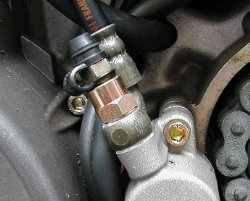
The clutch slave cylinder bleed screw is in the top of the
banjo. If you want to retain a bleed screw at the slave
cylinder, you'll probably need to reuse this "rare"
fitting. You may be able to obtain an aluminum banjo with
bleedscrew from Jenspeed products. I used the OEM banjo
with new aluminum washers.
|
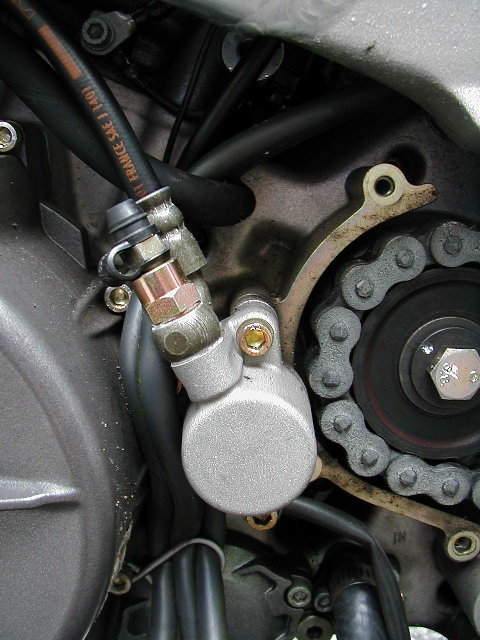
The stock clutch line has the bleed screw in the
banjo bolt. The Fren Tubo supplied banjo bolt did not
come with bleed screw.
|
|
Rear Brake Line
Installation Procedure. The rear brake line is a little
different.
-
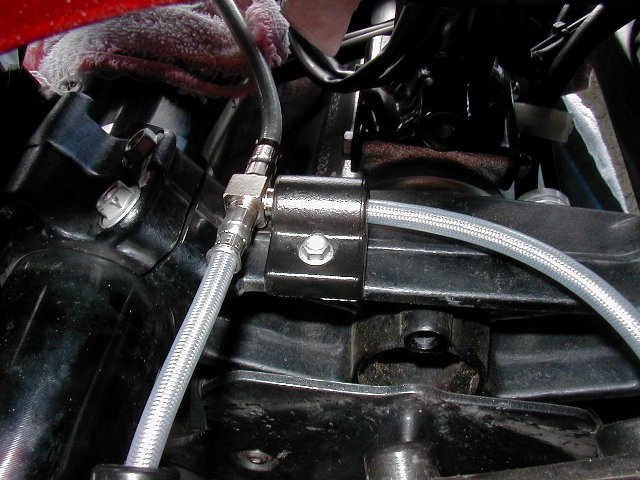
The rear line runs within a protective channel under the
swingarm. Remove the channel, but be careful not to push on
the wellnut on the inside of the swingarm. If you lose it
into the swingarm, you'll need to find another. It is the
same size used on many windscreens, such as the Honda
CBR600F4.
-
It is nearly impossible to bleed the rear caliper without
removing it, due to the fact that the fittings and bleed
screw are at the lowest point. Remove the caliper when
bleeding and hold it above the master cylinder. You'll need
to place something between the pads to keep them from
pushing together.
-
When you are done, replace the zip ties holding the brake
line to the speedometer sensor cable, and the brake line to
the brake switch and reservoir line. Also, there's two
guides on the motor to contain the line. You can zip tie
the line to those too. The line runs outside of the inner
guide, inside of the outer guide.
Build your own lines?
Yes, its possible.
Go back to the Falco home page.