Like many early Falco buyers, my battery was never really up its task. It struggled turning over the motor, and after a couple weeks of sitting I was subject to getting the dreaded dash reset. I never remember seeing a full voltage on the on-board voltmeter (although I've seen inaccuracies in these when checking against a handheld meter). Finally, after a long winter, my battery was no longer reliably getting me home from work.
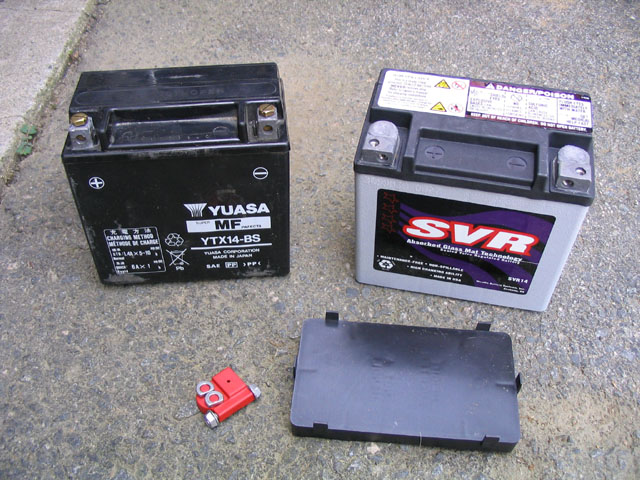
The stock battery is a Yuasa YTX14-BS, of the maintenance-free variety. I've had decent life out of Yuasa batteries, but in this case a company called Westco made a replacement with higher capacity (and rave reviews). Their price has recently jumped from a competitive $60 to a high $90, but I was still willing to try it.
| Spec | Yuasa YTX14-BS* | Westco SVR-14 |
| Reserve Charge Capacity | 14 A-h | 14 A-h |
| Max Cold Cranking Amps | 200 A | 250 A (+25%) |
| *Others similar: PowerSource WD14-B, Westco 12V14-B, etc | ||
Click on any image to enlarge it.
|
|
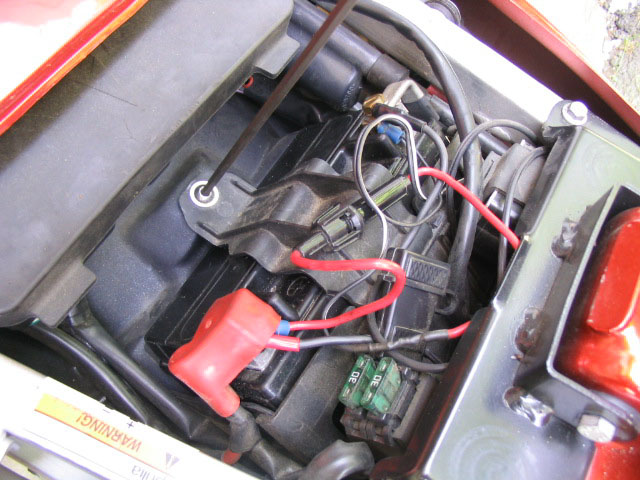
The battery is under the pilot's seat. There is only one bolt holding it in, but you'll need to hold the lock nut with a 10 mm socket from inside the wheel well while you remove it. I remove the negative battery terminal first, then the positive. This reduces the chances of shorting an energized screwdriver to the frame. |
| Westco's tech line lists the Falco as requiring a height spacer (SVR-14L), but in fact, the SVR-14 battery alone is the same height as stock. If your battery ships with the large black plastic spacer shown here, discard it. The red cap in the pictures contains two new terminal bolts and two spacers that make using the side terminals easier. |
|
Before using the battery, you should absolutely make sure it has been charged. Failure to intitially charge the battery will reduce its maximum capacity forever. In the case of the Westco SVR line of glass-mat batteries, they claim no charging is necessary if the battery is less than six months old. I had no real way of verifying the state of charge, so to be safe I put it on my 2-amp charger for the morning.
|
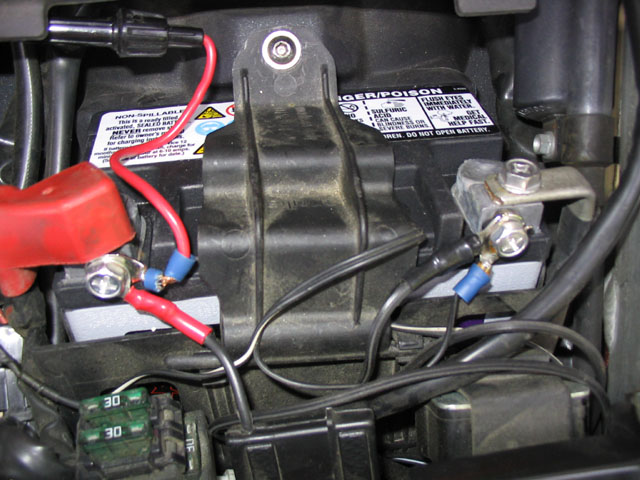
When replacing the battery, brighten the posts with a little sandpaper, then connect the positive terminal first. If you connect the main leads to the top of the posts, you can attach accessories to the side posts The supplied side-post spacers help you clear the case, but you'll need to find your own bolts. Like car batteries, the Westco terminals have a molded-in threaded block that stays put while you're starting the screws. With Yuasa (Diehards, etc) I have always fed a small spring under the threaded blocks to force them to pop up and meet the bolts. |
Go back to the Falco home page.