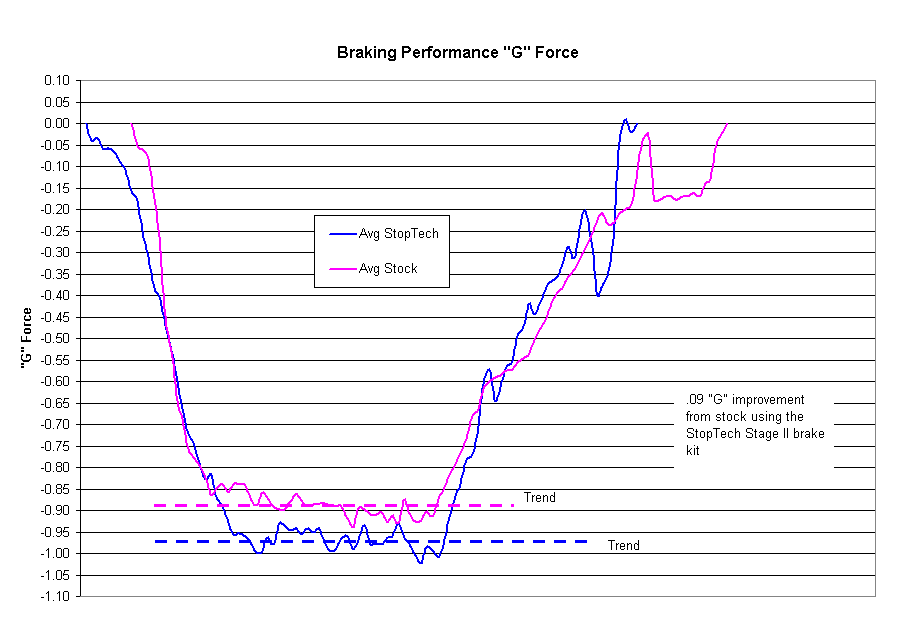
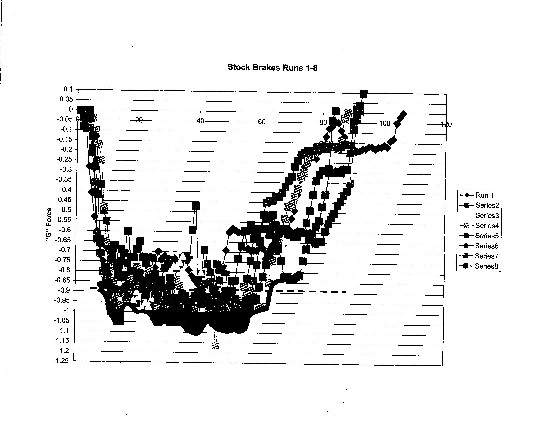
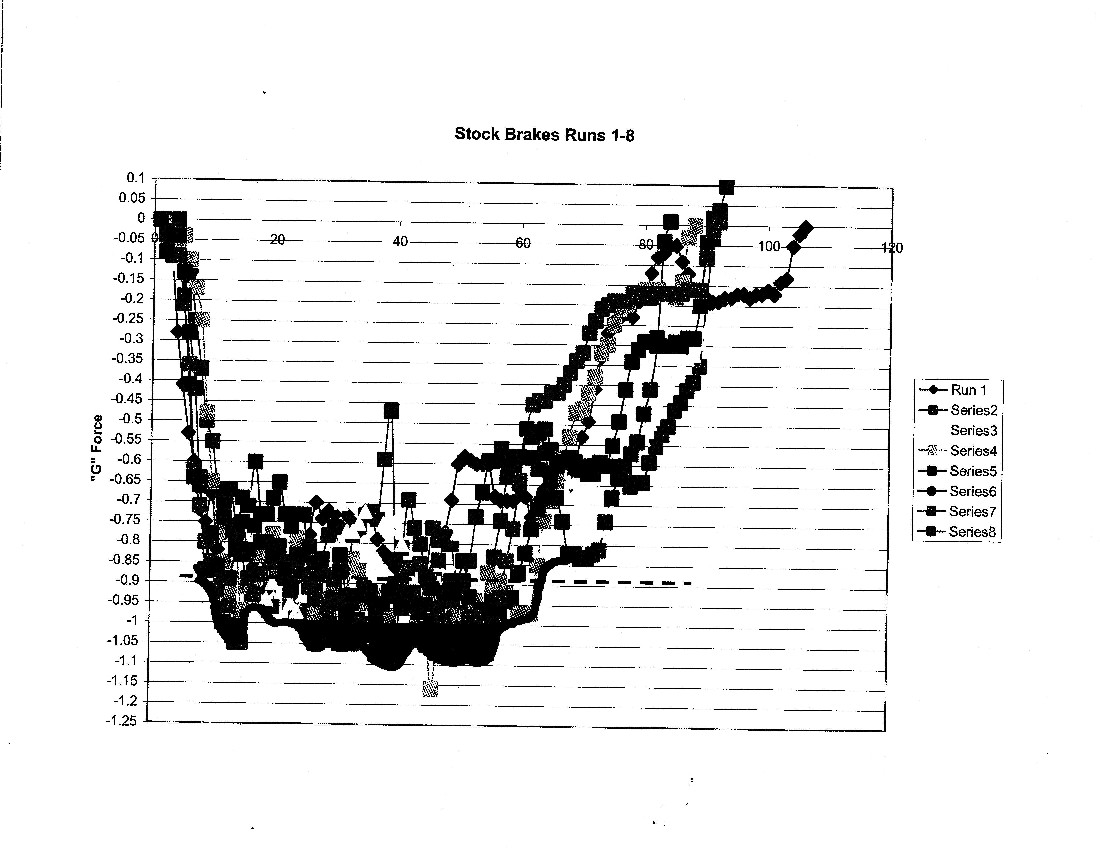
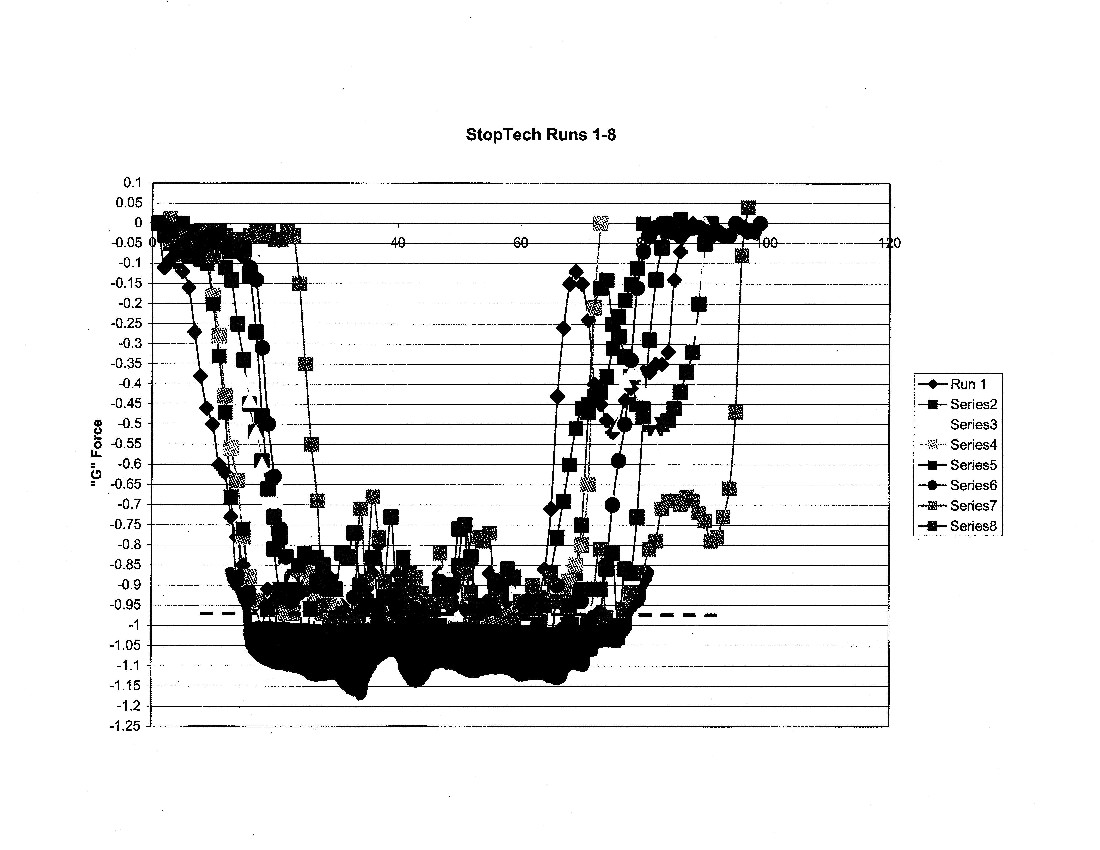
First off I want to say that we were very happy with this kit and the performance results. It seems to be a sweat spot kit as far as cost and the components appear to be high quality. When compared to stock brakes we were able to get a firmer pedal feel and an increase in braking peak �G� force of .09 G with this set-up and an increase in area under �1 �G�. We can�t claim reduced stopping distance because that is a little harder to get good data, but I can say that when autocrossing with this set-up, I was able to get within about 1 sec to my benchmark competition who drives a stock Acura Type R. (Complete pictures at bottom of Page).
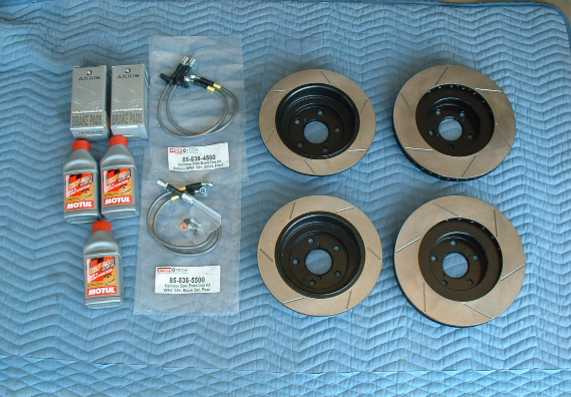
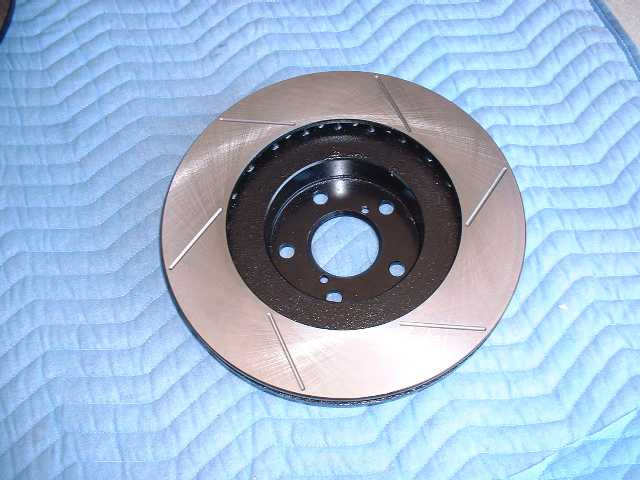
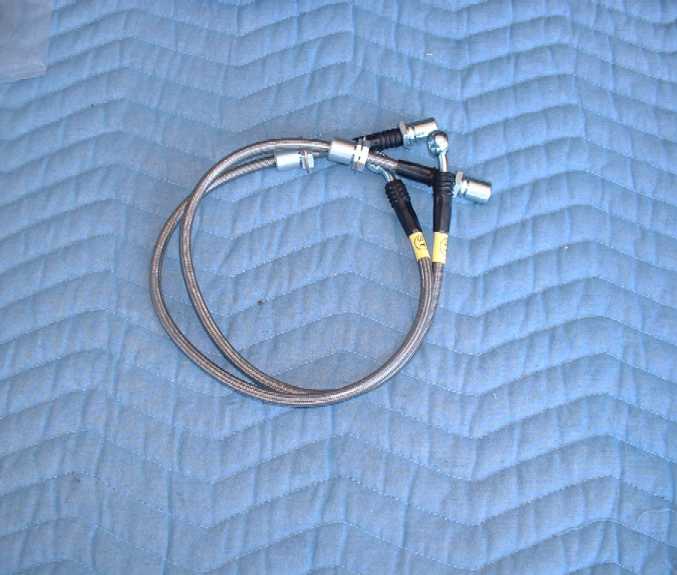
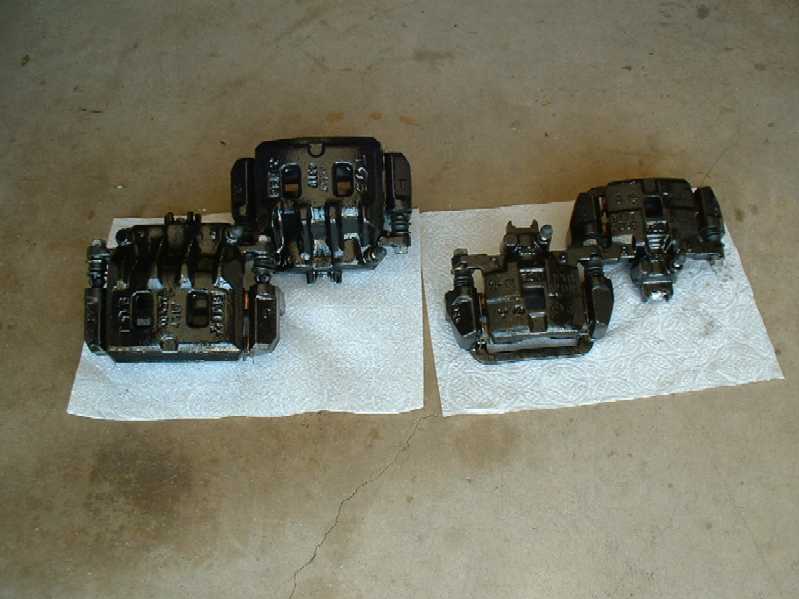
The ST kit as received included stock size slotted rotors, stainless steel brake lines, Axxis Ultimate brake pads and brake fluid. The kit arrived well packaged and all the parts were there but there were no installation instructions. I was surprised to see that the rotors were slotted and not drilled but that is OK, We prefer slotted rotors.
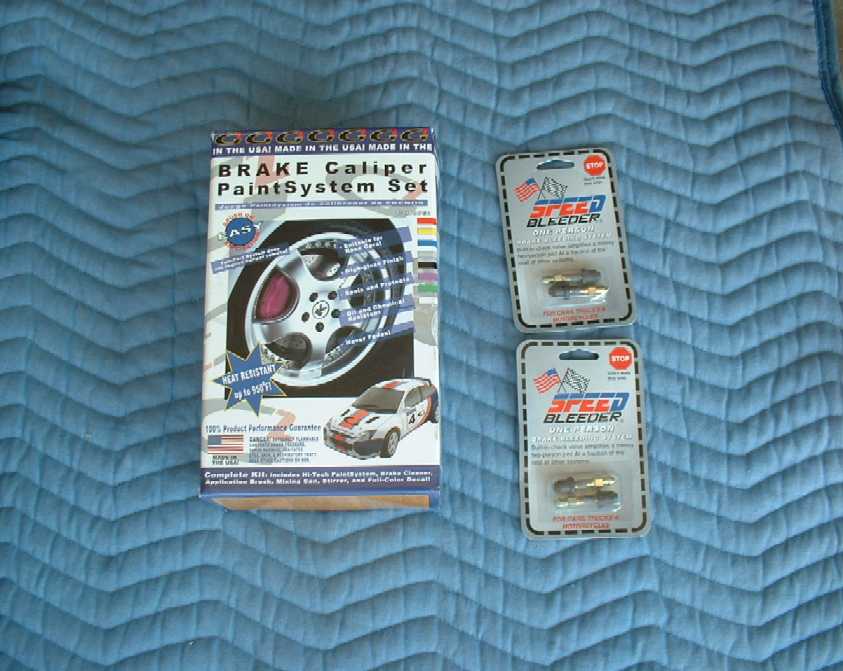
In addition to these components we used Speedbleeders (Purchased at Oakos Automotive) and G2 brake caliper paint.
Removal of the old rotors and lines was very straightforward; the only caution is to use a flare nut wrench on the ridged line. We made sure to have plenty of newspapers and rags available and a pail for the brake fluid. Even being careful, it is easy to let the master cylinder get low on fluid and that is a no, no.
Removal of the old brake pads is pretty simple, push them out of the clips then remove the clips.
The real fun began when we decided to paint the calipers, because of this decision we turned a one-day fairly easy install into a long 2-day job. The first step is to clean the you know what out of the brake calipers. G2 provides plenty of brake cleaning fluid and we got most of the dirt and dust off. Mixing and applying the paint is rather messy, this catalyzed paint really sticks to everything, and it is almost like working with glue. After application it will take about a day before the calipers can be re-installed.
We clipped the pad shims on (with a little anti-squeal liquid ) and installed the Axxis Pads without a problem; just press the into the clips. We then threaded in the new Speedbleeder fittings.
When installing the rest of the components we grabbed the instructions for the Big Brake Kit off of the StopTech site and also used the Suby service manual.
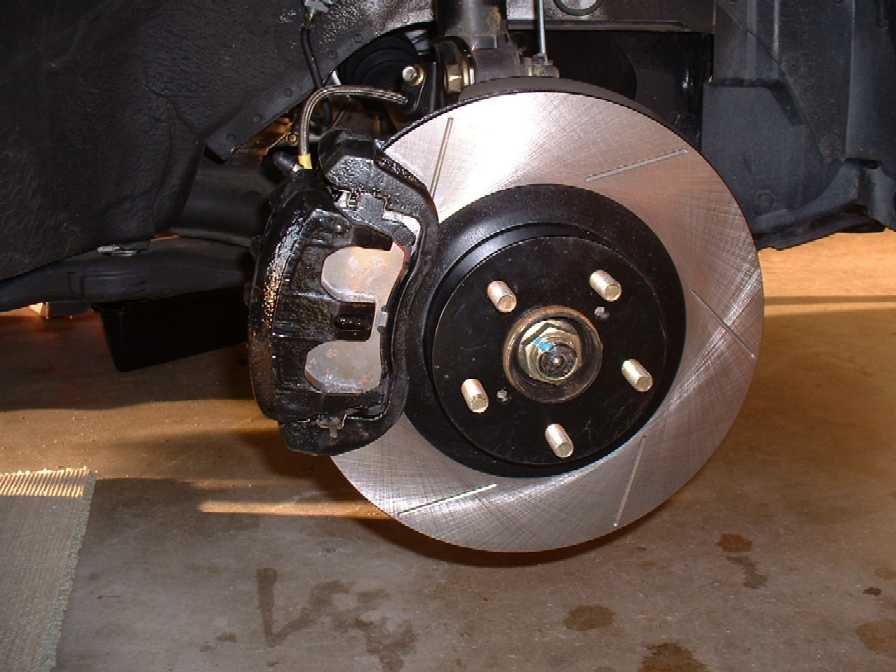
Everything fit well and bolted up correctly. (Note: the ST stainless steel line mounts may be a little loose when using the Suby mounting clips but not enough to present a problem).
We followed the bleeding instructions sequence of right front, left rear, right rear, left front and made sure we kept plenty of fluid in the master cylinder. Using the Speedbleeders makes this job almost enjoyable; I won�t ever go back to the old way.
After one final visual inspection and torque check we then hit the road for a quick brake test and bedding-in procedure.
We ran 2 sets of 10 consecutive stops of 60-50 mph down to 15-10 mph, without stopping between runs. (Note we found out later that StopTech recommends only 6-8 consecutive runs for stock dia. rotors).
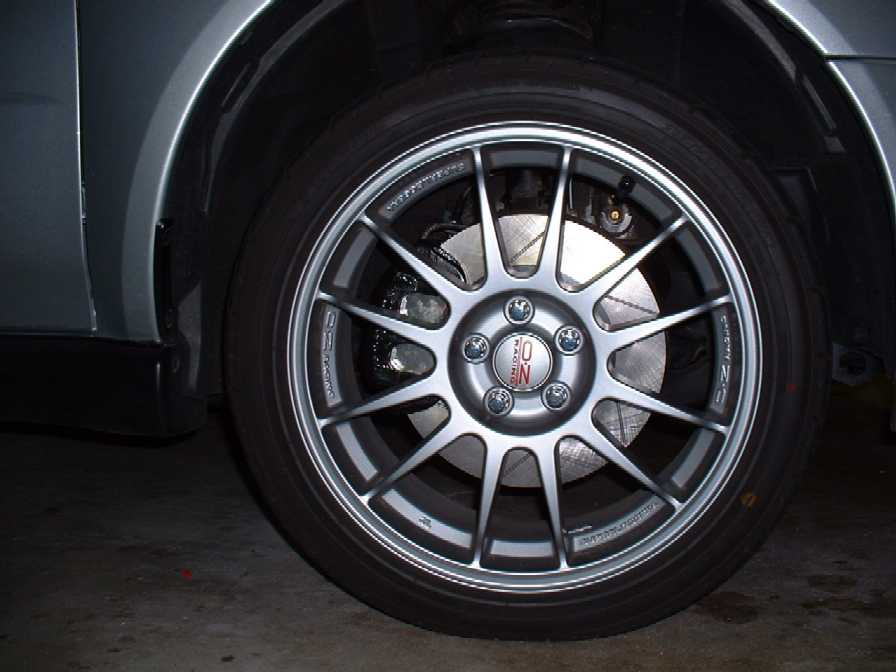
That is it, better brakes, that look good too.
1/29/03 Copyright 2003, skoshiracing