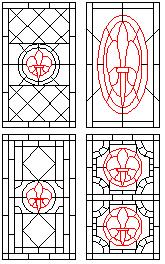
All Mary knew she wanted was a Fleur-de-Lis. These were the designs I showed her.

| The window and the process | |||||||||||||||||||||||||||||||||||||||||||
|
|||||||||||||||||||||||||||||||||||||||||||
|
|||||||||||||||||||||||||||||||||||||||||||
| The first designs. All Mary knew she wanted was a Fleur-de-Lis. These were the designs I showed her. |
|||||||||||||||||||||||||||||||||||||||||||
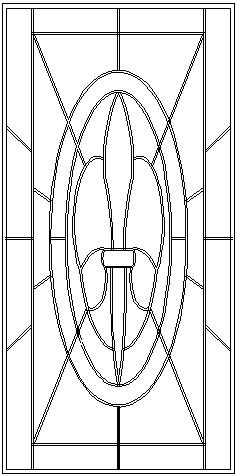
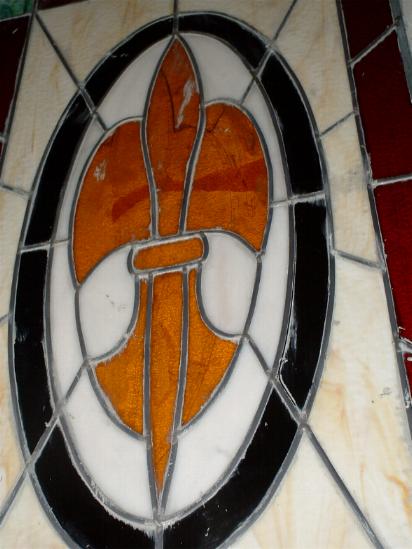
| This was the final choice. When she said she wanted a Fleur-de-Lis she wasn't kidding! | |||||||||||||||||||||||||||||||||||||||||||
|
|||||||||||||||||||||||||||||||||||||||||||
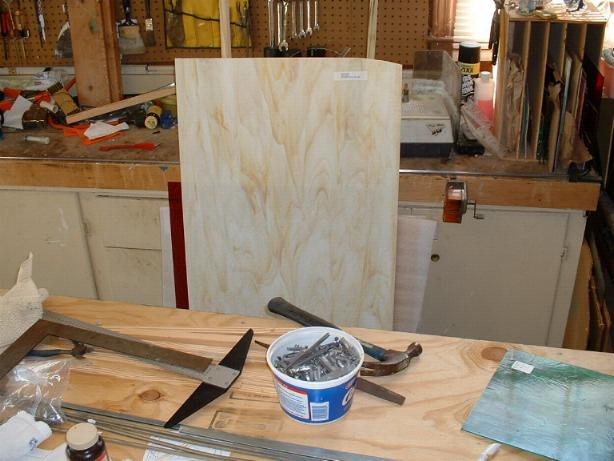
| 1. All the glass is gathered. The tools are properly scattered and the place is its usual mess. It�s time to start! | |||||||||||||||||||||||||||||||||||||||||||
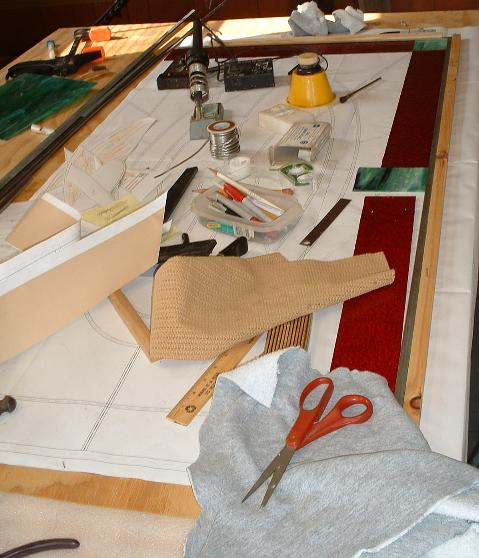
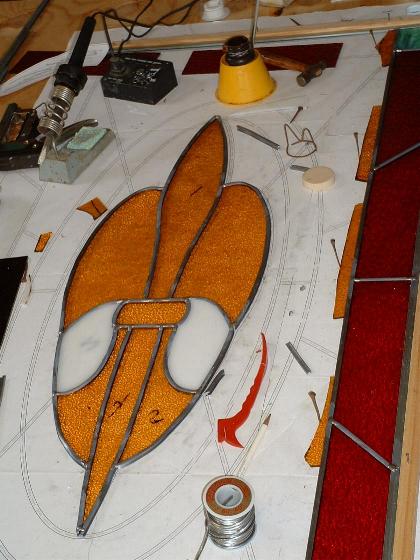
| 2. The pattern is stapled down and the border has been started (pass your mouse over the picture for a closer look). It�s amazing I could find a place to cut the glass, but I work better with clutter. | |||||||||||||||||||||||||||||||||||||||||||
|
|||||||||||||||||||||||||||||||||||||||||||
| 3. The Fleur-de-Lis is cut out and placed on the pattern. | |||||||||||||||||||||||||||||||||||||||||||
|
|||||||||||||||||||||||||||||||||||||||||||
| 4. It is now wrapped with lead came and the white glass filler leaded in as well. | |||||||||||||||||||||||||||||||||||||||||||
|
|||||||||||||||||||||||||||||||||||||||||||
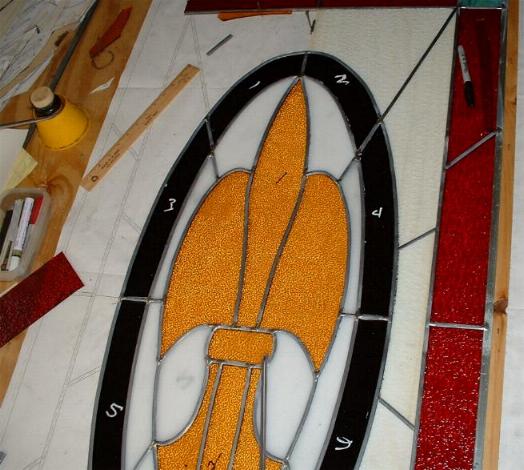
| 5. The edge is built and the background has been started. | |||||||||||||||||||||||||||||||||||||||||||
|
|||||||||||||||||||||||||||||||||||||||||||
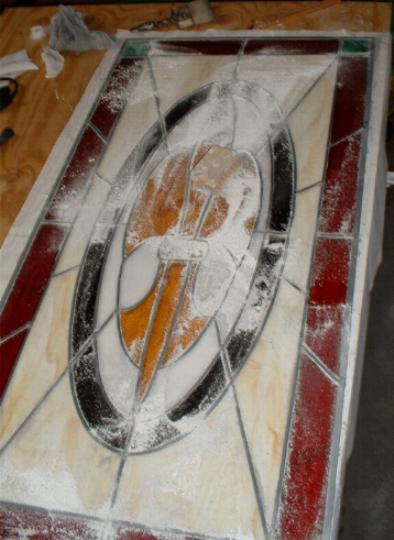
| 6. This shows the window built and it is now being glazed. You mix glazing compound with paint thinner until it�s about the consistency of gravy. You pour this on the window and rub the glazing in with a natural bristled brush. Oh yeah. It�s a lot of fun. After doing one side you then have to flip the window over and do the other side. | |||||||||||||||||||||||||||||||||||||||||||
| 7. The window has been glazed and I now use painters whiting to clean the excess glaze off. This is another fun process (note the sarcasm in my voice). | |||||||||||||||||||||||||||||||||||||||||||
|
|||||||||||||||||||||||||||||||||||||||||||
|
|||||||||||||||||||||||||||||||||||||||||||
| back | on to the finished window | ||||||||||||||||||||||||||||||||||||||||||