Chapter 9: Combat—Tanks vs. archers vs. casters


Finally we get down to what some people (like my sister) think Baldur's Gate is all about: Killing things. Well, just as in so many other cases, the best offense is a solid defense. No matter how much destructive power you wield, your party is going to get absolutely nowhere if you have to go resurrect 2 or 3 party members after every fight. That's why so many people use
Tanks. How to build a Tank: Strip your Warriors and Clerics naked, and examine them to see who has the best defensive qualities—AC, hitpoints, Saving Throws, and resistances, in that order. Whichever one you judge to be the best will be your Tank (although nobody ever said you were limited to just one Tank). Once the victim has been selected, give him all your best equipment, anything that will improve his defensive skills, and while you're at it, give him a good melee weapon, too. Now that you've got this character as close to invincibility as you can, his job is to block the enemies by running right up to them, and staying there. That way, all the bad guys will concentrate their firepower on the one guy that they can't hit, while the other 5 members of your party are happily firing their ranged weapons from a safe distance. Note that even though the Tank is thoroughly offensive in manner, he's actually a very defensive
character, no matter how much carnage he causes (which is actually irrelevant: It doesn't even matter what his THAC0 is, as most of your party's kills will come from the archers that he's protecting. A Tank's job is to draw fire, and stay alive while doing so).

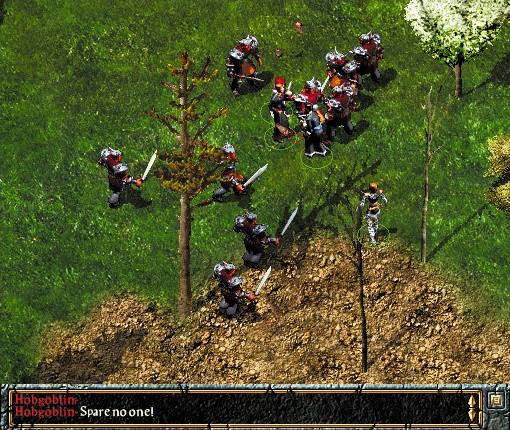
This is what happens when you try to use your Mages as Tanks: You can't fight worth beans, you get swarmed by Hobgoblins, and you quickly find yourself in deeeeeep doo-doo.Well, I guess it's okay when you're only fighting Xvarts, but it's still not a good idea.

Your enemies almost always have the exact same sight radius you do; if you can see them, they can see you. Enemies tend to attack the first party member they see, and keep attacking them as long as they're in sight range. So, if your party is happily walking along, and you find that your Mage has somehow blundered his way to the front of the group and was the first person seen by a pack of Hobgoblin Elites, who cheerfully aim a score of poisoned arrows at your Mage's soft white underbelly, you are in BIG trouble. You have to pull your Mage back out of the Hobgoblins' sight range (casting Slow Poison on him if necessary), and keep him there for a while until the bad guys have forgotten about him. Meanwhile, have a Tank run up and get in the bad guys' faces. Any enemy, when confronted with a target in melee range, will switch to a melee weapon. I have never seen the game's AI do otherwise, except of course when the enemy has no melee weapon. Some enemies may advance to try to threaten your back rank: You must quickly have your Tank head them off, so they'll forget about attacking your weaker Thieves & Mages and try to whack this annoying armored dude. (By now, you've probably figured out that giving
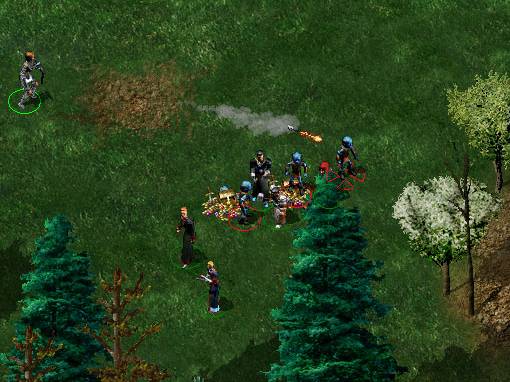
your Tank a whole bunch of Healing Potions to carry around would be a really good idea.) Notice that I'm using the word "archer" to describe every party member who prefers ranged weapons to duking it out; even Wizards and Priests, who cannot use Bows, are considered archers (which is not to be confused with "Archer," the Ranger kit). Somewhere between Tank and archer are the substitute Tanks; if your party is getting low on ammo, 2 of your stronger party members could bring out their hand-to-hand weapons and create a more brawling-oriented party, or if combat gets particularly hairy, run up to stop an enemy that got past your Tank. Substitute Tanks are also very useful when your Tank has taken so much damage that keeping him in the fight any longer would be a real risk, so you have an understudy step up while you perform some quick Healing backstage.

So what are your spellcasters doing during all this? When they're not using their Slings, they should be firing off spells, which would be SO difficult if there was no Pause button. Let's consider these basic types of spells:
1) Healing. Most of these spells are not quick to cast, so saving them until after the fight is usually best.
2) Direct Damage. Simple pain and hitpoint loss, from a distance, like Magic Missile or Flame Arrow.
3) Touch-Damage. The caster must cast the spell, then make a melee hit in combat. I think most of them are useless.
4) Summoning. Suddenly having 4 or 5 allies right up there with your Tank and helping him out is never a bad thing.
5) Incapacitating. How would you like to suddenly have half your enemies fall asleep in the middle of the fight?
6) Buffing spells. Spells that improve fighting ability, like Chant & Haste. Some can affect the whole party, others can't.
7) Combat Protections. Spells like Mirror Image, Stoneskin and Mantle protect the caster from physical weapons.
8) Spell Protections. These shield the caster from the harmful effects of enemy spells—making him practically invincible.
9) Anti-Protections. These spells, like Breach and Spellstrike, are made to bring down enemy casters' Protections.
indentThese are by no means the only types of spells, but they are very pertinent to combat. Usually, the best spells are AOE spells, which stands for Area of Effect, meaning one spell can hit several targets. Some examples of AOE spells are Entangle (Incapacitating), Fireball (Direct Damage), Resist Fear (Spell Protection) and Bless (Buffing/Protection). Be very careful where you toss your AOE spells: You don't want to knock your Tank unconscious with a Stinking Cloud. Also, if you harm your Summoned creatures (and even party members!) with spells, there's a chance they could turn on you!

Now, what's it like when the enemy has spellcasters too? Enemy Priests and Wizards can really make your life hell if you let them: If they get some spells off, they win. If you can kill them first, you win. The key here is disrupting their spells: If a spellcaster takes damage while he is casting, his concentration is broken and the spell fails. You can usually see the spell's energy uselessly fizzling into the air when this happens. The spell is completely wasted, and cannot be re-cast without sleeping
to memorize it again. That's why you need to keep your Wizards and Priests well back from ground zero, so they don't get hit and lose their spells. By the same token, enemy spellcasters usually aren't standing on the front lines either, and your Tanks probably won't be able to run up to them in time to interrupt their casting, so it's a good idea to have your archers try to take out the enemy's casters before anyone else. I should note that sometimes the game likes to cheat: There have been times when I've hit enemy Priests and Wizards while they were casting, hit them good and hard, too, and yet they still kept right on goin', and still got their spell off. Annoying as hell, when it happens. Of course, sometimes my casters have taken hits during casting as well, and still completed the spell, so even though it's unfair, at least it isn't biased.

Marching in Formation: When you've got more than 1 party member selected, you'll see a set of Marching Formation buttons on the bottom of your screen. Using them, you can make your party march in a straight line, a wedge, a pentagon, 2 columns of 3, etc., enabling you to position your party members (pretty much) right where you want them. 
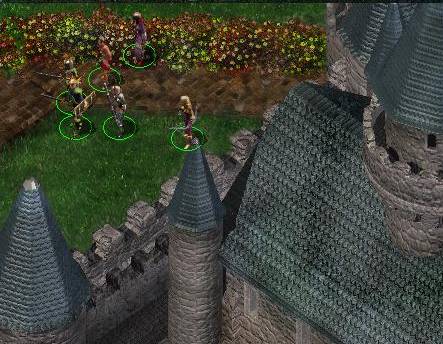
This gamer is using the "V" formation: Tanks in front, backup Tank and archer on the left flank, and casters on the right flank. A good setup, if you can avoid being attacked from the right.
(To see more Formations, right-click any of the buttons.) The only flaw with this feature of the game is that the Party Leader (the member whose portrait is topmost on the right-hand side of the screen) is always at the very front of the group, and the party's Charisma is determined by the Charisma of the Party Leader. So, if your best Tank happens to have severe halitosis, accompanied by chronic projectile vomiting, you have to keep selecting another party member to be your 'Public Relations Representative' and go talk to people. This also means that if your PC isn't a good Tanking character, you can't be the Party Leader. At least, that's the way it is in BG1. In BG2, most of the formations are unchanged, except the position of the Party Leader is different: In some formations, he's the main Tank, but in others, he's in the back or protected in the center, or taking a flank position. This is a step in the right direction, but not quite enough—I like the Pentagon formation, because it puts the party members very close together, with a single Tank on point and 2 backup Tanks on the sides, all protecting 3 weaker characters. In this formation, the Party Leader has the center position, which is fine if I'm a Mage or Bard or something, but what if I'm a Barbarian? In BG2, a Tank who wants to be Party Leader cannot use the Pentagon formation. All right, that's enough mini-rant for now. (If you don't know how to make someone else be Party Leader, you can change the party's Marching Order by left-clicking the portrait of any party member, and dragging it higher or lower in the Order.)
Characters who can use Stealth are very useful for scouting. They can observe enemy numbers, species, weaponry, etc., and enable you to come up with an attack plan before the enemy even knows they're under attack. A variation on the Steath-scout is the Sniper (Archers are best for this): When scouting, you happen upon a large group of enemies. After observing them, pull back until you can only see 1 or 2 of them, and fire a single arrow at them. The one you shot, and maybe 2 or 3 others, will attack you. Don't go back into Stealth, but instead lead them back to the rest of your party, who will help you tear them to pieces. Repeat.
Healing Potions can only be drunk at the rate of 1 per round. Drink one, and your hp will be regained instantly, but you will have to wait for a few seconds before you can attack again. This does not keep you from walking around, however, so an injured Tank can drink Potions and still dance around distracting the enemy, keeping one step ahead of the big, bad dude that injured him.
Hosted by www.Geocities.ws

1