|
|
|
|
|
|
|
|
|
|
|
|
|
|
|
|
|
|
|
|
|
|
|
|
|
|
|
|
|
|
|
|
|
|
|
|
|
|
|
|
|
|
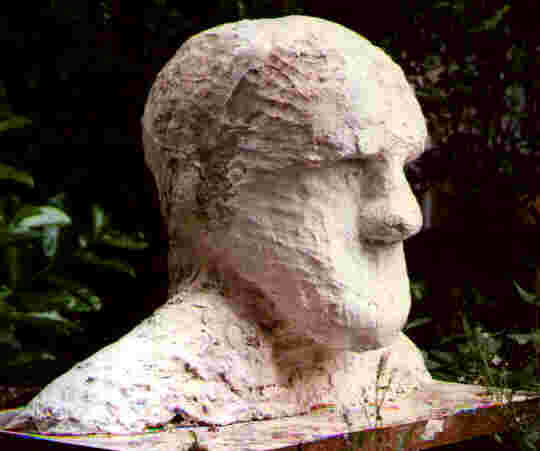
Simon the Sculptor |
|
|
|
(Click on an image or the text to view a larger picture) |
|
|
|
The Body Moulding Process |
|
|
|
 |
|
|
|
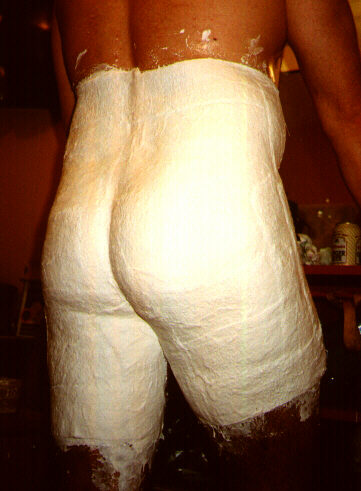
Pose the model to make the best of their body.
Cover the area to be moulded with vaseline. Then cover with 3 to5 layers of plaster bandage.
About 1 hour per set and mould |
|
|
|
|
|
 |
|
|
|
 |
|
|
|
|
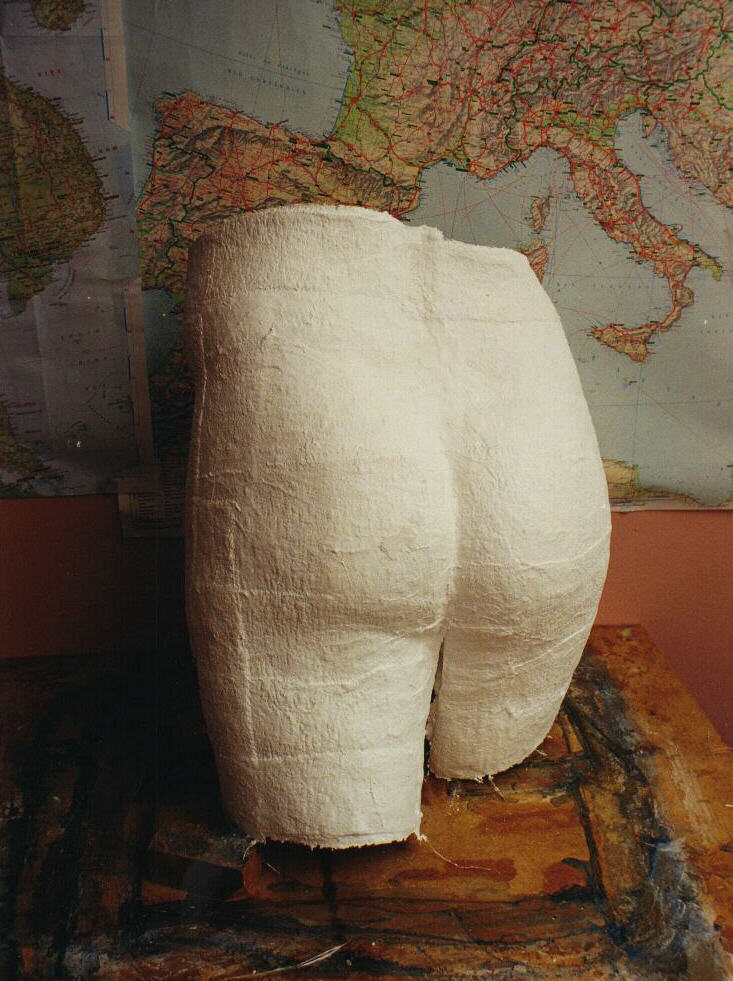
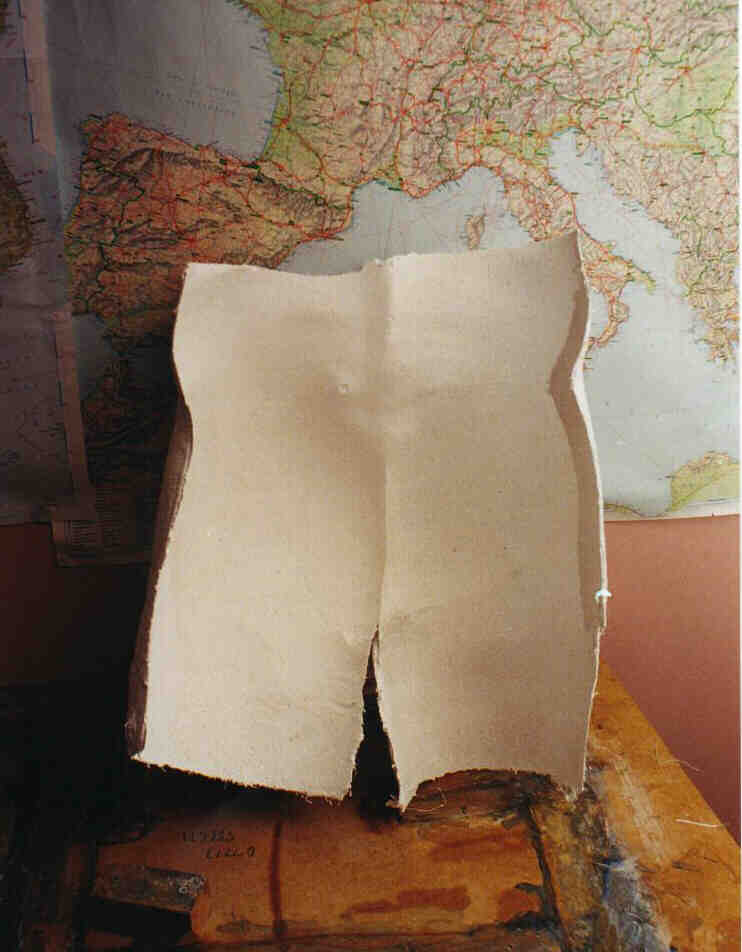
Let the mould dry for about a week |
|
|
|
|
|
|
|
|
 |
|
|
|
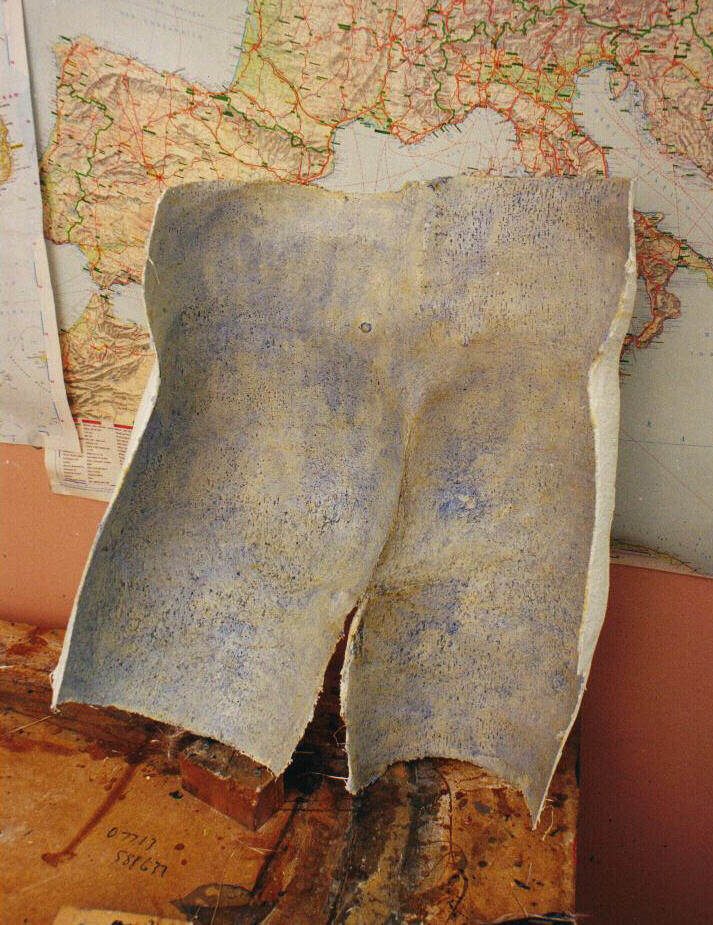
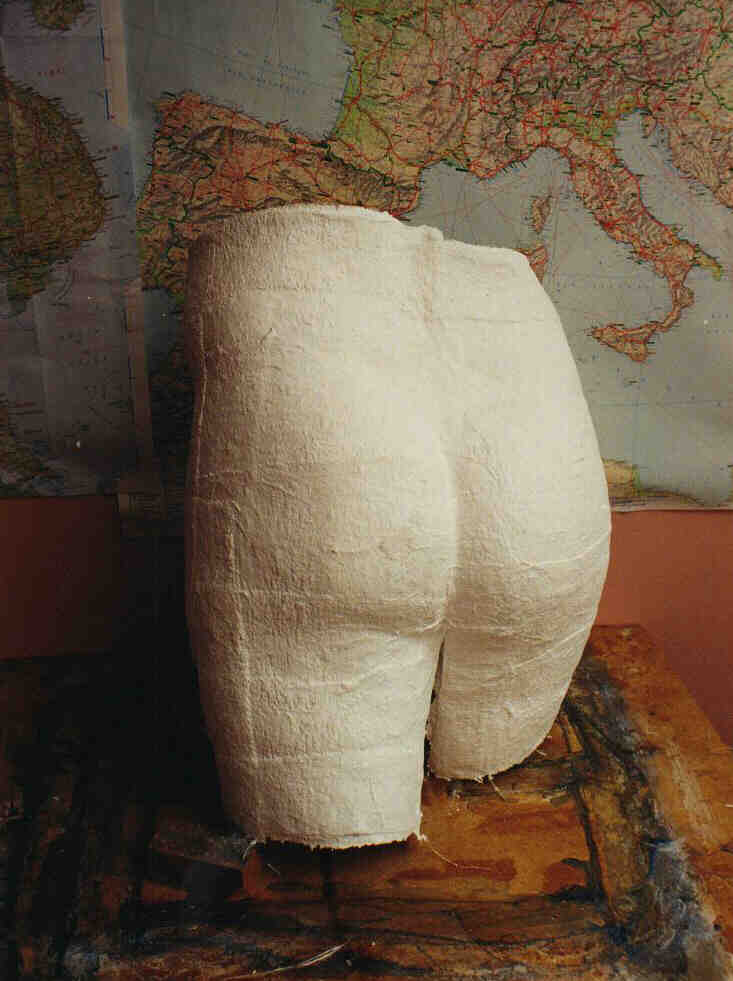
Cover the mould with varnish, beeswax and mould release agent.
2 hours work spread over 2 days |
|
|
|
|
|
 |
|
|
|
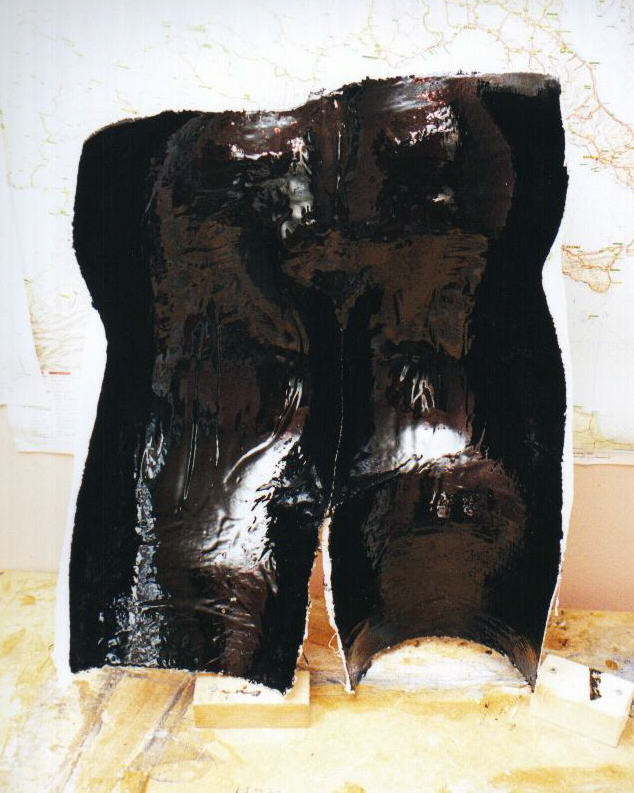
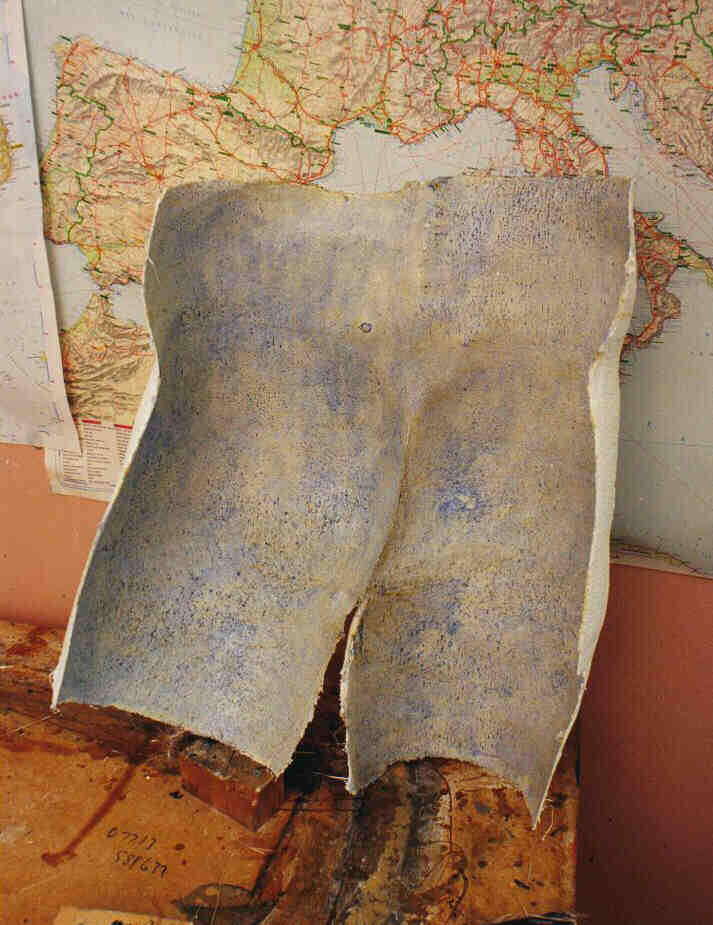
Cover the mould with gelcoat resin and allow to set.
30 minutes work and lots of smell. |
|
|
|
|
|
 |
|
|
|
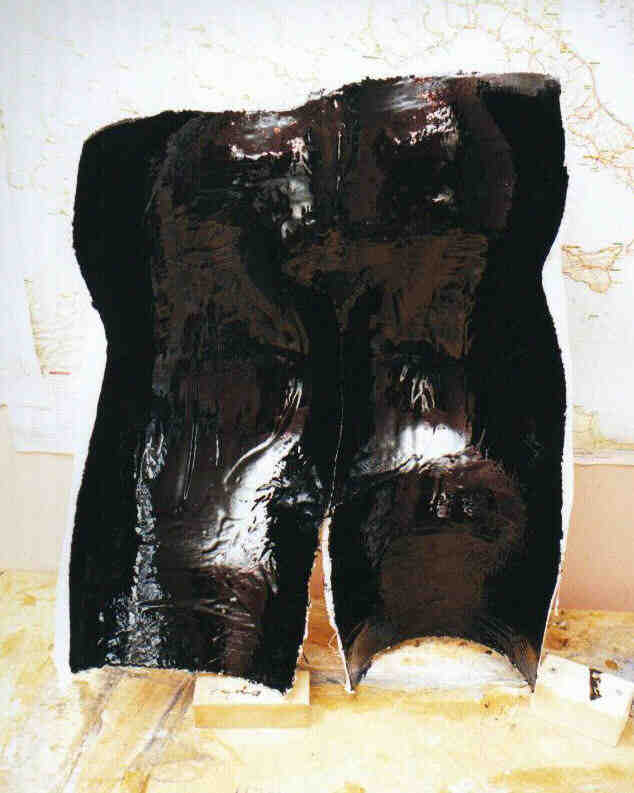
Fill the mould with 2 to 4 layers of glass fibre cloth with polyester resin - Allow to set.
1 hours work and more smells. |
|
|
|
|
|
 |
|
|
|
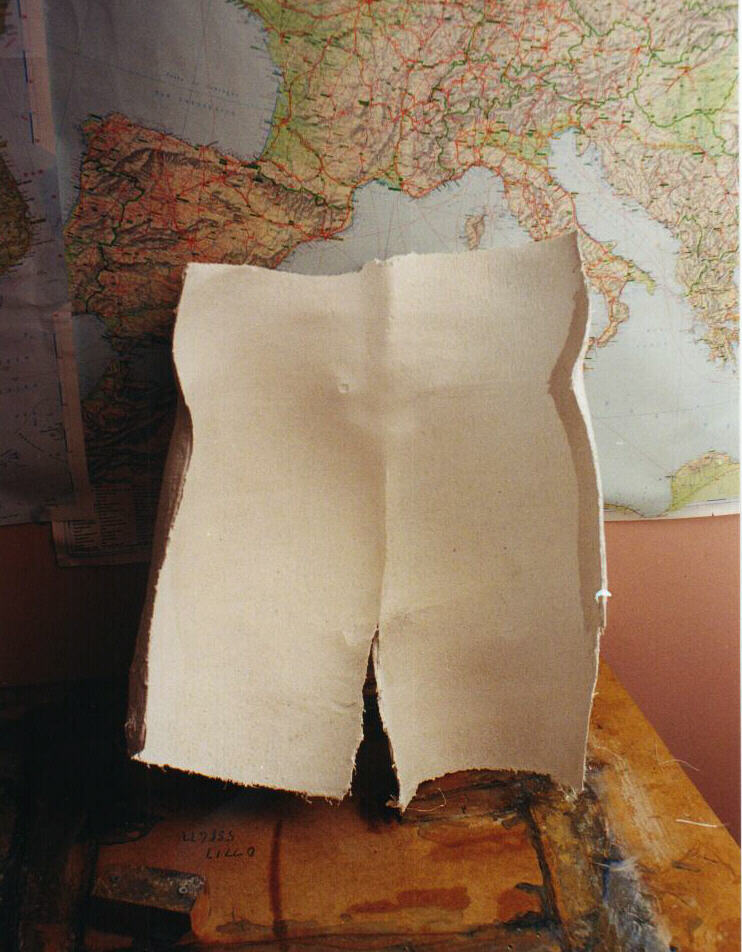
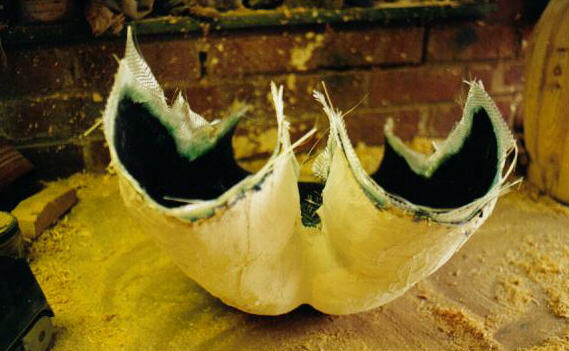
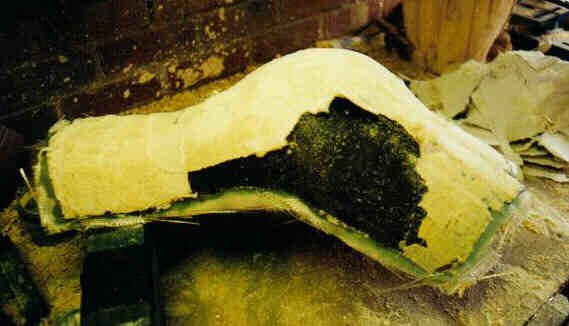
Remove the plaster bandage.
1 hours work and glazed knuckles. |
|
|
|
|
|
 |
|
|
|
Finish the body shell - this is the first impression, which can be used to make a permanent production mould.
2 hours work. |
|
|
|
|
|
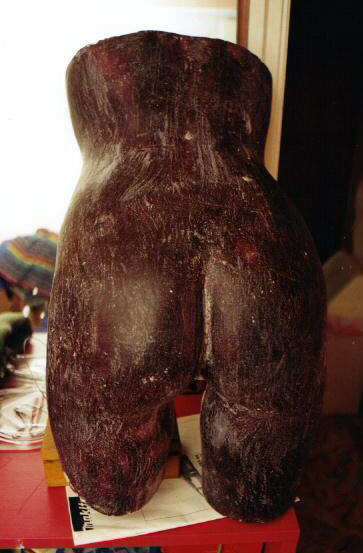
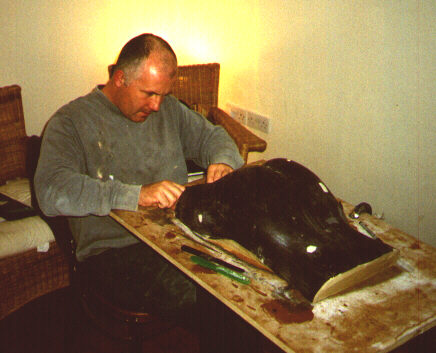
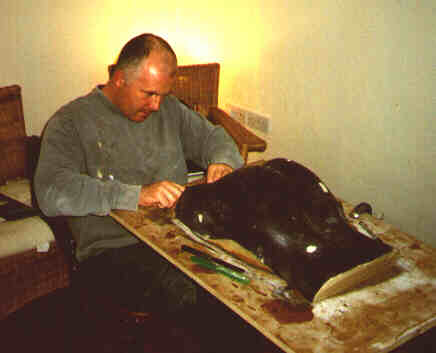
Attach the body shell to a board and fill in the holes (where the arms, legs, neck, etc were!) with wax
This results in a solid "plug" that can be used to make a production mould.
2 hours work. |
|
|
 |
|
|
|
|
|
|
There are more photos and text to come on the following:
- Making the production mould
- Casting the sculpture
- Finishing the sculpture
watch this space!!
|
|
|
|
 |
|
|
 |
|
|
|
|
|
 |
|
|
|
|
|
|