I created this page which I hope is help full to any other SHO owner who is attempting to install Koni struts on their SHO. I found the directions to be a bit vague and because of this I ruined one of my strut housings, good thing that I had a spare set should I happen to screw up one of my housings off of my car. Ok...Enough said on with the good stuff.
There are two types of strut housings used on the SHO's through out the years. One of these tends to work better for the Koni inserts that the other. They will both work but one may over time cause a rattle. This may be some thing you can live with but I can not so since the set of housings I had for the rear were of the type II variety I chose to use the Type I struts that were on the car instead of the Type II I had previously installed the housings in.
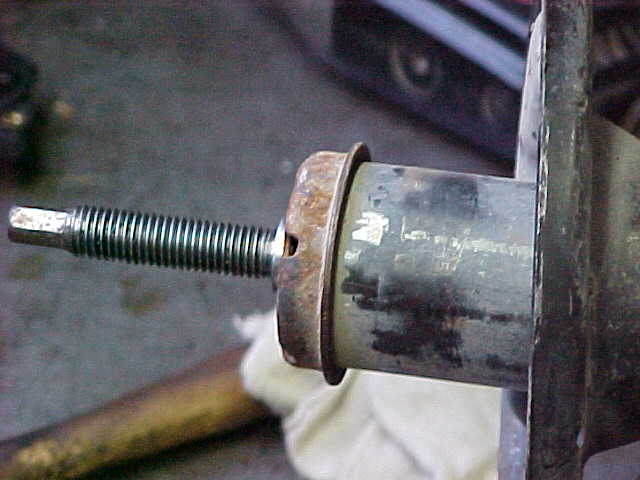
Type I Struts: These are the prefered housings since they provide a tighter fit. You can tell these from the Type II by the shape of the housing at the top These are a consistent diameter and have a Zink plated "hat" at the top. This "hat" has to be removed to insert the Koni's.
Type II: These may rattle but will work I'm told. I chose not to use these since they may rattle. You can tell these from the Type II by the shape of the housing at the top. While the Type I are consistent they are necked down kinda like a "bottle neck". You have to cut these housings farther down and that is why they may rattle. My instructions below detail both types of struts since I have installed Koni's in both types of housings.
Type I
1: Begin by drilling a 1/8" hole in the center of the bottom of the OEM strut housing. The measurements of mine for the center was 7/8" in from the outside. Your measurements may be different.
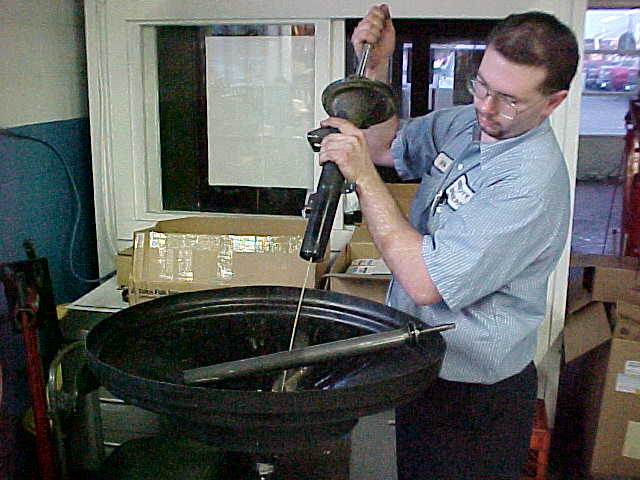
2: After you drill the 1/8" hole remove the oil by holding the strut upright and moving the strut rod in and out several times to vent the oil out.
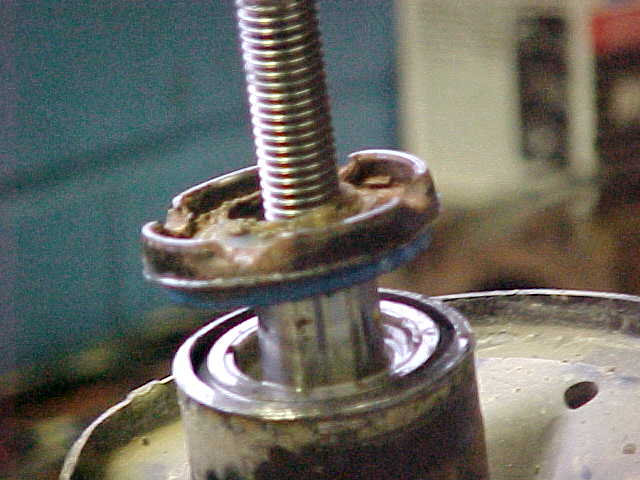
3: After this is done using a hammer and a punch remove the ring at the top part of the housing. Several swift hits should remove this fairly easily.
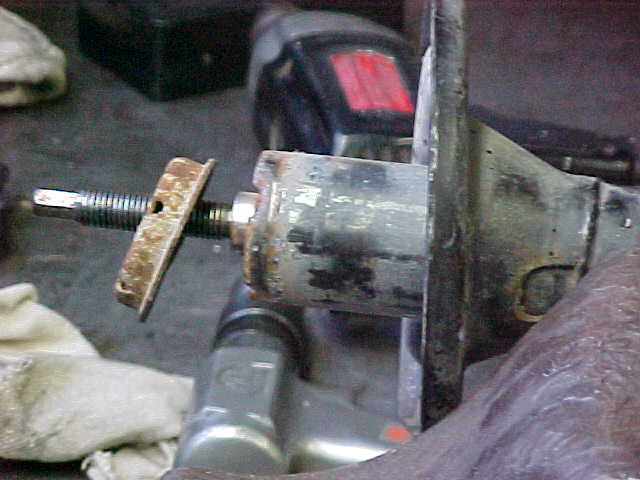
4: Then using a Pipe cutter, hacksaw, or other suitable cutter. I used one of those chain type cutters and it worked very good. Cut off the old housing just below the four crimps that hold the strut together. Approx 5mm from the top of the housing.
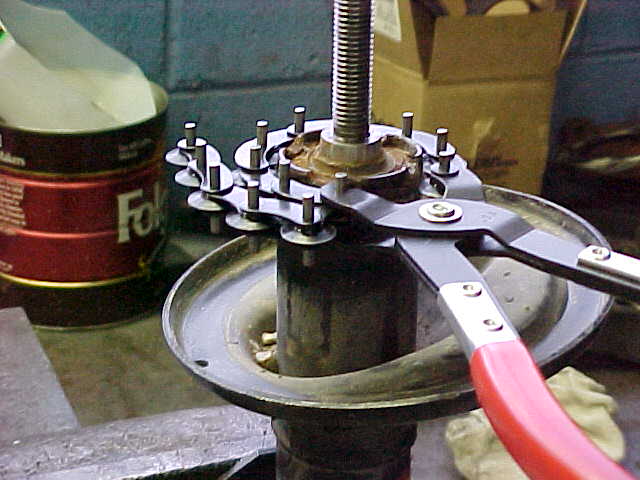
5: Grab the strut rod and slide the rod in and then pull out swiftly similar to a slide hammer and the internals of the strut housing should come out..
6: Now enlarge the 1/8" hole that you drilled in the bottom of the housing to 1/2".
7: Remove any burr's from the hole and where you cut the housing.
8: Clean all the metal filings out of the housing.
9: Install the KONI insert into the OEM housing and torque the bolt at the bottom of the strut housing that holds the insert in to 63 ft. lbs.
10: Install the rubber boot and the plastic ring at this time.
Type II
1: Begin by drilling a 1/8" hole in the center of the bottom of the OEM strut housing. The measurements of mine for the center was 7/8" in from the outside. Your measurements may be different.
2: After you drill the 1/8" hole remove the oil by holding the strut upright and moving the strut rod in and out several times to vent the oil out.
3: Then using a Pipe cutter, hacksaw, or other suitable cutter. I used one of those chain type cutters and it worked very good. Cut off the old housing just below the weld where the strut bottle necks. Approx 26mm from the top of the housing.
4: Grab the strut rod and slide the rod in and then pull out swiftly similar to a slide hammer and the internals of the strut housing should come out.
5: Now enlarge the 1/8" hole that you drilled in the bottom of the housing to 1/2".
6: Remove any burr's from the hole and where you cut the housing.
7: Clean all the metal filings out of the housing.
8: Install the KONI insert into the OEM housing and torque the bolt at the bottom of the strut housing that holds the insert in to 63 ft. lbs.
9: Install the rubber boot and the plastic ring at this time.
Created March 10, 1998
Special thanks to Todd Cook of TCE Performance Products on his insight of installing Koni inserts