Flower
![]()
![]()
![]()
Open up a new
canvas size 50 x 50
Zoom in so you can see very clearly!
Select your paintbrush
Brush size 1 and chose square
Then in your materials palette set your stroke to what ever colour you would
like your flower to be
And copy the following image
Change your stroke colour to a lighter shade now and pixel in the gaps in
between the outline you have just drawn.
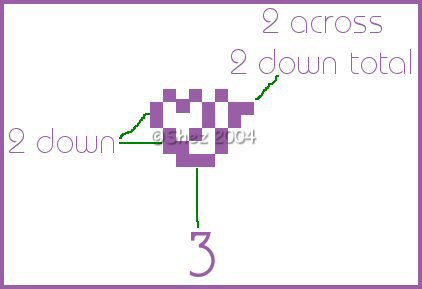
Now change your stroke to #008000
Then pixel a line down from the bottom of your flower (start on the middle
pixel as shown in main picture)
20 pixels downwards
Add anew raster layer
Change your stroke to #087008
And pixel out the following
![]()
Merge all layers
Save in psp format for future use
Tutorial copyright of © Shez and may not be reproduced, linked to or passed
out in any form without prior consent.