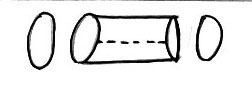
This is a little
expensive to build, but it illustrates the principals which can be used
to build something similar from local materials. Any really effective designs
can be submitted for when this manual gets updated.
This oven consists
of a firebox which heats the air in an empty space surrounding the oven
chamber. The entire system is then buried with dirt to insulate it.
Materials:
1 good condition oil drum (200 Liter)
1 old oil drum of the same size
Flat iron sheets for door and inner trays
Scrap corrugate
10 pieces of 3/4 inch pipe cut into 3 inch lengths
Binding Wire
2 1-inch hinges
2 4-inch diameter pieces of chimney pipe
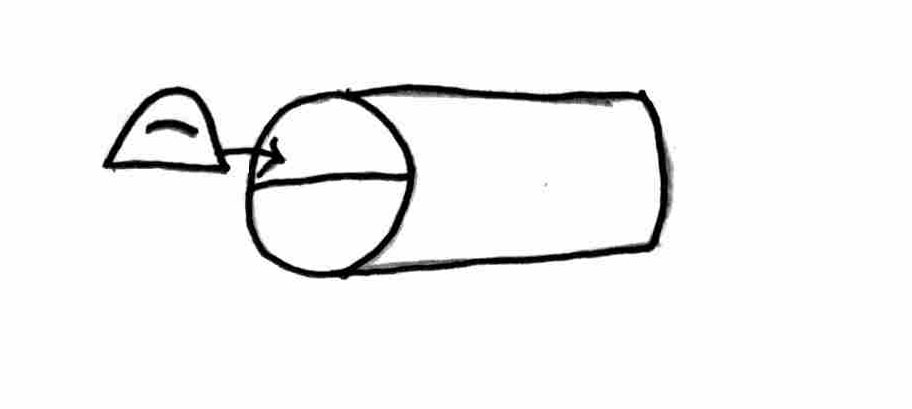
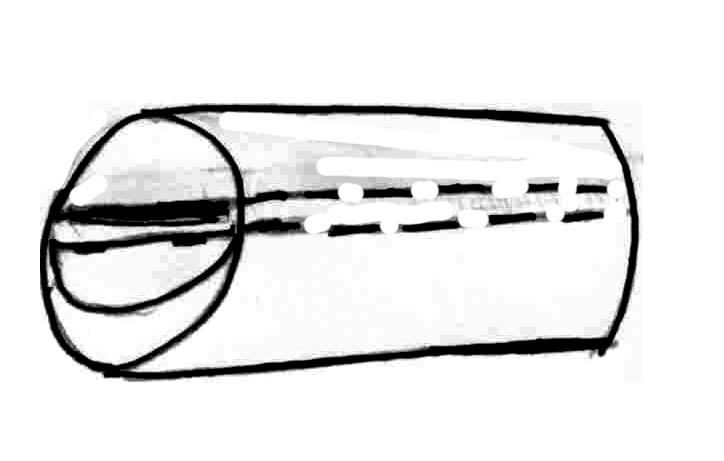
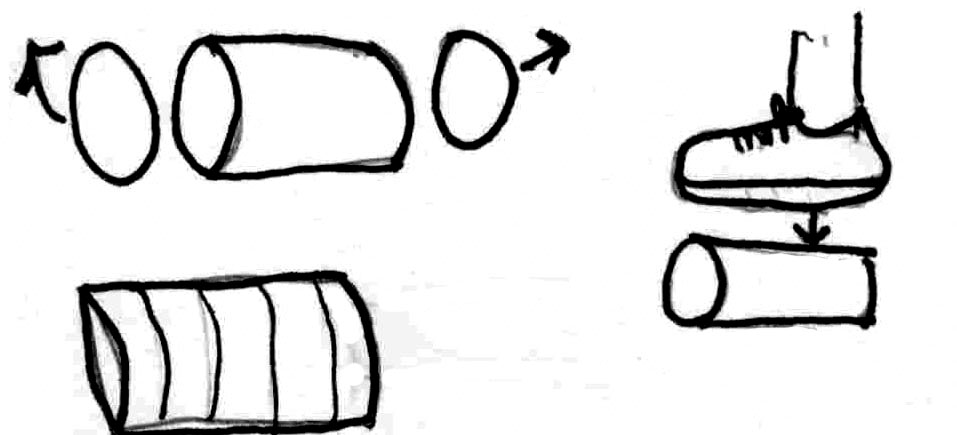
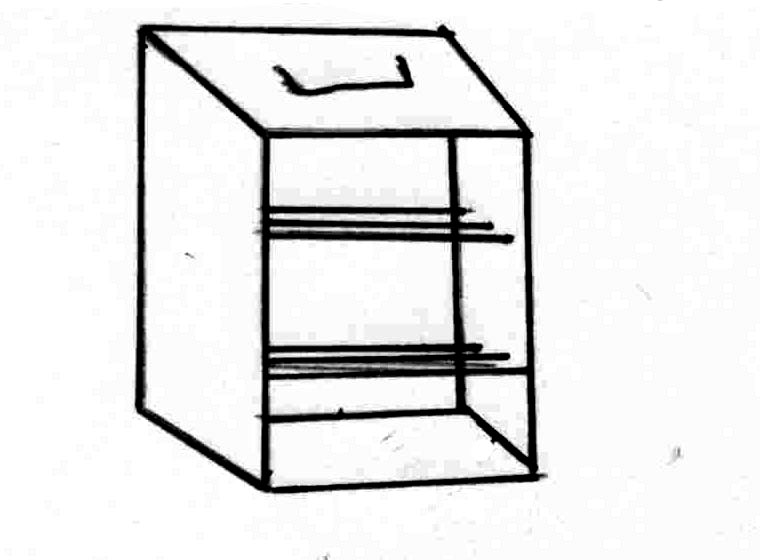
Outer drum assembly:
Remove the top and bottom of the drum and cut open one side from top to bottom.
Now poke holes in the drum to fasten the 3/4 inch pipe pieces to the inside of the drum. The pipes should be spaced evenly to create the air space around the inner drum
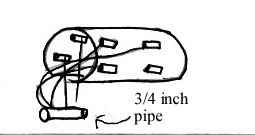
At the top of the drum, make 1 inch deep cuts around the rim spaced 1 inch apart. Then bend these cut edges back at a 90 degree angle.
Finally, cut a
hole in the top of the drum large enough to fit the chimney pipe.
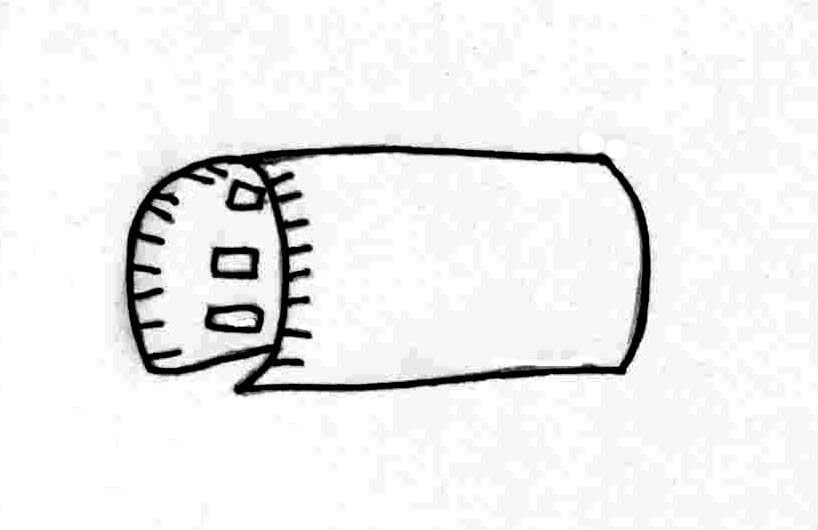
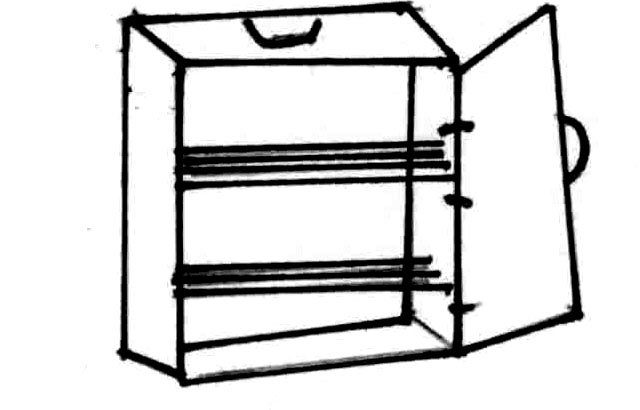
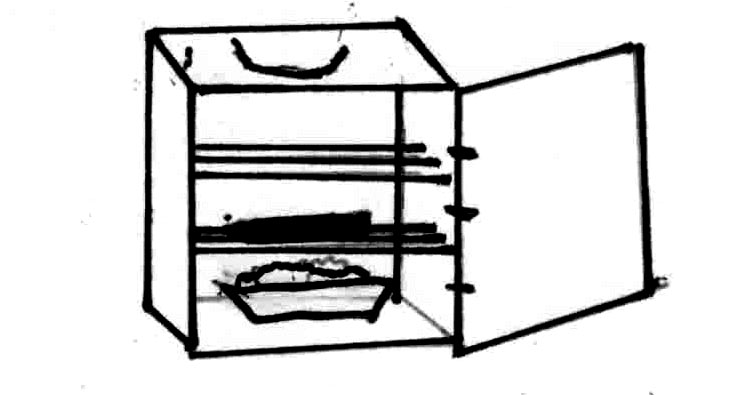
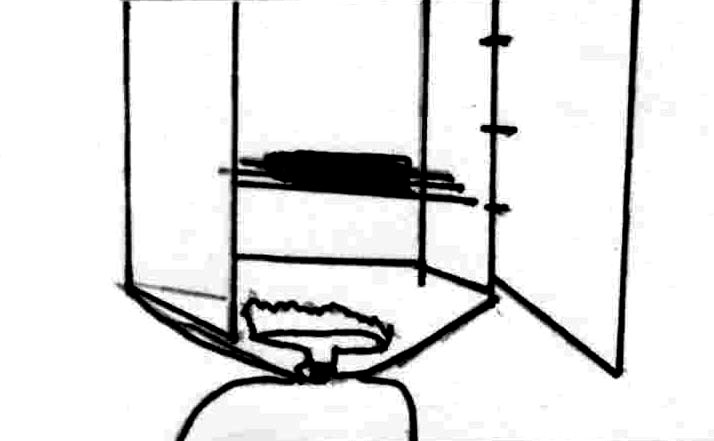
Inner drum assembly:
Cut the top half off of the lid of the drum. Reattach this lid using the 1 inch hinges. This creates the front door. Also attach a handle and latch to the door with scrap metal.
Rivet some metal sheeting to support the tray inside the oven. This should be done so that a tray can be placed in the center of the can.
Firebox assembly:
Use the scrap corrugate to build an open box without a top or front. A bottom is also optional. The sides should be 8 inches high, and 5 feet long. The back should be 8 inches high and 8 inches wide.

Oven assembly:
Slide the inner can into the outer
can assembly, so that the cut space on the outer can faces the ground and
the chimney hole faces up.
Place the two drums on top of the
firebox assembly and place the chimney on the top holes.
After the oven is assembled, bury
the oven in dirt, sand, concrete, etc. to insulate the system. Make sure
the door, firebox, and chimney pipe are left exposed.
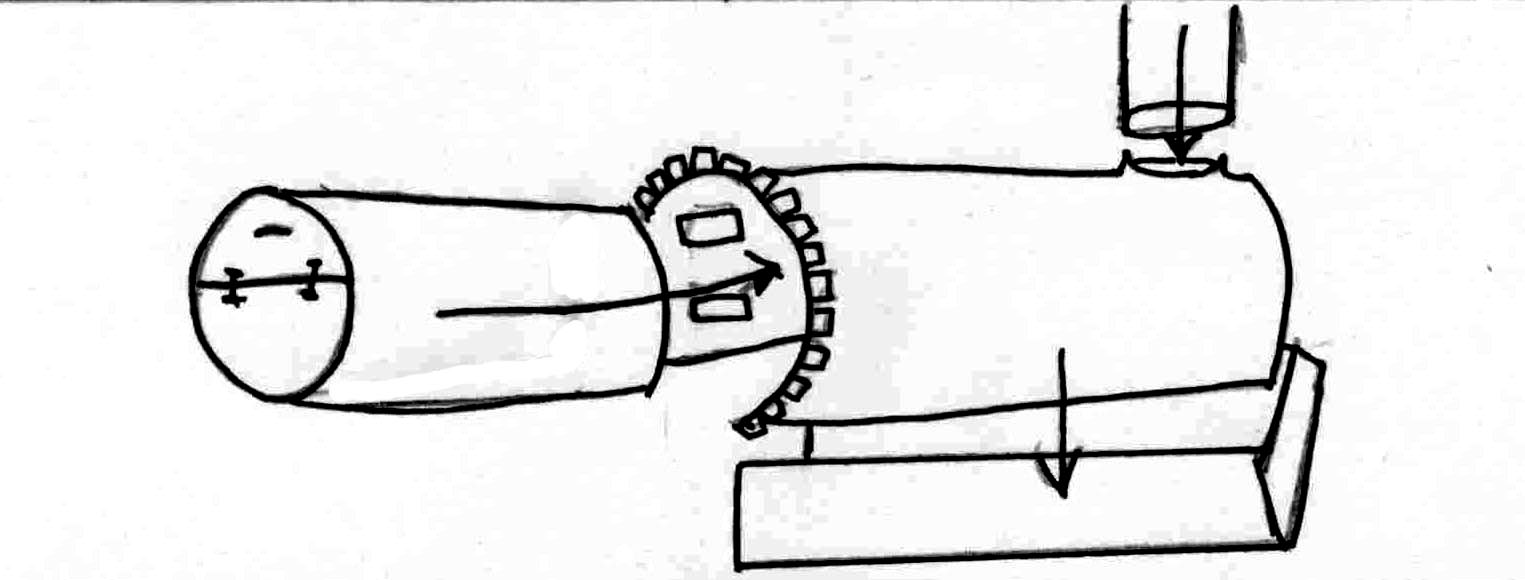
Bury the oven leaving only the chimney, front door, and the front of the firebox open.
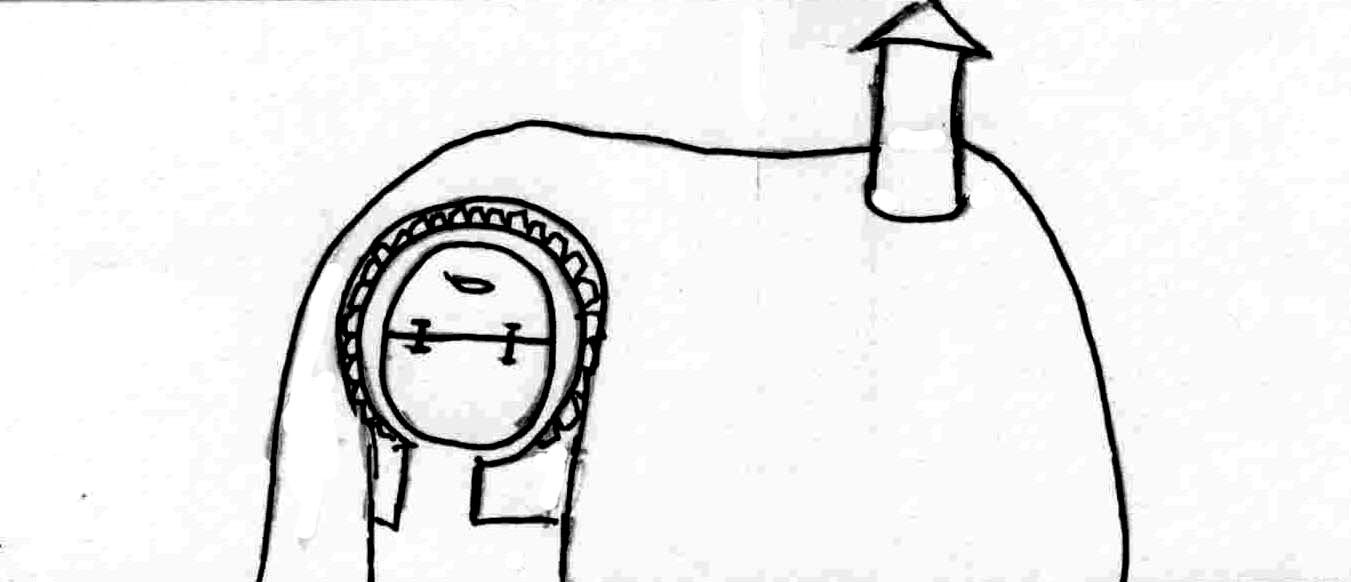
The upper can has both ends removed. Half-way up the can, holes are cut and bent inwards to form ledges. One of the removed lids is placed on the ledges to act as a shelf.
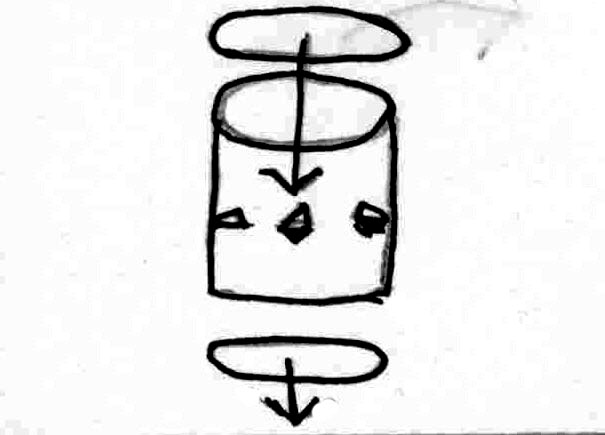
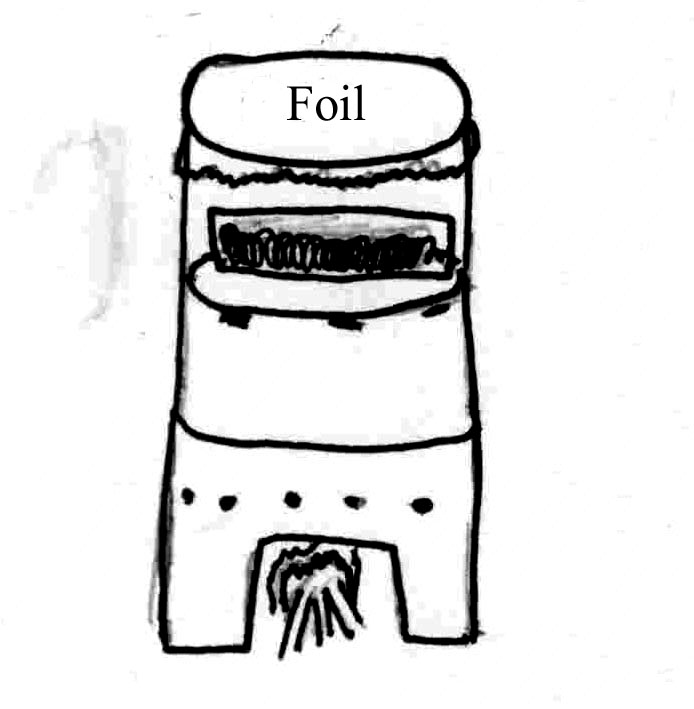
To use this oven, place the food in the upper can and over the top with foil and feed the fire from lower can.
Horizontal
Can Oven:
Again, this is
an oven made by two large tin cans.
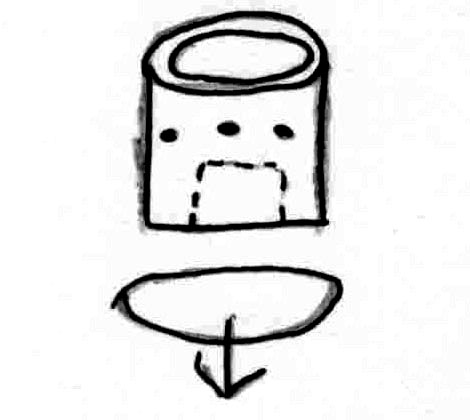
Cut both ends off of the lower can. Cut a door in the front for feeding the oven with fuel or coals. Bend the top so that the second can can rest securely on top.
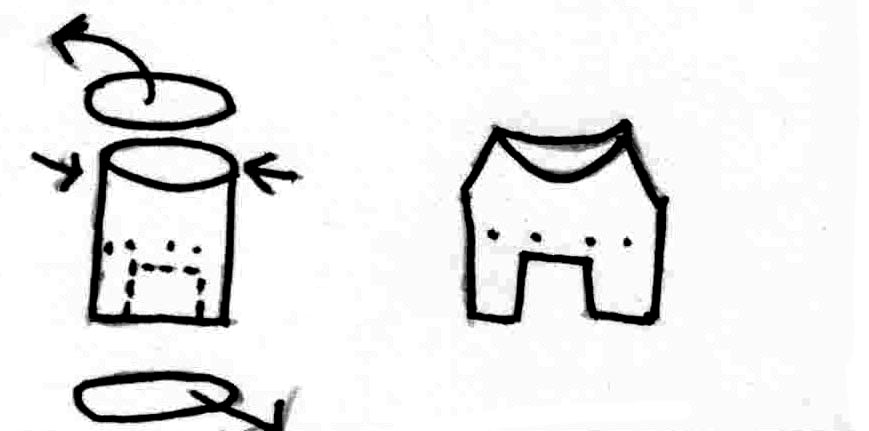
If you are using a can with a resealable lid (such as a powdered milk tin) for the upper can, take a lid removed from the lower can and fold it into a shelf. If you are using a regular can, remove the lid and fold it into the shelf. Place the can on its side and put the shelf inside the can.
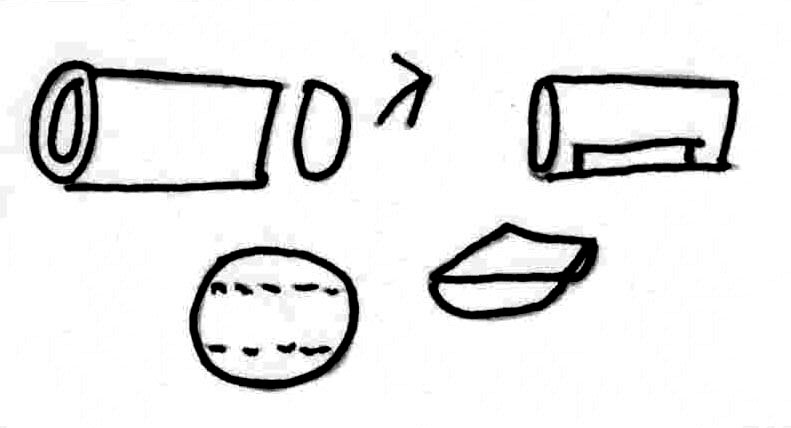
To use this oven, place the upper can horizontally on top of the lower can. Place the food on the shelf inside. If the can has a resealable lid, seal the can. If not, place tin foil across the end of the can. Add fire or coals to the lower can and let the food bake.

Most of the following oven designs require some sort of heat diffuser to redirect the energy from the heat source and make sure it spreads evenly throughout the oven.
One of the simplest heat diffusers can be made using a tomato paste tin. Remove both ends from the tin and flatten it. Now you have a heat diffuser.
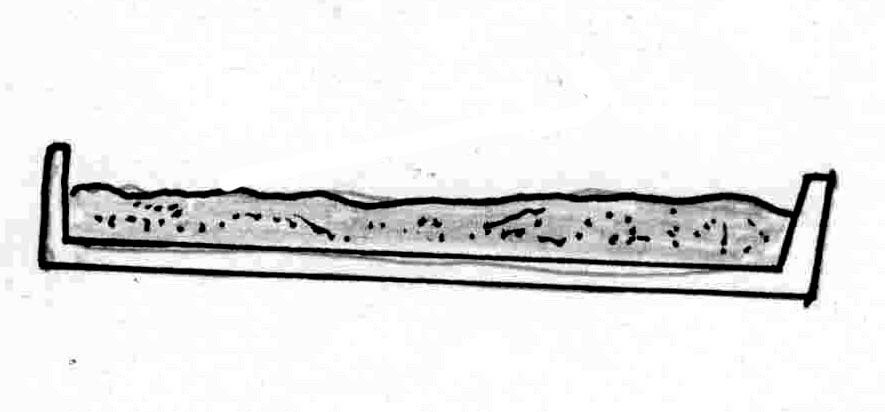
Another type of heat diffuser can be made by filling a shallow pan with sand
Simple
Box Reflector:
Materials:
1 cardboard box
tin foil
Several empty drink box containers (optional)
Binding wire
Glue
1 heat diffuser
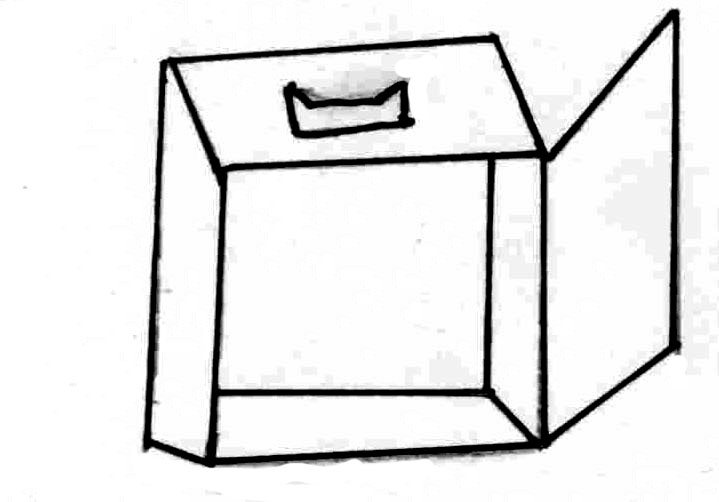
If you are going
to use the oven with a gas stove, remove the bottom from the box. If you
are going to use a pan of coals to heat the oven, leave the bottom of the
oven intact.
Next, remove
one side of the box to act as the door. Also, make a small window on the
top of the box to help to vent and control excess heat.
Unfold and glue the drink boxes to the inside of the main box. Glue the outer side of the drink boxes so the reflective side is seen inside the oven. These will help to insulate the oven.
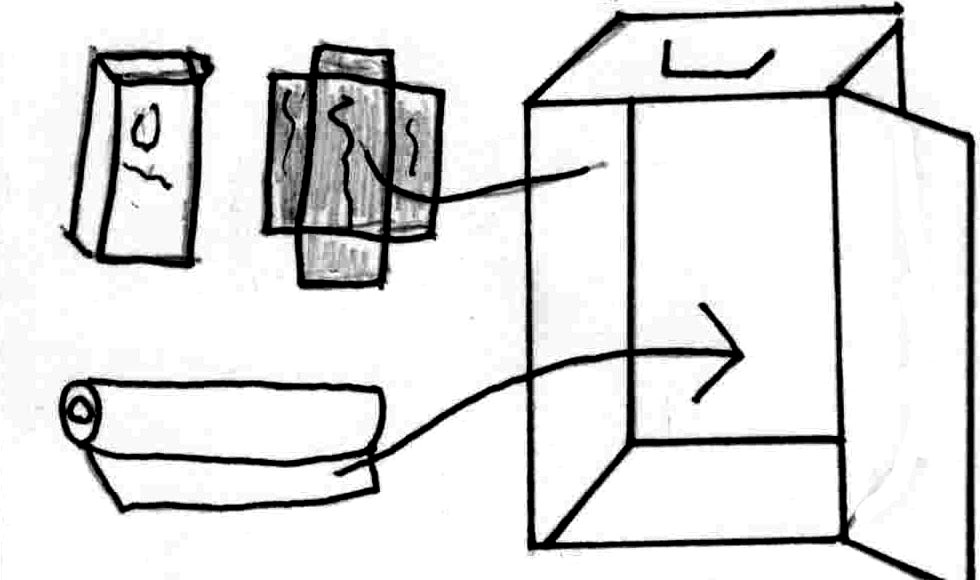
Now, line the
inside of the box with the tin foil, with the shiny side exposed.
Use the binding to make wire shelves across the box. One shelf should be close to the bottom (about 1/4 of the way from the bottom). This is the shelf that the heat diffuser will rest on. Place another shelf in the center of the box. This is where the food will be placed.
Reattach the door using the binding wire. Also, you can use the wire to make a handle for the door.
Heat the oven by either placing it over an oven or by placing a pan full of coals in the bottom. Add the food and keep the coals or flame going. Check the oven periodically. If the oven is getting too hot, open the top vent.
If you are using a gas stove where the burner is right above the fuel bottle, you need to wrap a collar of Heavy Duty foil (shiny side up) under the burner to reflect heat away from the fuel container. Other wise the heat will be unsafely reflected back onto the gas tank.
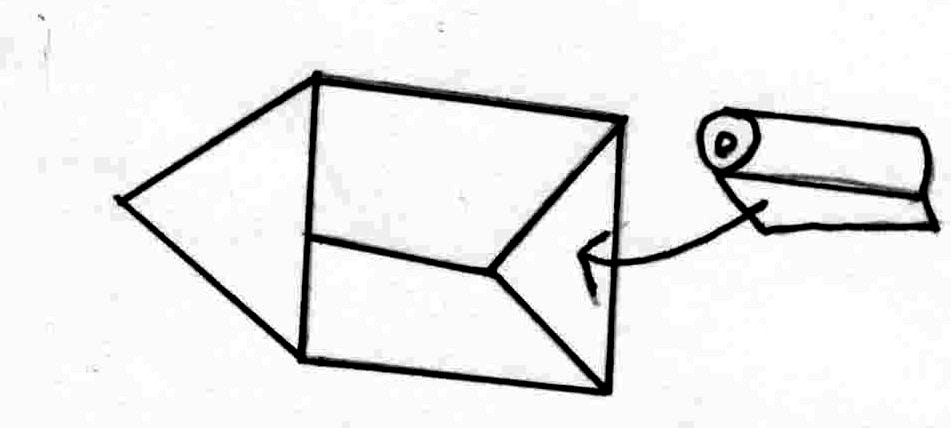
The
Deflector Reflector Oven:
Materials:
1 cardboard box
tin foil
binding wire
glue
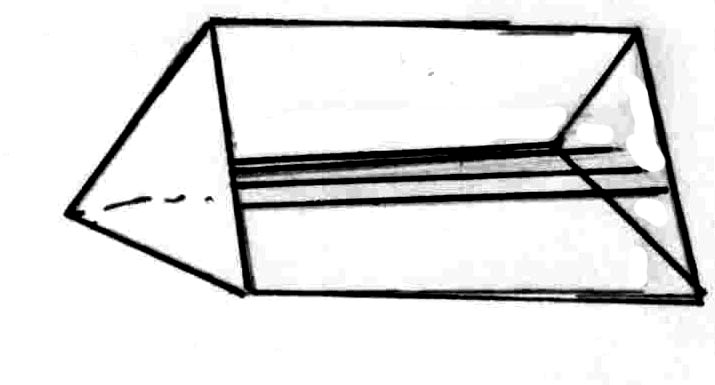
Cut the cardboard box in half diagonally, creating 2 traingular boxes.
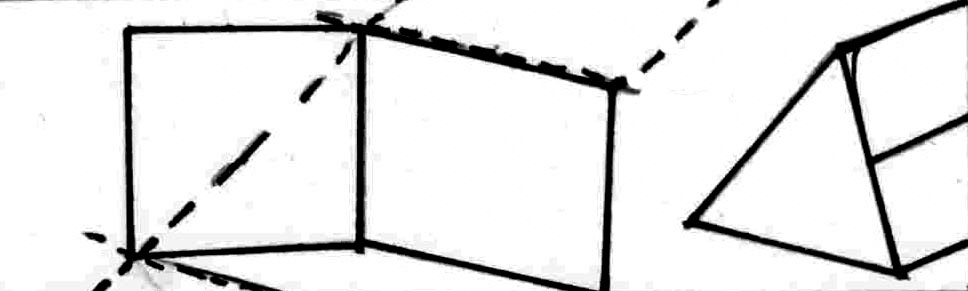
Next, line the inside of one of the halves with tin foil, making sure the shiny side is exposed.
Use the binding wire to create a shelf across the center of the box half.
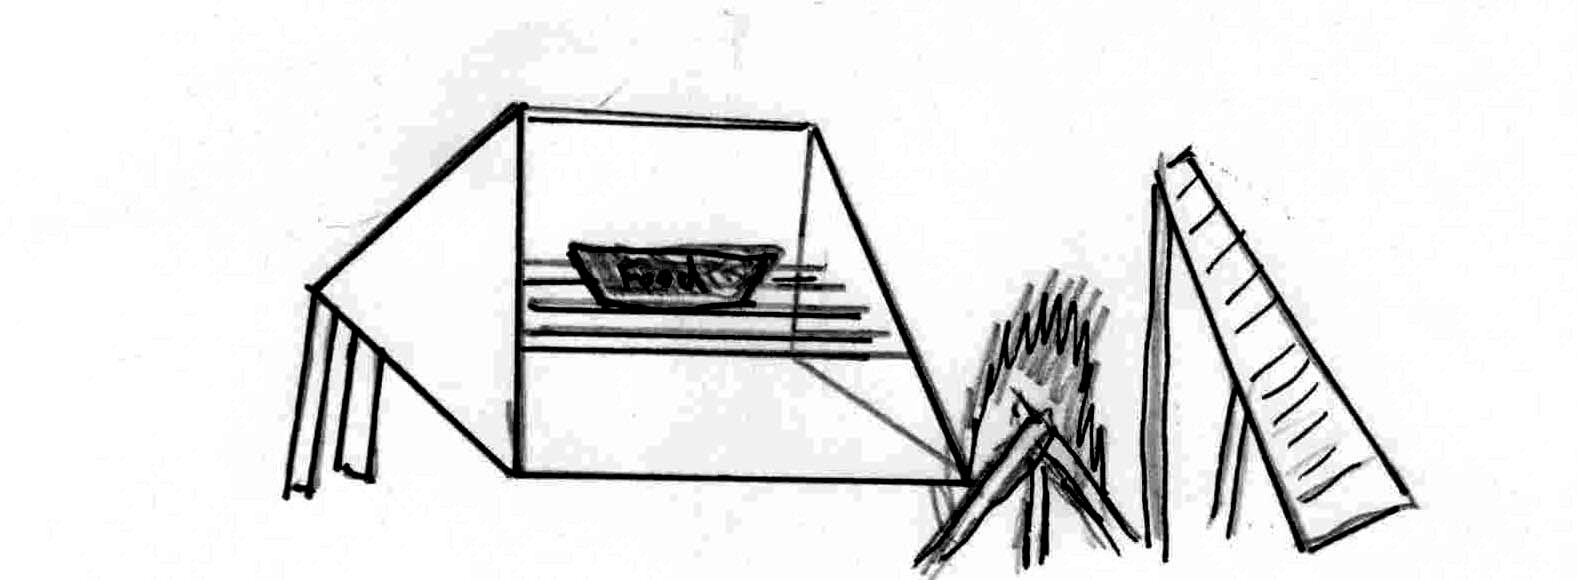
To use this oven, you need to prop the box half up on its edge. You could use rocks, sticks, or the other half of the box. Place the food on the rack. Light a fire on the open side of the oven. The oven will catch the heat from the fire and reflect it onto the food. To speed up the cooking, you can prop a secondary heat deflector on the other side of the fire. This can be made with a pile of sticks of a piece of foil covered cardboard
Frying
Pans:
Any bread, cake,
or muffin mix can be cooked in a frying pan like a pancake. If you place
a heat diffuser between the flame source and the pan, you can fill the
fryin gpan and slowly bake one side, and then flip the dough, and bake
the other side.
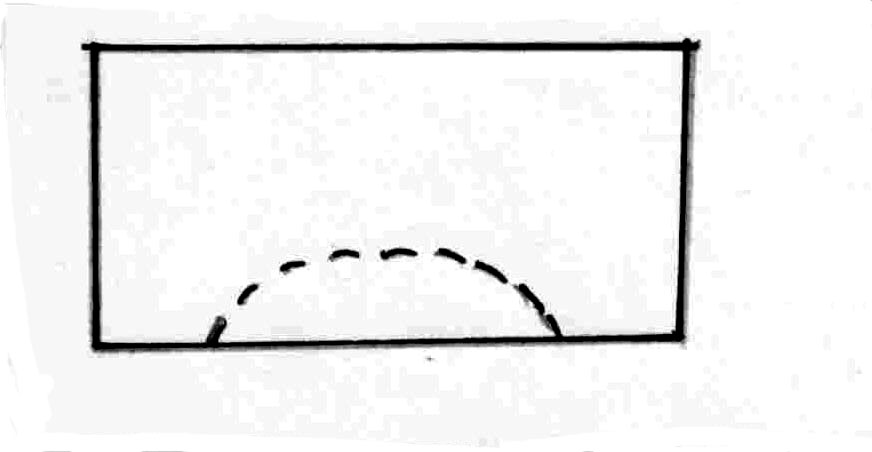
A twiggy fire oven is a simple cooking pot with a sturdy lid. As the pot is placed on the fire (or heat diffuser) a second fire is built on top of the lid, providing heat both on top and on the bottom of the dough.
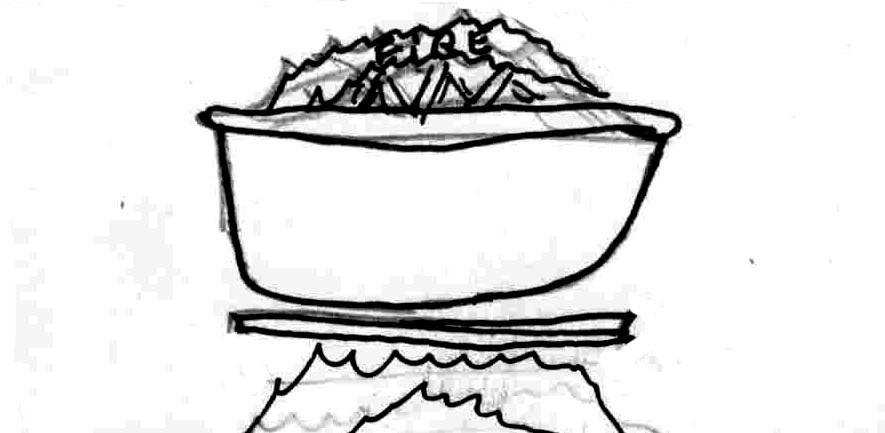
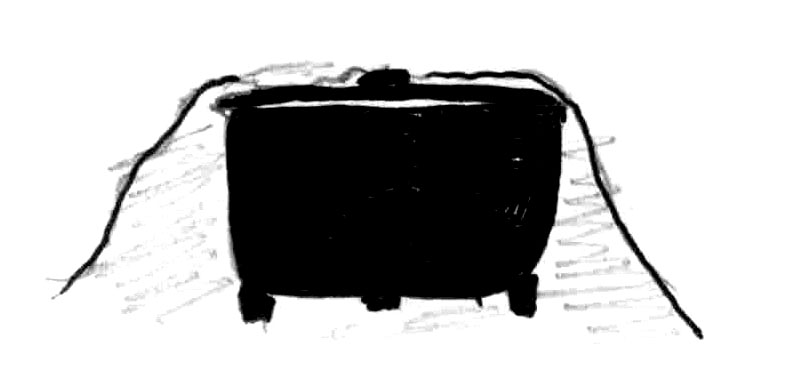
The local cast iron cooking pots can be used just like Dutch ovens. Grease the insides thouroughly with shortening and add the cooking mix. Then bury the pot in hot coals and allow it to bake.
Oven goods can be baked in a double boiler, or a small pot placed in a larger pot where the space between the two is lined with sand. In both systems, the heat is spread evenly around the inner pot by the sand or water. You want to grease the inner pot, and fill the inner pot to 1/3 to 1/2 of the way.
