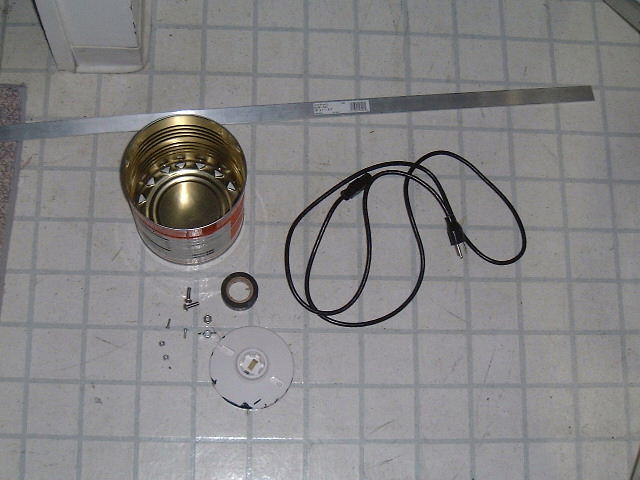
WHAT YOU NEED
One coffee can with bottom still intact
One standard white light socket (The kind that attach to J-boxes)
One 1" by 1/8" aluminum bar 18" long (usually sold in 4 and 8 foot lengths)
Two 1/4" bolts
One 1/4" nut
One 1/4" wingnut
Two smaller nuts and bolts (to attach socket bottom of coffee can)
Wire and plug(I used an old power cable from a computer)
electrical tape.
TOOLS
Screwdrivers
Drill with 1/4 inch metalworking drillbit and drillbit to match smaller bolts
Hacksaw
Wire cutters and strippers.
HOW TO BUILD IT
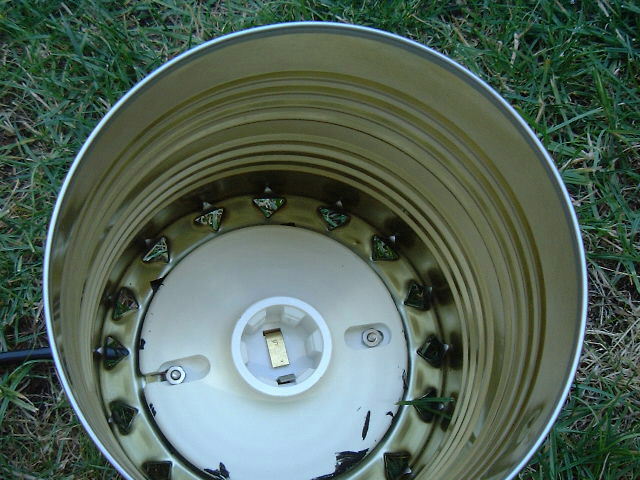
1. Turn the can upside down and use the pointy end of a can opener to punch holes all the way around the can. These are vent holes to allow heat to escape from the fixture.
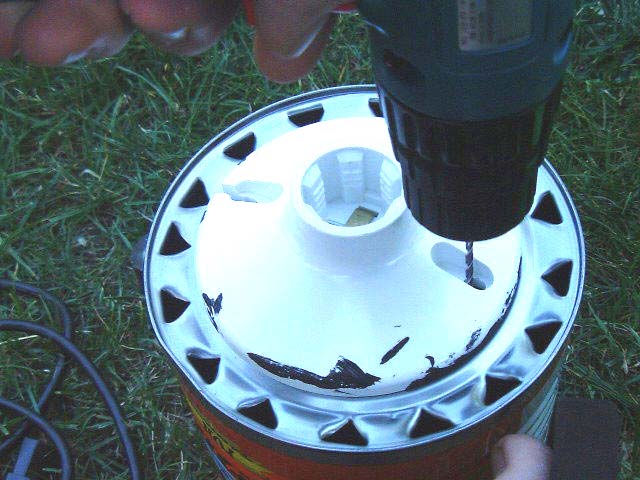
2. Set the socket on the can and drill holes as need so when you place the socket on the inside of the coffer can, it will be centered. These holes should fit the smaller bolts. Now drill a larger hole in the center for the wires to pass through. I used a !/4 inch bit which You should already have handy, because we will use it later.
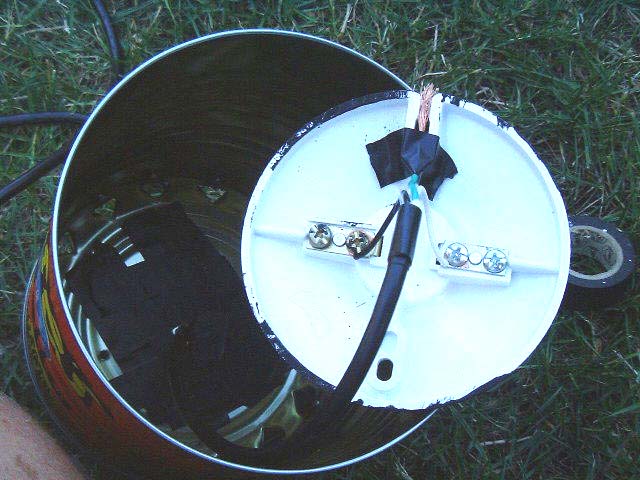
3. Turn the can right side up again, and tape the bottom on the inside with electrical tape. This is so when you attach the socket, The electrical contacts on it wont touch the can causing a short circuit.
4. Pass the wires/cable through the large hole and attach them to the socket. Don't worry too much about the ground(green) since this is a low wattage fixture. Just make sure it is placed away from the other electrical contacts. I taped it so that it would touch one of the bolts that I attached the socket to the can with.
5. Pull the slack cable out of the can and attach the socket to the bottom of the can using the smaller bolts and the holes you just drilled. Make sure those electrical contacts don't touch the can except for the end of the ground wire.
6. Now for the yoke. Take the aluminum bar, cut and 18" section with the hacksaw(if this isn't done already)and drill a 1/4 inch hole a half inch in from each end and one in the center (9" inches in ). Now make marks 6" in from each end. You will see now that the bar is divided evenly into three sections. Bend the bar at these marks to make a "U". The middle hole is for you to attach a C clamp to or bolt the fixture to a par bar. 1/4 inch might not be big enough, but you can fix this later if you need to.
7. On the coffee can, there is probably a seem where the ends of the sheet meet to form a cylinder. Drill a 1/4 inch hole here halfway up on the can On this seem. Using one 1/4 inch bolt and nut, attach one end of the yoke here. Roll the can over and drill another hole and attach the other end using the other 1/4 inch bolt and wingnut.
8. Paint the inside and outside black using a heat resistant paint. Place a piece of tape over the hole where the light bulb connects to the socket so the contacts aren't painted over.
9. Place a Par 38 lamp or standard floodlight in the socket and plug 'er in. You now have a great new member of you're inventory. The PAR lamp should be about 100watts. They get pretty hot with a 100, so I wouldn't a 300. They stay cool outside, just make sure it doesn't rain. They might work in rain if the vents wern't cut in the back, but that would make them more hot, so I don't know. Experiment.
Gel Frame Holder? Click Here
Any comments or questions? leave them at my guestbook. or click here to go back to Savery Tech Lighting