Due to the popularity of this topic received by us via email and also as it appears on various discussion boards, we decided to put up an online help guide to assist you in reassembling your mini airsoft gun once it's been taken apart and all the little pieces went flying and lodged themselves into the farthest reaches of your work space. Not that we would know anything about that. For our guide, we used the UHC's Mini-M16; most other mini airsofts are nearly identical as far as internal parts go so this guide should still be helpful.
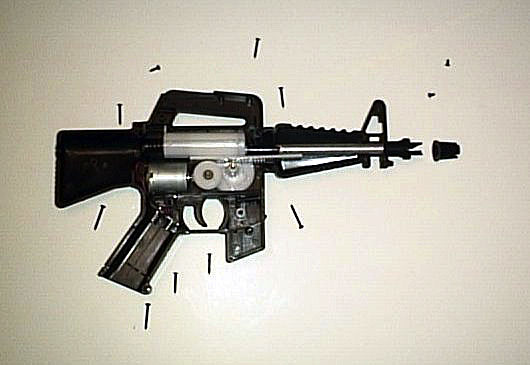
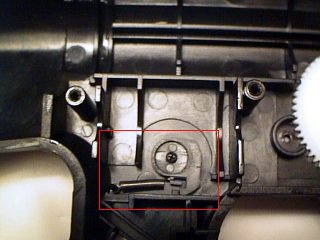
Before you start, try to make sure you've got all your parts including body screws, springs, etc. handy. The photo at the top of the page shows the general layout of mini parts just after we pulled the right half off the body (which is what you should always do - never pull the left half off and expect the parts to stay in the right half). Okay. Now, assuming you're starting with a mini that all the parts fell out of, first check to make sure the safety spring is still in place as shown in the following photo:
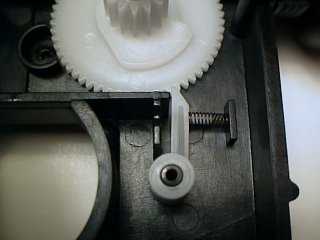
Next, make sure the piston gear and the piston gear ratchet are in place along with the ratchet spring as shown here:
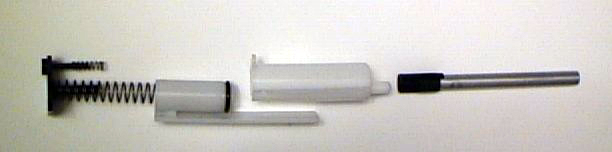
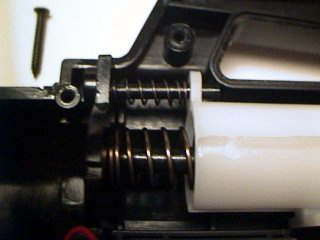
Now place the barrel in the body with the rear mount cutout facing upward, so BBs can drop into it. Place the inner piston into the outer piston, then place the piston assembly into the body, sliding it forward so it goes into the barrel. This photo shows the layout of the piston parts and the barrel:
Once the piston and barrel are installed properly, put the piston springs on the spring mount and slide the guide into the back of the piston assembly, and then put the spring mount into its holding groove in the body:
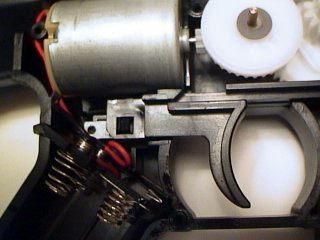
Install the motor, the transfer gear, trigger assembly, and inner battery contacts. The transfer gear has a very thin washer that goes on top of it as shown in the photo. Once the motor and gear are in place, put the trigger switch and inner battery contact panel in place. Then slide the rear of the trigger over the battery switch as shown here:
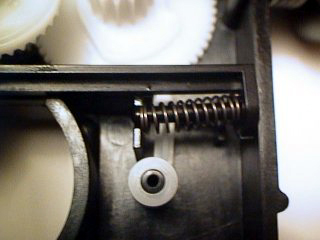
At the front of the trigger you will find a spring guide on which you should place the trigger spring. Compress the spring on the guide with your fingers, and set the spring guide in its notch in the body, and then slowly release the trigger spring so it rests against the spring guide holder. This step takes a lot of redoing usually since you have to be very careful - the trigger spring doesn't want to stay where it is and often pops off before you can completely reassemble the gun:
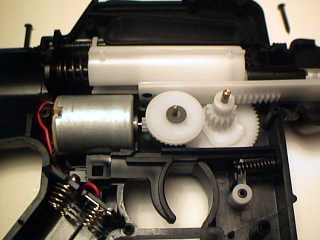
Once you've got all your parts in place, the mini should look something like this:
Now that the hard part is over, replace the BB hopper cover and the battery door cover and carefully place the right half of the body on the left, making sure to listen for springs flying off their guides or any other indicator that things aren't going well inside. Once the body is back together, insert a couple of screws back into the center of the body, put in a fresh set of batteries, and see if it works. If it doesn't, take the thing apart and look for problems - pieces out of place, broken parts, etc. Continue this process until you can get it to work after reassembly, and you're good to go.