|
P.A.C. 1 |
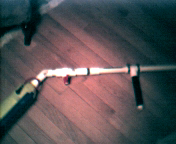
| The P.A.C 1 was the first cannon I built it is a very simple concept a tank full of pressurized air connected to a valve then to a barrel. | |
| Plans: |
|
Qty. |
Part: |
| 1 | 30in. of ¾" SCH 40 PVC |
| 1 | ¾" Tee |
| 1 | ¾" end cap |
| 2 | 2 or 3" Auto
clamps (hose clamps) you only need two of the big ones. |
| 3 | ¾" Female adapters |
| 1 | ¾" threaded PVC Nipple (about 1.5" long) |
| 1 | ¾" 45 degree fitting |
| 1 | Large super
soaker tank (Like the green tank in
the picture bellow. My tank was approx. 12" in length, and 3.5"
wide)I got mine from a supersoker 100 but this was only pic I could find |
| 1 | Small hand pump
with 6" hose. I got my
pump at Benny's. It is a ball pump. |
| 1 | Tube of shoe goo or plumbers goop. Shoe goo recommended |
| 1 | ¾" PVC ball
valve. They are usually found
in the PVC section of a hardware store. The valve must open very fast and
easily. |
| 1 | Can of PVC cement |
| 1 | Automobile Tire Valve Stem |
| Step-by-Step
Instructions
1. Get the 30" piece of PVC and cut it into five lengths. The following lengths should be:
Cut the lengths with a pipe cutter. If you do not have a pipe cutter use a saw (very carefully). You should now have five pieces of PVC. 2. Glue (PVC glue) one of the female adapters to the end of the 18" piece. 3. Glue another female adapter to the end of one of the 1.5" pieces of PVC. Glue the ball valve onto the other end of the piece that you just attached the female adapter to. 4. Glue the 2" piece of PVC into the other end of the ball valve. 5. Glue the 45 degree fitting onto the other end of the 2" piece of PVC. Glue in such a way, that the angle of the 45 degree fitting is pointing down or perpendicular to the ball valve. Look at one of the pictures bellow: 6. Glue the 1.5" piece of PVC in the other end of the 45 degree fitting. 7. Let all of those pieces dry. 8. Get the Tee and look inside it. There
will be a ridge. This ridge must be filled out so the inside is somewhat
smooth. Then cut the Tee on the dotted red line as shown bellow: Cut the Tee with coping saw by clamping the Tee in a vise. 9. After it is cut, clamp the Tee on the piece of 18" PVC (with female fitting now glued on it) with the auto clamps. Look at the picture below:
Glue the 7" piece of PVC in the Tee that is now clamped to the barrel. Then put the end cap on the end of the 7" PVC as show above. DON’T GLUE IT ON! This section of PVC can be used to store about 10 paintballs. 10. You then have to place a small screw (approximately 3/10" long) next to the female adapter as shown below. NOTE: You may have to pre-drill.
11. Hose Instillation - First, to attach the automobile tire valve stem you must drill an appropriate sized hole in the side of the tank and then installing the stem valve using the nut and washers. I bought my ball pump at Big 5 Sporting Goods store and my pump came with a 6" hose. To connect it, simply screw the hose onto the stem.
12. Tank Instructions - The last female adapter is for attaching the tank to. If for some reason the tank does not fit the female adapter then go to the Hardware Store with the tank and find a threaded adapter that fits the tank. The size is usually ¾". When you get home, spread some more shoe goo all over the tank threads and inside the threaded fitting. Twist the two together and hold it for a couple minutes. Let it sit over night for the most possible strength. Some of my friends where building this air gun and they were just to excited and they started pumping air into the tank that created an air bubble, causing a leak. So let it dry as long as possible! Glue the female adapter onto the 1.5" piece of PVC that is connected to the 45 degree fitting. 13. Put some Teflon tape on the end of the hose after everything is dry, and then screw the pump onto the hose. 14. Use a couple of pieces of duct tape and securely tape the pump to the tank. 15. You should now have two pieces. The barrel and the chamber. Take the chamber part and close the ball valve. You can now test your paintball gun! Slowly pump air into the tank, making sure there are NO leaks. Pump about 20 pumps. Then open the valve VERY fast. A bunch of air should escape very rapidly out of the valve. It should sound like a pop. If there are any leeks try putting some more shoe goo on or else you will have to start all over. 16. Screw the nipple into the female adapter that is connected to the ball valve. Then screw the barrel on the nipple so that it looks like the diagram bellow:
17. Now to the fun stuff! Pump the gun up about 20 to 25 times. Get a paintball and place it down the barrel, making sure it does not roll out. Then aim at a safe target and flip the valve very quickly. The paintball should fly out of the paintball gun very fast. Depending on how your gun is built, you may have to pump it more or less to get the maximum performance. Feel free to experiment with your new paintball gun and create new designs. You can add a different type of valve so that it opens faster. You can make your barrel so that the paintball will not roll out the barrel (very useful when you up in a tree sniping someone). I have shown how to do that bellow. You can add a bicycle grip onto the 7" piece of PVC for extra grip, or you could add a scope. Due to the detachable barrel, you can make a 1" barrel to widen you variety of ammunition. To make your barrel so
that the paintball will not roll out, you must detach the barrel from the
chamber. Then you must get many small pieces of duct tape and build it up
so that it looks like bellow:
|