
Step 2. Dyeing the seats
Choosing the type of dye to use can be a bit
confusing. Dye comes it 2 forms: Spray can and paint can. I prefer the spray
can because you can apply very thin coats, it also offer a better level of
control.
It may be necessary to mask off areas with masking tape if don't want any
overspray. When applying the dye, if you're using the spray, apply thin even
coats. The further away the can is the lighter the coat. Before applying
a layer make sure the previous layer is dry to touch. Spraying on a
wet layer will cause runs in the paint. If this happens you will have
to rub it out when it dries and go over the areas you messed up.
Step3. Conditioning the seats
When you have completed the dyeing process.
You have to put moisturize back into the seats. If you recall the leather
prep you used to remove the oils from the seats is alcohol based. To make
the seats suple and keep them from cracking use leather conditioner. Lexol
makes a good conditioner but I don't use it on my Saab for two reasons. One,
the leather in the old generation Saabs are thicker than the leather in newer
cars, lexol seems to condition these better. And two, lexol is very
expensive. I use tanners conditioner, its thick and creamy smeels
like a brand new leather jacket and I get good results everytime. Avoid using
the thin watery conditioners, I tried them all and after using them my seat
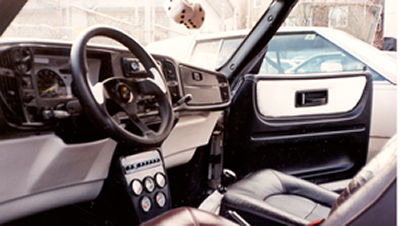
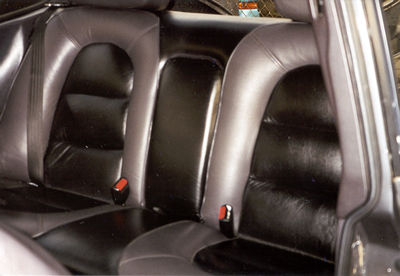
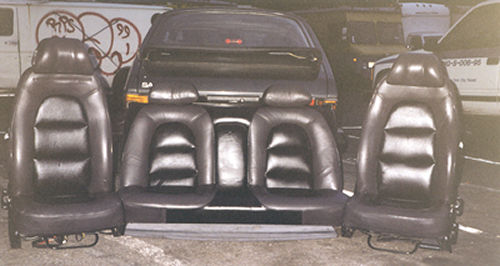
looks hazy. I've included photos of three of my cars that I customized to
show what you can accomplished with a little creativity.
Dyeing your seats requires a lot of patience. I can't stress enough that you have to be patient, trying to rush because you're excited to see the results only gives a false sense of hope. This article will cover the steps you must take to make your project a success.
There aren't any tools involved except for the one you're going to need to take out the seats. I will not cover how to take them out, this is pretty straight forward but if you're still confused you can refer to your owners manual.
Step1.
Preping your seats.
To prepare your seats for dyeing you need to use a product called "leather
prep". Leather prep removes oil buildup in your seats. I consider
prepping to be the most vital part of the job because good preparation equals
longevity. There are a number of products available out there but from my
experience I consider KEM product to be the best. Unfortunately, they decided
to discontinue this product and maybe there are some stores out there with
a few supplies left in their warehouse. If you decided on going with
another brand, avoid using a vinyl prep on leather, it just doesn't work.
When using the leather prep make sure you rub it liberally into the
leather to remove oil buildup from years of conditioning and Amoral If you
don't the dye will rub off on your clothes. Don't worry if the dye starts
comming off when you're rubbing the prep in, that's expected and its doesn't
defeat the purpose it helps. After going over the seats let it dry thoroughly.
If you feel you need to go over the seats again only you can be the judge
of that.