| The first step is getting the right tools. What you'll need is a small small metal brush an exacto or utility knife and a can of adhesive. You can substitute contact cement for this procedure. If you have a small stapler or masking tape it will also come in handy if you're working alone. | 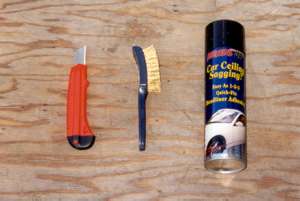 |
| The supplies you're going to need is 1/4" foam and leatherette vinyl. Get one that is flexible and soft, cutting corners for the cheap stuff will show in your work. You can purchase this from any fabric or upholestry shop. A yard of each is more than enough to do both sides. | 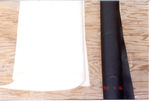 |
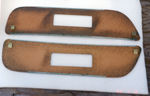
| After taking out the door panels use the metal brush to remove the loose
foam. The cleaner you make the panels the better the glue will hold.
Place the panels face down on the foam for cutting.
home
| performance | diy
| membership | gallery
| events
links | classifieds | contact | about saabzen This site created and maintained by MediaFlexx® 2001 © |
 |
| Using the utility knife make a replica of the door panel. Alway use a sharp blade it will make your job neater. | 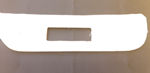 |
| Using the same method make a replica of the door panel from the vinyl. Make sure the panel and the vinyl are both face down, leave about 1 inch overlap around the edges. For the door pull cut diagonaly from top to bottom leaving about 1/8 of an inch from the edge. Then trip the excess from the middle leaving about 1 inch overlap as you see in the picture. This step can be done before or after glueing. | 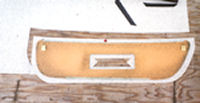 |
| Putting it together. Everything goes face down (panels and vinyl) put glue around the edges of the panel and vinyl (also, it doesn't hurt to put a little spray on the inside of the sponge to keep it from shifting). Let it sit until it feels tacky then stretch the vinyl over the panel. At this point you can use masking tape or a stapler to secure it. | 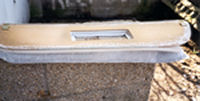 |
| When you stretch the vinyl around the corners to make it shape with the contour you have to make pinches in the vinyl to take up the excess. That's a trick used by the professional to separate the men from the boys. After its dried you can trim the excess to make the surface flush for the install. | 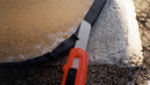 |
| If you like the way this came out you can customize the rear armrests. Make a template from cardboard, shape it to fit neatly in the armrest. Use the template to make a copy from 1/8 inch plywood. Follow the same steps for the door panels to cover the armrest |  |
| Voila! You just customized your armrest! You can hold it in place with velcro or after making the template fit 2 small bolts into the armrest that will pass through the panel to be secured by nuts and washers. If you really want to get fancy you can add some lighting in the back as I did since everything was out the car. | 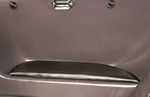 |
| Now, look how professional this job was done!. You just save yourself a few hundred dollars. You don't have to be a pro to get these results just be patient until it takes shape. | 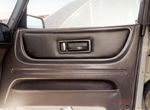 |
