
Holy Floorboards Batman!
Bullnose, 95/96, 97, Saab Life, Q&A
E-Mail me at: [email protected]
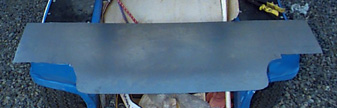 1.Ralph the wonder welder made a templace and cut 20
gauge steel to fit. This was an inexpensive alternative to cutting a floorboard
out of a wreck and fitting it to match, or buying a replacement part.
1.Ralph the wonder welder made a templace and cut 20
gauge steel to fit. This was an inexpensive alternative to cutting a floorboard
out of a wreck and fitting it to match, or buying a replacement part.
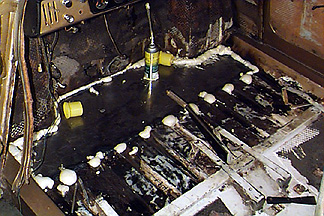
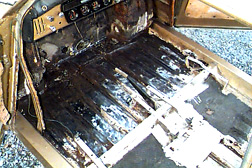 2. Before the new metal goes
in, all the rusty crud gets ground out. Bare metal rules! This was an exhausting
dirty job. Some former owner had poured in an epoxy resin compound over the interior
floor that had clogged the channels where the brake lines run. This meant chipping
and scrapping for days. Chip, grind, sand...I did it all. At one point I was
ready to sand blast but I was talked out of it. I'm sure it would have filled
everything with a fine dust, but it would also have been gratifying to see that
crud fly out of there.
2. Before the new metal goes
in, all the rusty crud gets ground out. Bare metal rules! This was an exhausting
dirty job. Some former owner had poured in an epoxy resin compound over the interior
floor that had clogged the channels where the brake lines run. This meant chipping
and scrapping for days. Chip, grind, sand...I did it all. At one point I was
ready to sand blast but I was talked out of it. I'm sure it would have filled
everything with a fine dust, but it would also have been gratifying to see that
crud fly out of there.
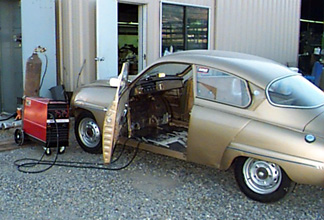 3.Ralph went to work. Fitting the new floor on to the
pan, he tacked it with the wire welder. Much swearing was heard. I kept my
distance. Ralph had trouble getting a good ground and the wire welder proved
more hassle than it was worth. In the end the traditional torch was used. Ralph
is a master welder and I've turned to him more than once for Saab jobs. Once
he gets going he always does a first rate job. The fresh floor was tacked in
and then welded in place. It is important to remember that this was not being
done for structural integrity. The frame rails were solid--and it is the rails
that gives the car its integrity.
3.Ralph went to work. Fitting the new floor on to the
pan, he tacked it with the wire welder. Much swearing was heard. I kept my
distance. Ralph had trouble getting a good ground and the wire welder proved
more hassle than it was worth. In the end the traditional torch was used. Ralph
is a master welder and I've turned to him more than once for Saab jobs. Once
he gets going he always does a first rate job. The fresh floor was tacked in
and then welded in place. It is important to remember that this was not being
done for structural integrity. The frame rails were solid--and it is the rails
that gives the car its integrity.
 4.The empty channels under the new floorboard needed
to be filled. I didn't want to repeat the 'epoxy' fix of the previous owner.
I needed something that would be rust and water resistant. I ended up with
expanding spray foam.
4.The empty channels under the new floorboard needed
to be filled. I didn't want to repeat the 'epoxy' fix of the previous owner.
I needed something that would be rust and water resistant. I ended up with
expanding spray foam.
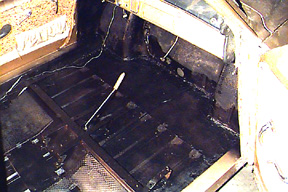
 5. Next came "the foam." This created a strong sandwhich
structure. One can was more that enough. The foam sealed the area, and extruded
out the rust holes in the pan. I timmed away the foam and later covered the
entire bottom of the car with a thick coat of Henry's roofing tar.
5. Next came "the foam." This created a strong sandwhich
structure. One can was more that enough. The foam sealed the area, and extruded
out the rust holes in the pan. I timmed away the foam and later covered the
entire bottom of the car with a thick coat of Henry's roofing tar.
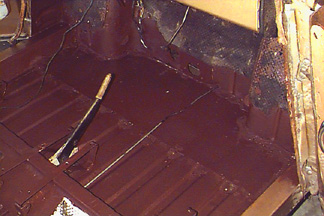 6.A double coat of Rustolem rusty metal primer went
on. The idea was to saturate all the trouble spots. I'd pulled away some of
the sound deadening materials to get access to the rust on the firewall so
that got painted as well.
6.A double coat of Rustolem rusty metal primer went
on. The idea was to saturate all the trouble spots. I'd pulled away some of
the sound deadening materials to get access to the rust on the firewall so
that got painted as well.
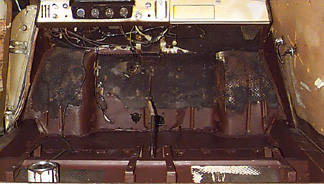
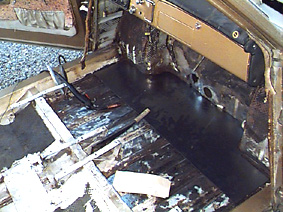
7.Once the primer coat dried I hit all the seams with
a liberal coat of Henry's asphalt roofing tar. Next I sprayed the whole area
with flat black anti rust paint. All this will be covered with matting, fiberboard,
and carpet. In fact the whole repair will be invisible. Which is the real pain
of rust repair, you work like a dog to get back to a stable state. My pals
are sure the repair will outlast the car...we'll see. I also coated the bottom
of the pan. I was especially carefull to fill the areas where the rust had
got all the way through. The idea is to create a waterproof seal that would
keep out the water and stop the rust before it could get started. Doing the
bottom was a really ugly mess. I've still got tar in my hair. Now that the
grunge is done its time to start building the car up to a runner. Let the fun
begin.
Bullnose, 95/96, 97, Saab Life, Q&A
E-Mail me at: [email protected]