2. Press D on your keyboard to reset the colors to default, then fill the background black.
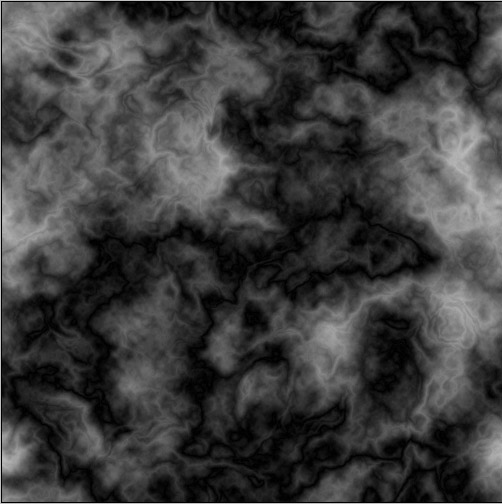
3. Filter > Render > Difference Clouds. Press Ctrl+F a few times until it turns all swirly. By now you should have something like this:
4. Image > Adjustments > Gradient Map. Click on the bar (not the arrow) and another window will come up.
Click somewhere right below the bar, then change the location to exactly 50%. Repeat for 2 other points, 25% and 75%.
Click on the little square of the first one (25%). Change the color to a sort of dark red - I used C80000.
Second square (50%) should be orange; I used FF9600.
Third square (75%) should be a very light yellow, and for that I used FFFFAF.
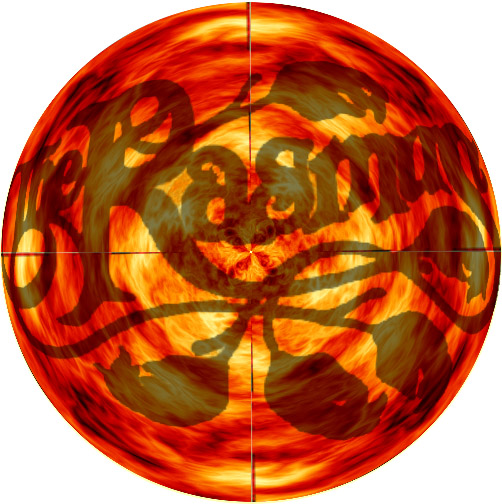
5. Click OK on both windows. You should now have a sort of fiery, lava-ish kind of look. Now, go to Filter > Distort > Polar Coordinates. Leave it as default - Rectangular to Polar.
6. Notice that annoying little line at the top? Well, we're actually going to use that as an asset. Duplicate the layer 3 times (Ctrl+J, Ctrl+J, Ctrl+J).
Select the layer above Layer 1 (Layer 1 copy) and go to Edit > Transform > Rotate 90� CW. Select the next layer above and repeat, this time Rotate 180. With the top layer, rotate it 90 CCW.
7. Set the blending mode of all layers but Layer 1 to Lighten.
8. Flatten the image (Layer > Flatten Image).
9. Use the Elliptical Marquee tool to select a perfect circle (hold Shift while selecting) roughly the same size as your wheel. Move the selection right on top of your wheel and press Ctrl+Shift+I to invert the selection. Now just press delete.
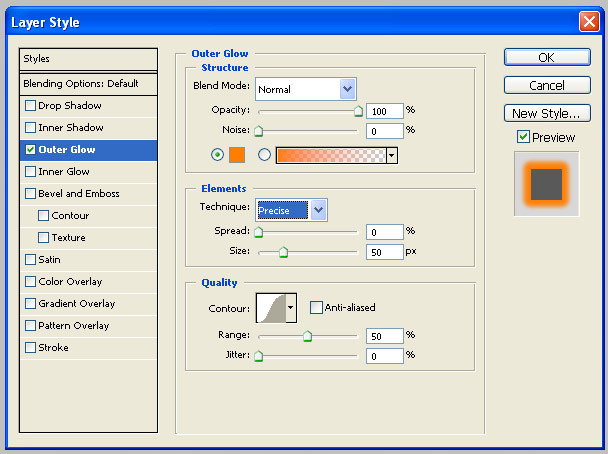
10. Double-click on the layer - a little box will come up. Just click OK and then press delete again. Go to Blending Options and check Outer Glow. Use my settings here:
Click OK.
AND YOU'RE DONE! You've made your own Fire Wheel!