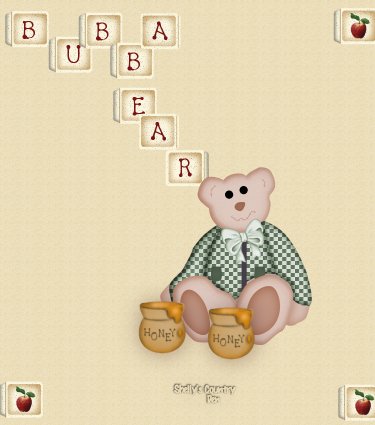
I'd like you to meet Bubba Bear named after my son ~s~
I would like to thank Beth for testing this tutorial for me!
Items Needed for this tutorial:
PSP 7.04 (should work in 6 or 7 though also)
Eye Candy which you can get here
For this tutorial you will need my selection files which you can get here. This hair tile just right click and save it to your hard drive.
Open a new image 750 x 850, I like to work big and resize when finished.
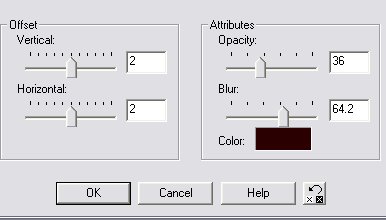
New layer Head, selections load from disk, head.sel ,Flood fill with D5C3C3, selections invert and apply the following drop shadow, you will use these settings on all drop shadows!!
Effects, noise add 9% uniform.
Now lets add a bevel to him, effects Eye Candy Bevel Boss, use the Subtle Button preset.
New layer left arm, selections load from disk leftarm.sel , flood fill ,effects noise add (use same settings as the head) selections invert, apply drop shadow. Repeat these steps for the right arm, left leg, right leg, and body!! ~s~
Pretty easy so far, just wait I will confuse you shortly..~s~
Ok, now lets go to the left arm layer and add a new layer , you can name is left sleeve, selections load from disk leftsleeve.sel, flood fill this with your choice of pattern, or solid color, selections invert and apply the drop shadow, then go to eye candy and apply the same Subtle button preset..
Now go to the right arm layer and add a new layer, Right sleeve, selections load from disk rightsleeve.sel, repeat above steps!
Go to your body layer and add a new layer , Vest, selections load from disk vestmiddle.sel, repeat above steps! Now, be sure your on your Vest layer and add a new layer, Button Strip, selections load from disk, buttontstrip.sel , flood fill with matching color, selections invert and apply only the drop shadow!! Layer new, Pocket, selections load from disk leftpocket.sel, flood fill this with the same color as your button strip, selections invert, apply drop shadow. Do the same thing for the rightpocket.sel .
At this point you can add a new layer and decorate his vest if you want ~s~
Allrighty now, on to the left foot layer, add a new layer Left pad, selections load from disk leftpad.sel, fllod fill with B29090, selections invert and apply the drop shadow. Go to you right leg layer , creat new layer right pad, selections load from disk, rightpad.sel, flood fill , invert, and apply drop shadow.
Now let's finish up his face!
Go to your head layer, create a new layer Ears selections load from disk, eardetails.sel, flood fill with the B29090, you may have to zoom in to see the fill.
Layer new, Nose, selections load from disk, nose.sel, flood fill with B29090 selections invert and apply the drop shadow.
Layer new, mouth, selections load from disk mouth.sel, flood fill with B29090.....
Layer new, Eyes, grab your paint brush, with the following settings,
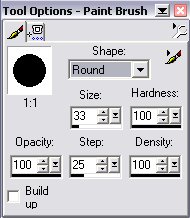
give Bubba some eyes!
That's it your finished!! Not too bad huh???
Now there's lots of possibilities with this little guy, before you merge your layers you can colorize him, do a shift d to duplicate him and then go to colors, colorize, and choose each layer to change the colors!! ~s~
Once finished, layers merge visible then resize him, I did by 50%,
now you can tube him or save as a jpeg, or gif.....
Any questions just drop me a line!!
Created on July 4, 2002