The process of developing prints is fundamentally the same as
developing negatives. The main differences are as follows: 1) The
emulsion layer on paper is lighter than on film and 2) The silver
halide grain take up half as much of the emulsion volume. Here are the
basic steps:
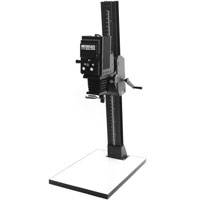
Place the negative into an enlarger; the image will be projected onto
the table. Adjust the enlarger so that the image is the desired
magnification and is in focus.
Using only a safelight (a light that will not react with the paper to
form a latent image), place a piece of photographic paper under the
enlarger where the image is projected.
The paper is then exposed to light shining through the negative image
for a specific period of time. The exact exposure length is determined
using test strips to make sure you get the correct
exposure.
The paper is then put into the developer, followed by a stop bath (if
used) and then the fixer. Finally, the print is washed and dried.
Good prints come with practice and experience.

Source: www.adorama.com. May 16, 2006.