| Coloring the mesh! |
| You've seen all those items that developers make. You may have seen how many items were devirved from the same thing and look different in shape. Well, now I'll tell you how they did that. |
| Check out these 2 dresses below to see how 2 dresses can look different when devirved of the same mesh. See if you can find what mesh they used. |
| For this we will only be using 1 tab, since I only use 1 as of now so I can't tell you what the others do. |
 |
| Remember those black pictures with white lines on the product page? Go back and save them, you'll need them for your maps. |
| Now there are 2 types of maps you need to make. The texture map, the one with the color, and the opacity map, the one that cuts stuff off. Im not telling you how to make them here, just put them in. Check the links below for help with those. |
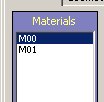
| Once you got your maps its time to put them in. On the side is a materials box. For this perticular dress the top one (M00) is the top and the bottom one (M01) is the skirt. |
 |
 |
 |
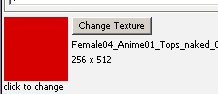
| Now hit the Change Texture button and find your COLORED map. Its set on the top so unless you changed it, get your top map. |
| Now lets get your opacity map. Find this little box and hit the opacity setting. |
| Put in your opacity map. Then change it to the skirt (M01) and do the same. |
| When you got your maps in click the "Apply Changes" button in the top left corner. |
 |
| Hope that helps you get started! Good luck developing. |