Our Model
We decided to build our own Arch based on the principles of the catenary. Here is a picture of our final product, and walkthrough of how it was built complete with pictures of some of the more important steps and a list of materials used.
Materials (what they were used for):
cardboard (ground level base)
a "one-way" street sign (the entire model's base)
lead based solder (the arch's backbone, shaped to perfection)
aluminum foil (the outer sheeting of our arch)
rubber cement (our fastening system, perfect because it shrinks)
tape, wet string, thumb-tacks, and a ruler (for the shaping of the arch's backbone)
scissors
wire cutters
The finished product is all the way down at the bottom! Just scroll down there if you aren't interested in viewing our construction techniques.
Walkthrough:
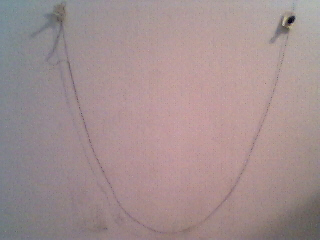
To get the caternary right (two times, exactly right), we used a "shadowing" technique where the correct size was pre-determined and created on a wall using thumb-tacks and wet string (so it was heavy enough).
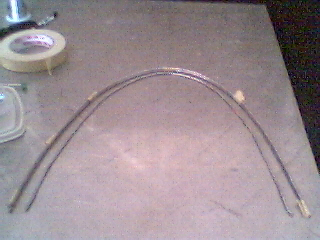
After shaping the two back pieces of the arch, we repeated the process for the inner piece, which has a sharper curve to it. Lacking the tools to shape it for us, this was done by hand. But the results are great as solder is rigid but at the same time extremely pliable. (Don't use lead-based if you want to stay clean, however!) The two back pieces were then taped together for a few days to ensure uniformity.

After cardboard stands were put in place for the ground-level part of the model to be placed on at the end, each arch piece was put into a poked hole in a half tennis ball. These, when glued to the base by about a pound of rubber cement made great, unmovable base supports, much like the support system of the real Arch.

After repeating this process for all three arch "spines", aluminum foil was carefully wrapped around the them and an initial layer of it was glued together with painted on rubber cement and allowed to dry. Why? Solder doesn't exactly stay rigid in varying temperatures. We came one morning to see our final product stooped over and laying on the ground with no evidence of any outside damage.
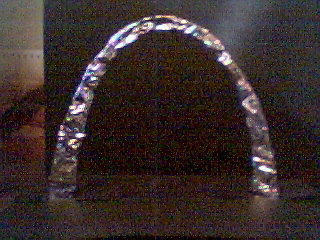
And here it is, the final product, complete with black card board terrain and backdrop. It's an "almost perfect" catenary with dimensions similar to the real Arch. Our is about 8% too wide on the bottom (or too short). All mathmatical concepts from the foundation used in our model to the catenary hang are accurately represented.
Total time spent: 8+ hours
Total cost: $0