| Heater Re-build |
 |
| The heater assembly was completely dissassembled and reconstructed. I replaced the heater core, motor then sand blasted and powder coated the sheetmetal. I reassembled the sheet metal with the origional fasteners that I had freshly zinc plated. Replacement parts are faily cheap and are easy to come by. Most restoration suppliers carry motors and cores or you can have the old core rebuilt if you like. |
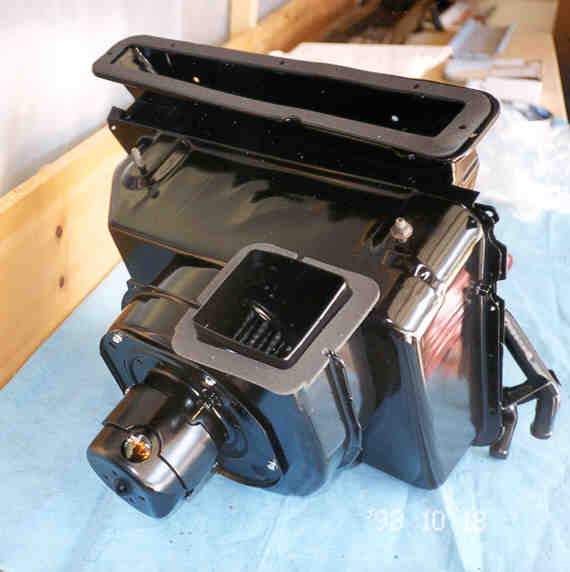 |
| Completed Heater Assembly |
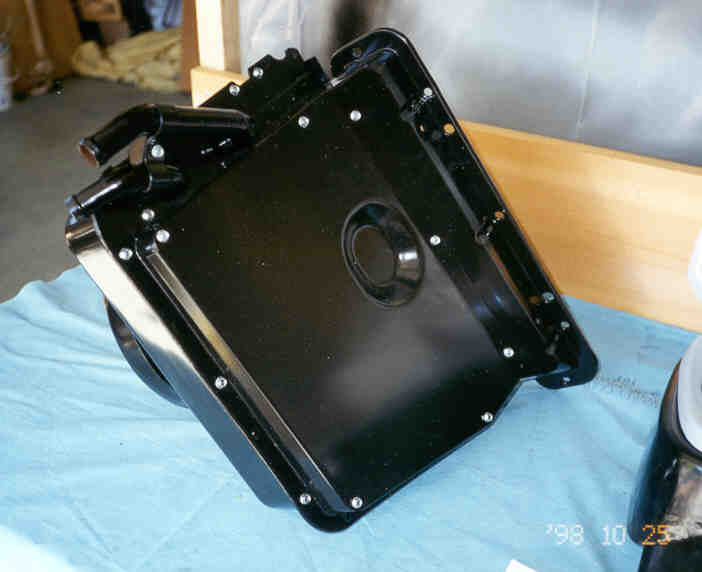
| This view of the heater assembly shows the gasket set used to seal the various interface joints. I ended up making a new gasket by using a low density rubber foam for the odd shaped outlet. I punched the holes for the mounting screws using a leather punch set. Worked great. The gasket was lightly coated (0n the heater side to hold it in place) with an RTV at final assembly. |
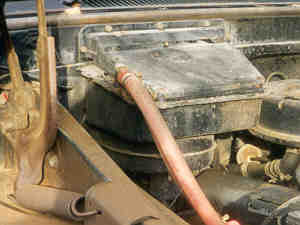 |
| This is the original heater box. After I re-finished the firewall, the heater looked so bad I couldn't remount it without at least cleaning it up. I also discovered the heater core had been leaking (which meant it needed to be replaced) and the motor was frozen due to water and anti freeze running down through the motor windings. Because this is the 'standard' heater option, there are no valves or other complications to deal with. There is a single wire feeding the motor, and two heater hoses for circulating the water. Couldn't be simpler. |
 |
| The motor housing and flange could not be easily powder coated so I found a good quality semi gloss black and painted it to match. It's not as durable a finish but it's close enough. |
| One of the many things that had to be rebuilt during this restoration project was the heater assembly. This was not on the list of 'things to do' when we first planned this job. But like most parts of the truck it was too far-gone to just put back 'as is'. My original plans didn't call for a rebuild as detailed as I ended up with. Things kind of snow balled when I decided to do the body work and paint on the cabs firewall and undercarriage. Because I decided to do the painting myself and after getting into the details of the job, I made some mid course changes. First, I decided to fill all the spot weld divots and other defects in the firewall and repair some of the lower portions of the cab where it had rusted through. And secondly, after extensive research into paints and paint systems, I changed my mind and went with the Glasurit paint system. Because of these improvements I needed to rebuild such a prominent under hood feature. The heater sheet metal was disassembled and media blasted then powder coated with a 60-degree polyurethane black. |