Gas Tank Upgrade
My truck came with the gas tank located in the cab, behind the seat. The filler neck extended from the tank to the outside of the drivers' side of the cab via a rubber hose. The hose was clamped to the tank and the filler neck with standard hose clamps. The hose provides the necessary compliance for normal movement between the tank and the cab. After reading several safety issues concerning gas tanks in general, I found one 'failure' mechanism for this truck was during some impact situations, (probably side impact) the rubber hose can separate from the tank and douse the driver and passengers with gasoline. The tank was covered with a thick card board cover, providing a separation between the tank and the seat but I felt this didn't provide enough of a shield for safety purposes. This safety revelation plus the desire for a small amount of storage space behind the seat, lead me to find another place. When I started this project I didn't plan on moving the tank but since I was going to I needed to find a good location, a tank with a good capacity and a reliable supplier.
I decided against searching the junkyards even though this would probably provide the least expensive solution.
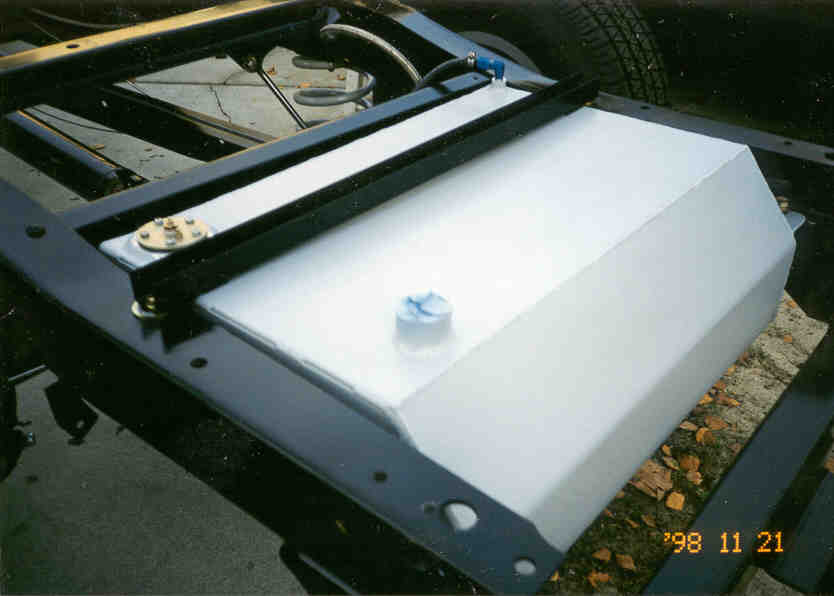
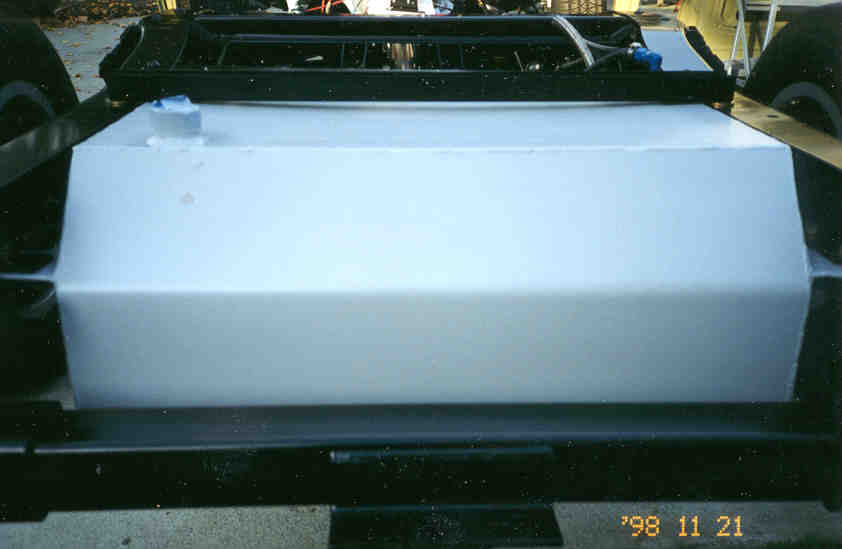
The obvious location was the space the spare tire currently occupied, underneath the bed. The fact that I had installed a trailer hitch meant the spare tire and brackets had to go anyway. So, I found a tank that would fit within the confines of my frame rails, hitch and rear end assembly. My first preference was a stainless steel tank but my vendor of choice wanted 6-10 weeks to build one for me. Also, this would have been a custom unit made to my specifications. I didn't want to wait and Nolimit Engineering had a prefabricated aluminum tank designed specifically for my year truck. The tank was expensive ($400.00) and required a sending unit ($75) and filler. These pictures were taken during trial fitting and show the tank filler neck with tape covering the opening. The finished tank was painted black and reinstalled after I was satisfied with everything.
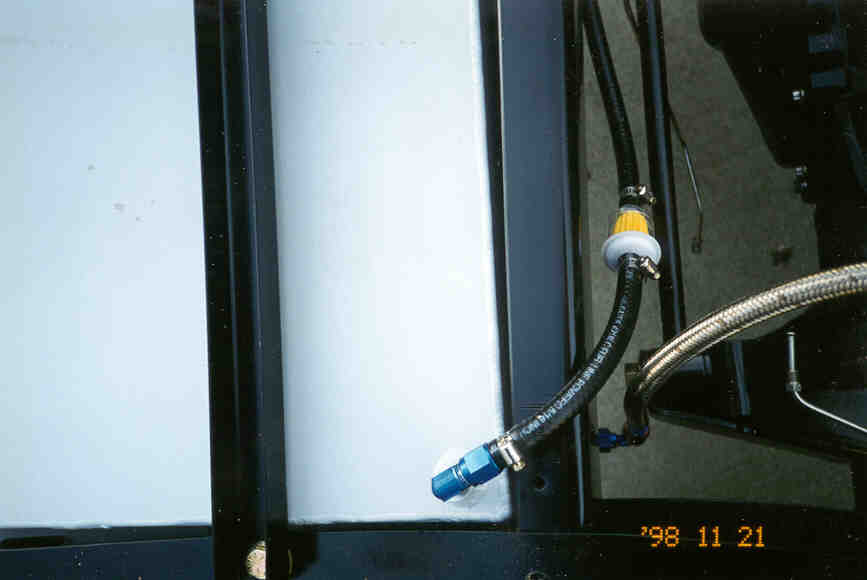
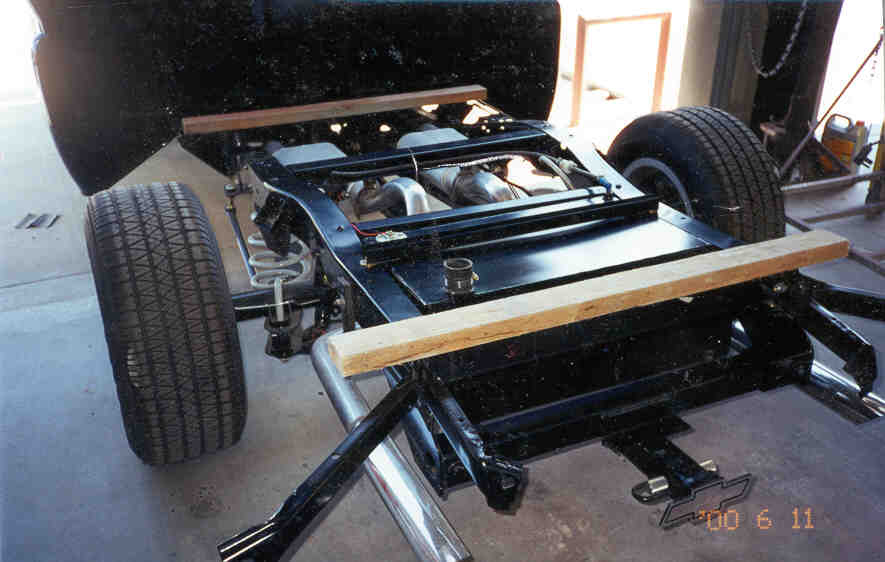
The tank is 0.090-inch thick aluminum that has internal baffling and is completely heli arced and pressure tested. The sending unit flange is machined to accept a variety of sending units and I used a VDO 90-ohm unit, which No Limit supplied. The tank has two horizontal flanges welded to the sides of the tank and provides a convenient means for mounting. The flanges are designed for use with the supplied 1/8-inch thick metal strips (with integral threaded nuts) designed to capture the tank flange to the frames lower flange. This installation 'captures' the tank within the safety of the frame rails. The rear most 'Z' brace needs to be removable in order to service the tank. I drilled out the factory rivets and installed grade 8 bolts for easy installation and removal if necessary. The top of the tank has a threaded 'bung' used for the installation of a 90-degree fitting that is necessary for venting the tank. The front of the tank has another threaded bung used for the fuel line fitting that connects the tank to the fuel pump. I used a 90-degree fitting to route the fuel line up and in between the inside of the truck frame to keep it out of harms way. I also used braided stainless steel for my fuel line for safety purposes.
After installation of the tank and bed I drilled a hole through the bed wood for a 'marine' type filler cap. I felt this was a simpler and better-looking solution to the alternative of running the filler out to the fender and installing a fuel door.
The tank is 18-20 gallons and has worked out beautifully. |