European Emblem Installation
Rear
 |  |  |  |  |
 |  |  |  |  |
 |  |  |  |  |
 |  |  |  |  |
 |  |  |  |  |
|
Rear Emblem
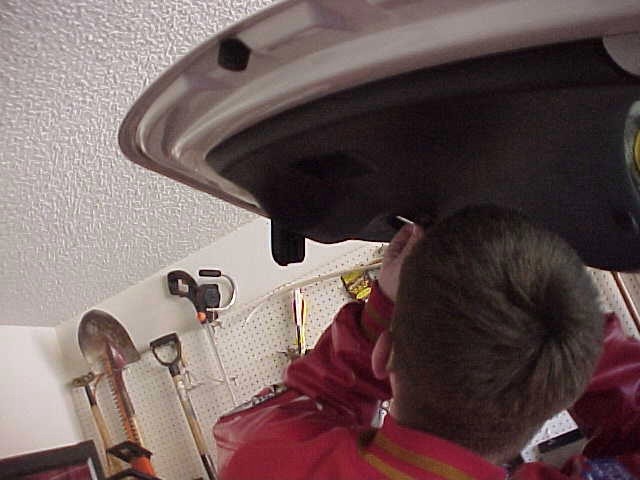
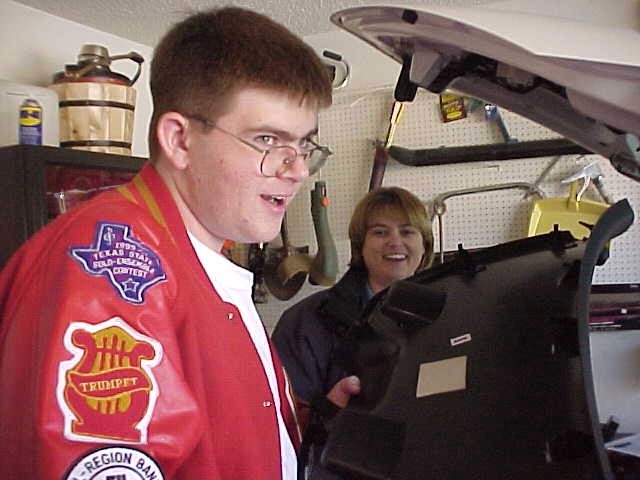
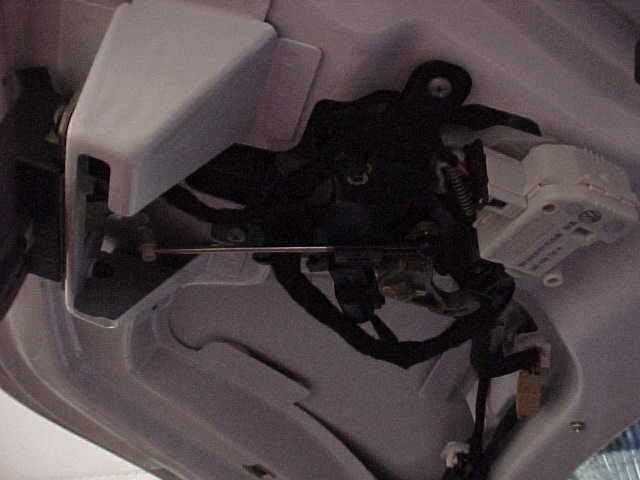
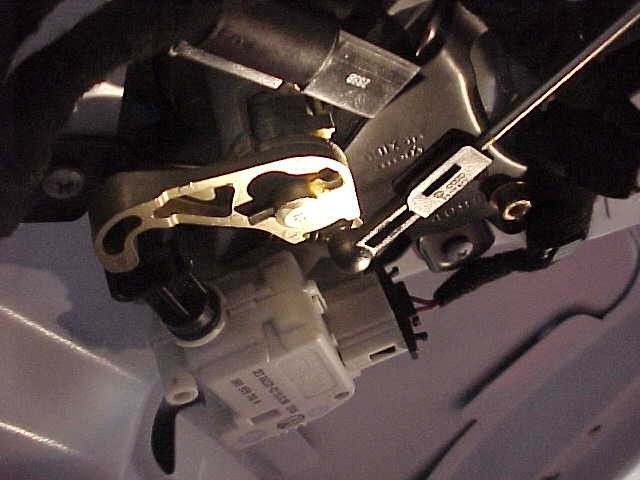
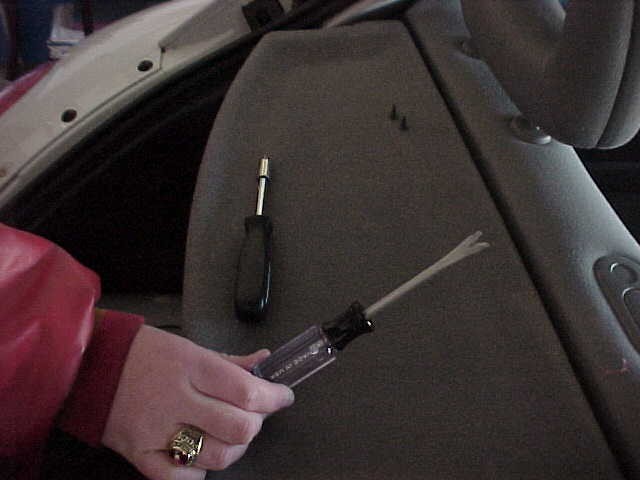
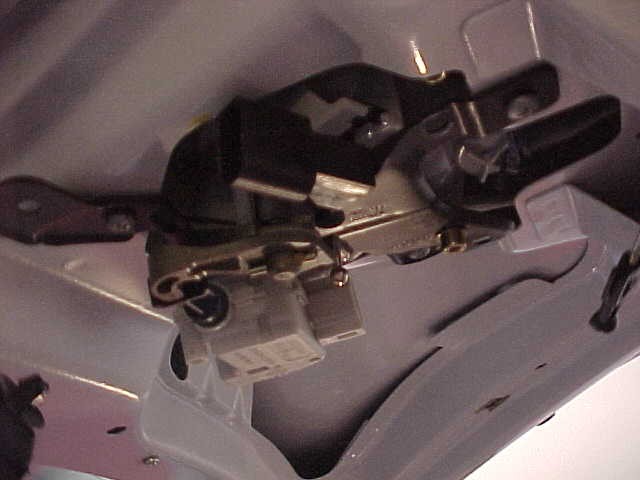
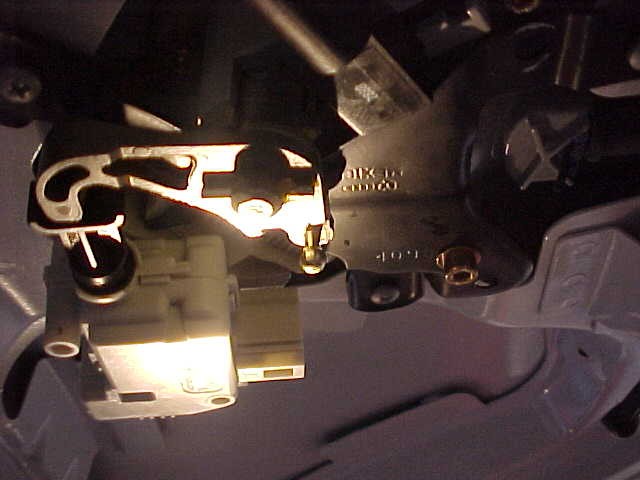
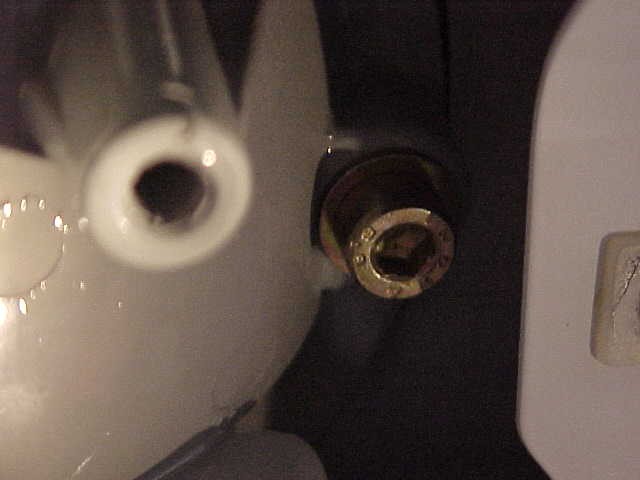
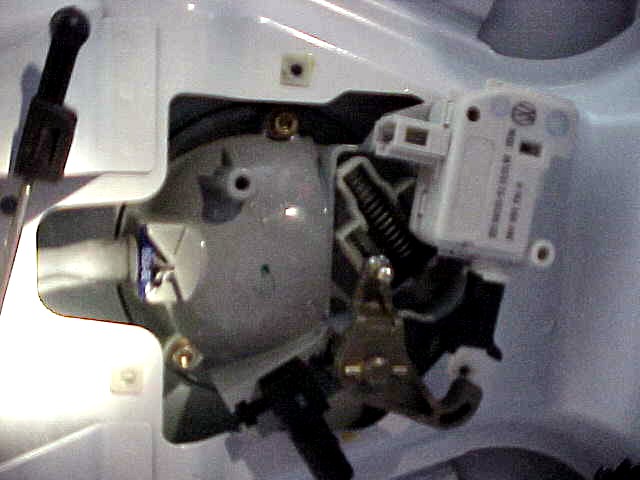
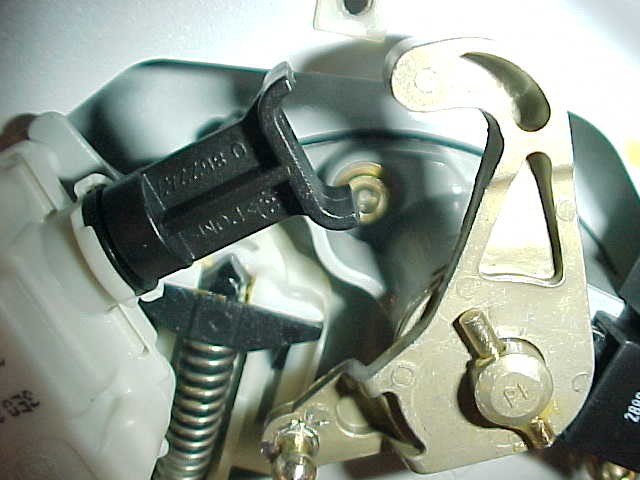
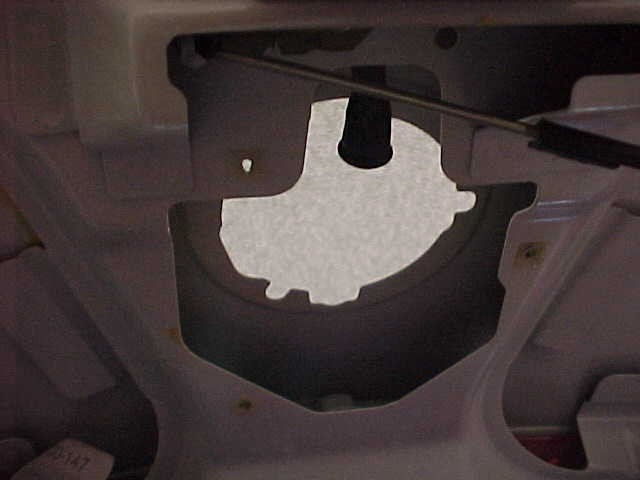
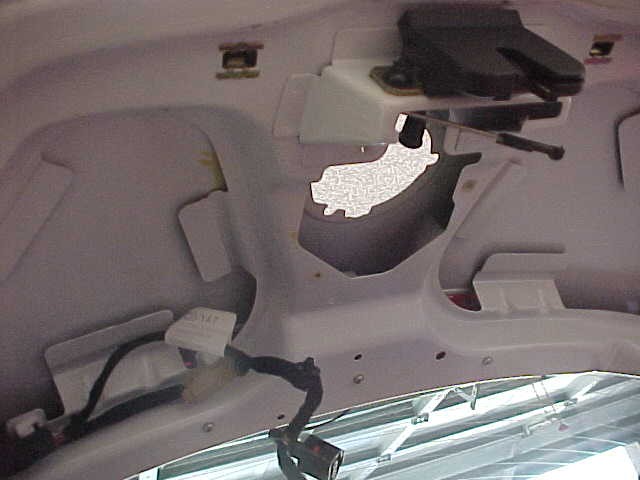
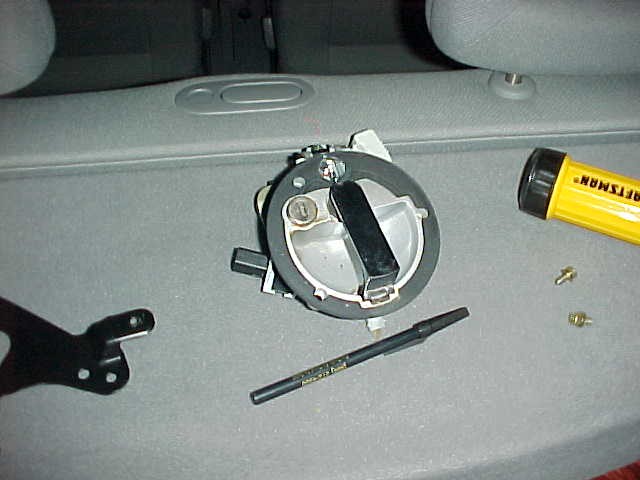
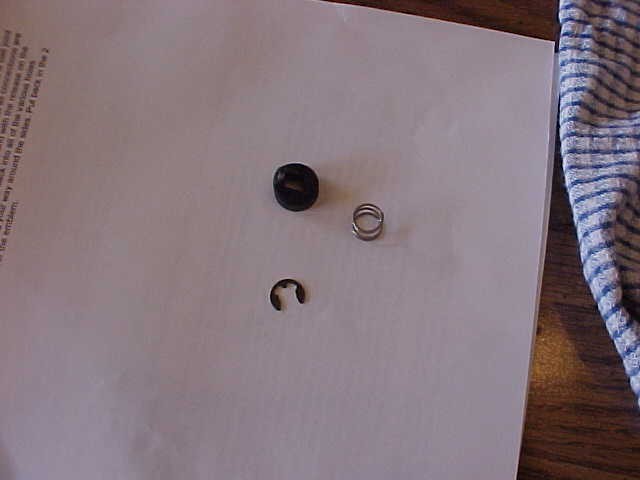
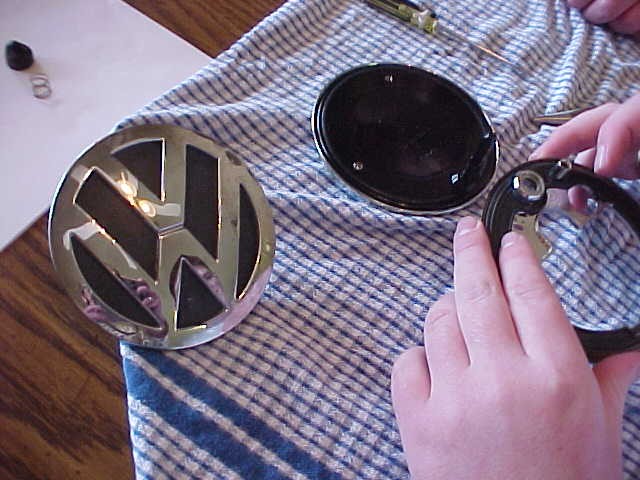
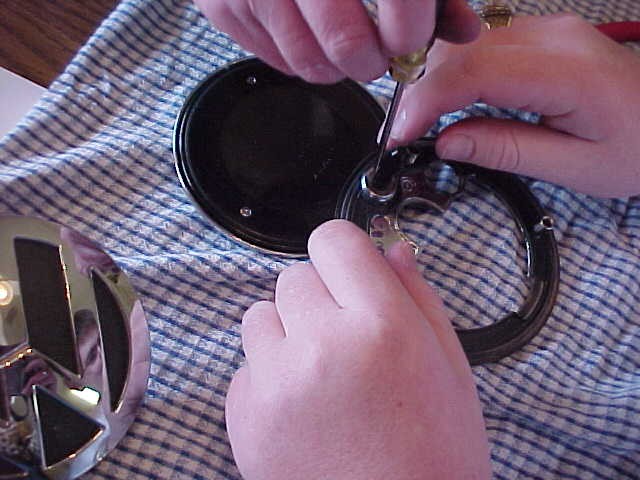
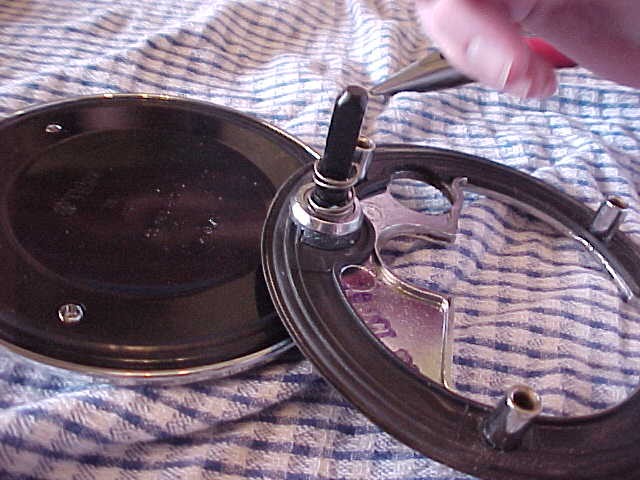
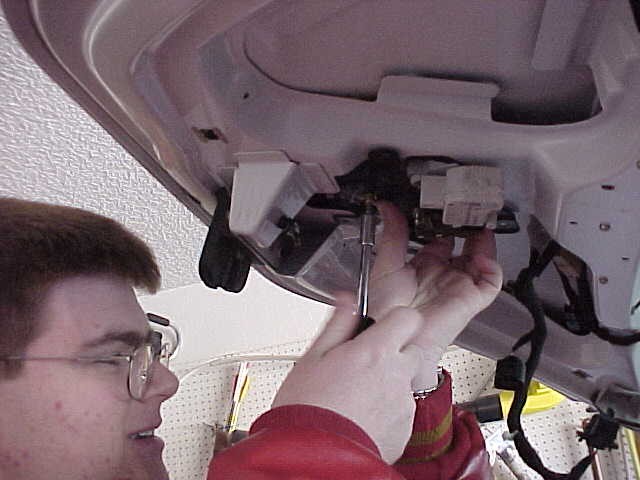
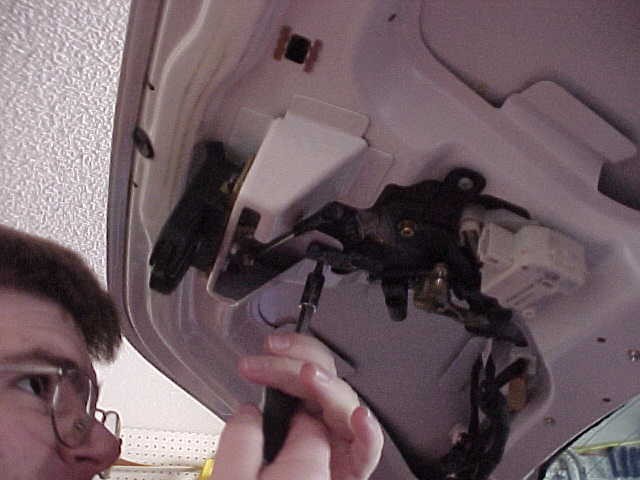
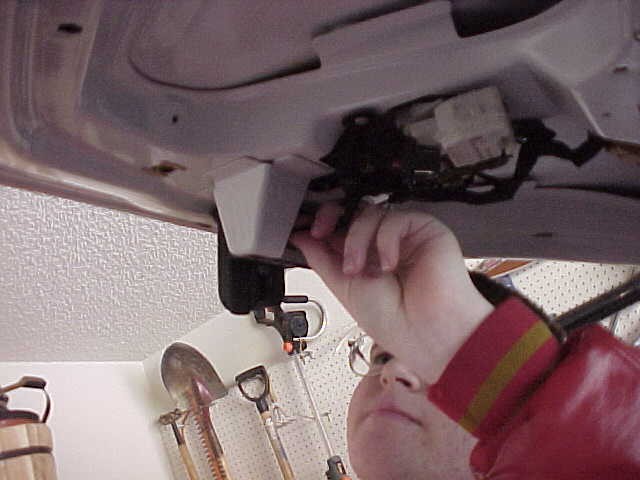
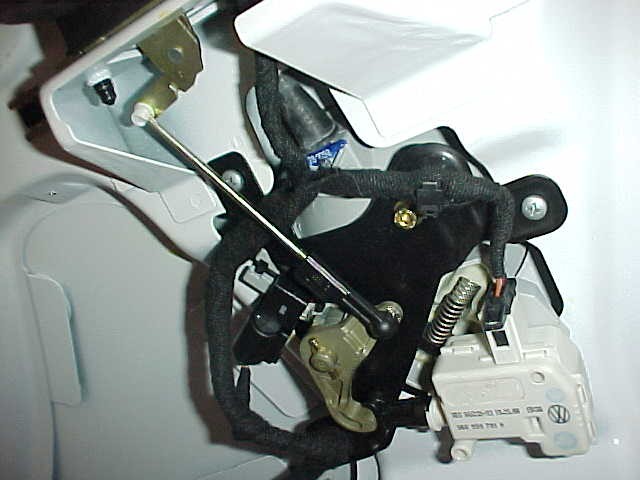
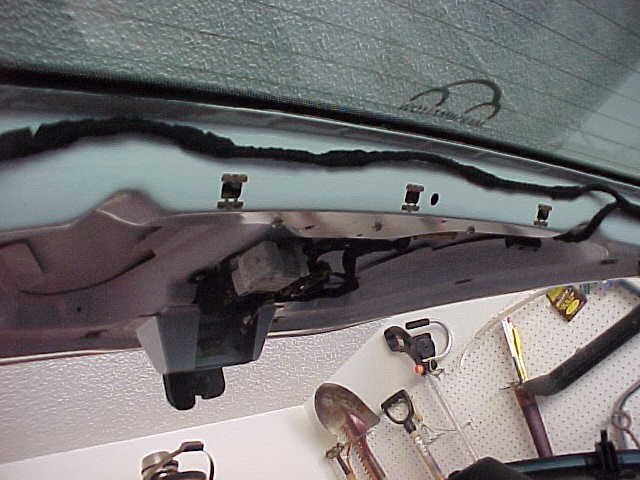
Approximate installation time: 30 minutes Open the hatch and remove the screw in each handhold of the black hatch cover. Pop the black cover off of the hatch pulling from the bottom (to you) away from the hatch and then pushing the cover towards the front of the car.Set to the side. The mechanism is now exposed. Unplug the various electrical connections. There are 3. There are 3 plastic rivets that are holding wire bundles to the black wire harness plate. Pop those away with a flat screwdriver or a tack removal tool (looks like a v notch weed getter for you gardener types). The long thin metal piece that ends in a ball joint in the center of the mechanism must be popped loose from the ball joint. Use a flat screwdriver. Lift this to the side. Do not twist this as it is set for opening your hatch. Using a Phillips head screw driver and a Torx 20 screwdriver, remove the 3 Phillips head screws and 1 Torx screws holding the wire harness plate to the body. Remove the black wiring harness plate. You will need to ease it out. The point here is to separate the outside of the lock mechanism from the inside of the mechanism. Remove the 3 Torx screws holding the inside mechanism to the outside trim ring. The cup where you put your hand on the outside goes with the inside of the mechanism. The trim ring on the outside of the cup and the emblem go with the outside of the mechanism. There is a seal on the inside mechanism next to the body. Turn the emblem so that the lock is exposed. Using the hair dryer, heat up the inside mechanism while pushing from the outside against the hand cup. You may need to swivel the emblem to work it out. The two pieces will separate. Take the trim ring and emblem assembly to a workbench for final separation. You may need to remove the drain hose from the bottom of the mechanism. Remember to put the drain hose back on. There is a black dust cap on the black spindle piece that is at a right angle to the emblem. If the black dust cap is not there, it is inside the other piece that is on your car. Use tweezers or needle nose pliers to retrieve it. Note its location so it can go back in the same manner. Remove the dust cap. Using a pair of needle nose pliers, remove the "C" clip that is holding the spring on to the spindle. Be careful to not let the spring go flying. There is also a washer and an "O" ring underneath the spring. Lift the trim ring off of the spindle of the old emblem and place onto the new emblem's spindle. Put the spring onto the spindle. Depress the spring to below the lip where the "C" clip will go. Put the "C" clip on the spindle of the new emblem. Replace the dust cap correctly. Return to the car and clean around the area for proper sealing. Clean the hand cup and lock while you have it accessible. Put the inside mechanism and the outside mechanism back together as they were. You may need to turn the emblem some to get it to drop back into the matching hole in the inside piece. Note that the dust cap fits into the hole only one way. Once seated correctly, put the Torx screws back in and tighten down. Put the black wire harness plate back in correctly. Attach with the 3 Phillips head screws and 1 Torx screw. Replace the wire bundles. Use a pair of pliers to place the long thin piece back on to the ball joint and snap together. Plug the electrical connections back in. Double check that all connections are made again and nothing is left over. Be sure to put the drain hose back on if you took it off. Open the hatch with your key and with the release on the door and the key fob. Replace the black hatch cover, pop back into all of the various holes starting from the bottom of the glass and working your way around the sides. You may need to hit with the heel of you hand to get it in properly. Put back in the 2 screws. Remove the protective cover over the emblem. |

Please Thank Susan Hester for writing the directions!