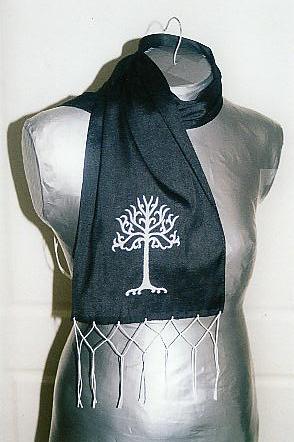
White Tree of Gondor Scarf
As always, I apologise for the dodgyness of the pictures. I'm much better with needle and thread than I am with a camera.This is a scarf I made for a friend in Washington. (I plan on making something similar for myself...eventually.) It's stitched with white DMC stranded embroidery cotton on 115cm wide black silk duponti. I got the pattern from Alleycatscratch, it's the one on Faramir's breastplate from The Two Towers.
Okay. So I had the silk, I had the cotton, and I had the pattern. The first major hurdle was figuring out how to transfer a design onto dark coloured fabric. Previously I'd only ever embroidered on white or cream coloured fabric, which wasn't an issue. I had no idea how to go about it.
After pondering a while I came up with a technique that I have since found documented elsewhere - pinpricks and powder. I enlarged the tree to the desired size then made dense pinpricks around the outline. (Next time I won't do it manually but with an unthreaded sewing machine - at least for the straight bits. So much quicker!) Once I had the holes in the paper I positioned it over the silk and secured it in place.
Enter the tea strainer.
I put about a teaspoon of plain flour in my tea strainer and shook it out over the holes. Then I rubbed the flour into the perforations to get the design through to the silk. I used my finger, but next time I'd use a cotton ball to the pattern doesn't shift as much. Then I very carefully lifted up the pattern to expose the flour dots on the fabric. (At this point I had to leave the sewing room for the obligatory jumping-up-and-down "YAY! It worked!" process. Doing so in the same room would have disturbed the flour ;-)) I then used a sharpened white dressmaker's pencil to draw the outline following the dots. Et voila - White tree on black fabric.
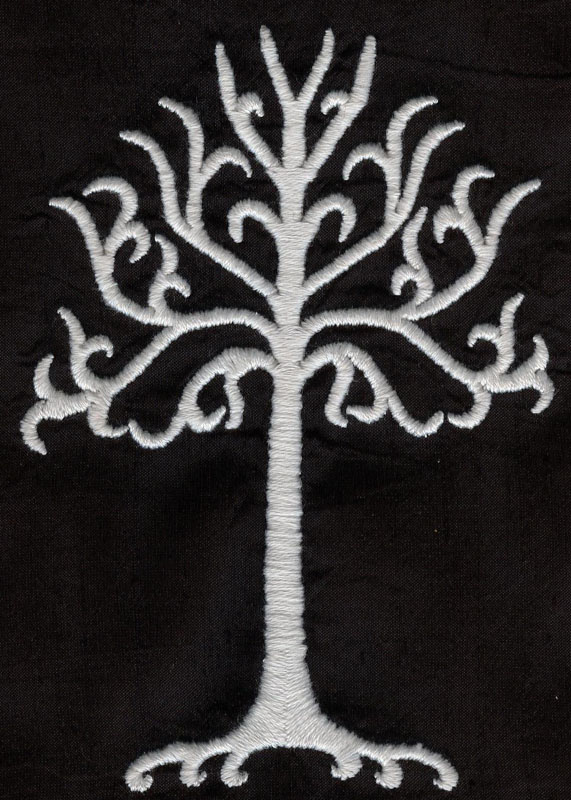
For the embroidery itself I used a hand monogramming technique I found in a Threads magazine. First you outline the area in chain stitch with a single strand of cotton. Then you fill in the area with chain stitch with a double strand of cotton. The final step is satin stitch over the top. The chain stitch fill gives a nice raised look to the satin stitch - provides a bit of padding.
Here are some close ups of the embroidery itself. The actual dimensions are about 9cm by 13cm.
The front
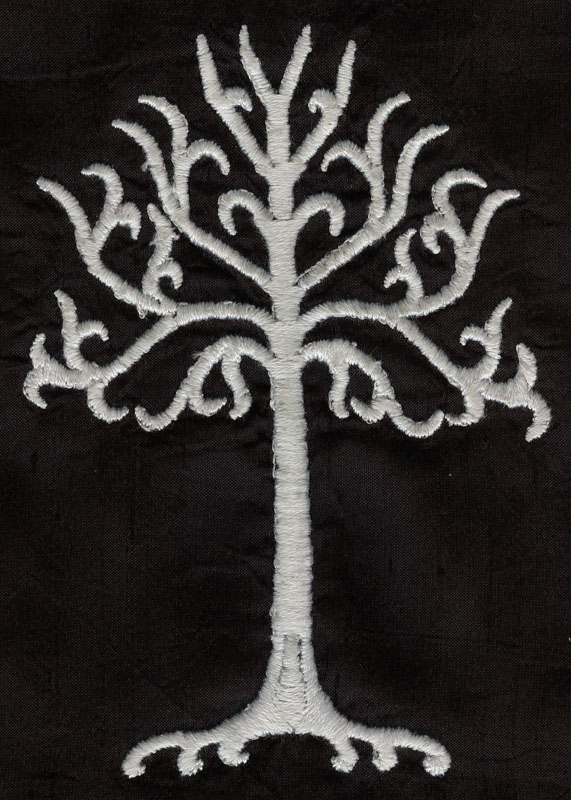
The back
Details I'm pleased/not pleased with

The bits circled in green I'm quite pleased with. The bits in red I fully acknowledge are fairly dodgy stitching of the "I can do better than that" variety. I'm particularly happy with the way the bottom of the trunk and the roots turned out. I knew I wouldn't be able to keep going as a straight satin stitch all the way down because the stitch length would become unmanageable. So a couple of centimetres before I got there I started doing a Croatian Flat Stitch which I slowly angled out so it hit the base of the tree at about 45 degrees. (Very approximate!) From there I eased it out to almost vertical stitches for the roots themselves. I covered the gap in the back with a surface satin stitch so you couldn't see the lines from the chain stitch.

For the fringe I cut 30cm lengths of the leftover white DMC cotton and attached it to the edges. I tied them together in two offset rows of reef knots. I like how it looks a little like the roots continue down into the fringe.
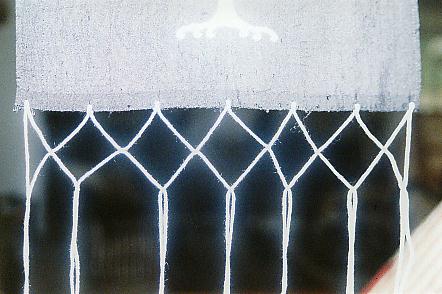
Note the faintly elvish glow around the fringe. I have absolutely no idea what happened there in the photo, but I like it!