I decided I wanted to build the fins as close to scale as possible.
Shaping
I liked the idea of using skins on the fins and fililng them with foam like
VAHP used.
They used plywood skins and also cut the main piece of plywood
with lightening holes.
In thier account of building them it seemed like a lot
of work to get these pieces of ply to lineup and fit well.
I decided to go a
different route.
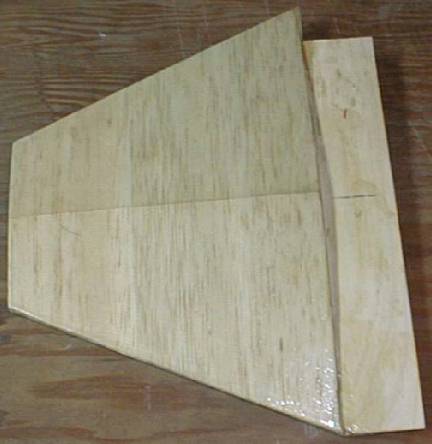
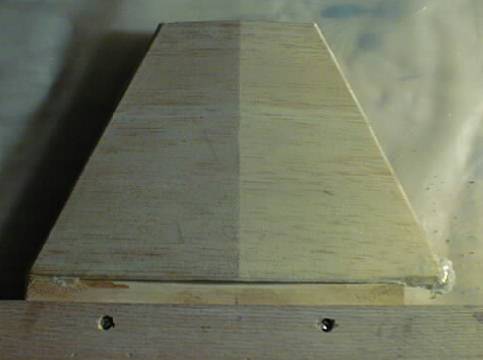
I decided to use balsa for the fin skins because it is much
easier to work with.
Because balsa is not as strong as plywood I would not
put any lightening holes in the main fin plywood.
I made a rib that
would run down the center of the fin to make the raised part in the middle.
I
scored the balsa sheeting across the grain and cracked it with my strait
edge.
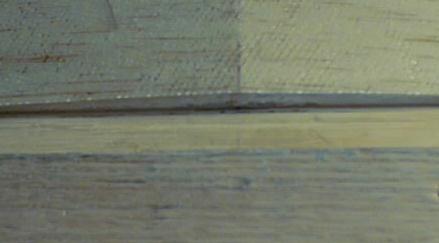
This I placed over the fin and tacked it down with CA glue, then
trimmed the sides flush with the plywood.
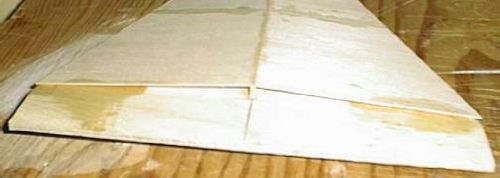
Once I had all the skins on and trimmed I mixed
up some thin epoxy and drizzled it down the inside seam where the ply and balsa
came together. I then hung the fins with the tip down so that any extra epoxy
could drain out.
Foam
I then proceded to destroy the fins using spray foam.
I read alot about
spray foam and the biggest concerns I read were about heating and not drying in
a sealed fin can.
I figured neither of these were a concern because there
wont be excess heating in the fin area and the fin is thin and can breath so it
should dry.
The issue that got me and the one I didnt read about till after
the incident was the foam continuing to expand over time where the two part
dries in a short time and there is no expansion after that.
When I applied the foam it looked great, just filling the cavity and oozing
out the end some.
Well the next day was a differnt story. Instead of haveing
nicely formed fins they were all bulged out and one had split the seam in the
center of the fin.
I was able to take a sharp knife and trim out the extra
foam. Then I used a syringe to inject epoxy into the slots in the foam to glue
it back together. This resulted in a somewhat heavier fin but it was back to
shape and solid.
Vacuum Bagging
I have never done vacuum bagging but what better time to start.
I looked online and found some info on using
a food vacuum sealer to do the job.
Well I wanted to
use a vacuum pump I had access to and some plastic sheeting so I used this web
page as a guide for how its done I just did it a different way.
I started out at the fabric store. Standing stairing at the large display of
cotton batting that I would use for a breather material. I decided upon the $8
roll due to the scientific evaluation that it was the cheepest.
Then a stop
at Home Depo to pick up some 6mil plastic sheeting, because it was the thickest.
Oh and a role of duct tape.
Finally a stop at the local boat shop to get the
West systems reliese fabric and 6oz glass cloth, I allready have the West
systems epoxy at home.
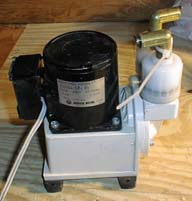
First thigs first, I built a jig to attach the vacuum hose to the plastic sheeting.
I used a vacuum pump I borrowed for the weekend.
I then had a dry run. I cut the plastic sheeting big enough to fold over and make a pocket to hold the fin with about 4in on each side. I then duct taped 2 sides and mounted the hose jig at one side. I cut the reliese fabric and breither to size and wrapped them around the fin. I stuffed this into the bag and taped it closed. Fired up the vacuum pump and it pumped right down. It looked like it would work so I fiberglassed and bagged one of the fins. It turned out great.
I then proceeded to do the other 3 fins.
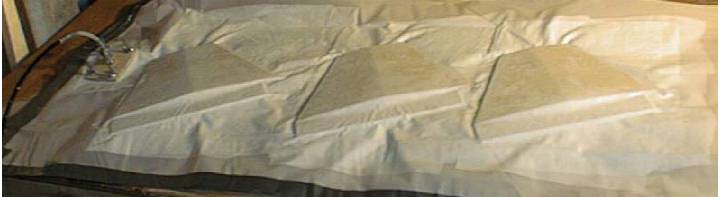
I pre-cut all the release fabric and batting so it would go smooth. I then fiberglassed each fin and wrapped it in release and breather then shoved it into the bag. One thing you will notice is that I had to put an extra piece of breither material under the vacuum hose attachment so that the plastic would not clog it.
I let the pump run for 12 hours(probably could have got away with less
but I need my sleep).
The next morning I removed them from the bag. The
release was a bit tough to get off. Its hard to get started but once you get it
started pealing back it comes off easier. Maybe just because you have more to
grab onto.
There were some pinholes in the service between the weave. I brushed on some epoxy and hung them tip down to allow the extra to drip off the end.
Trimming
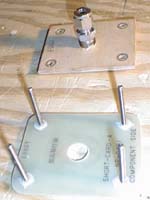
Then I built a jig to trim the root edge so that it would be flush with the airframe and just touching the MMT.
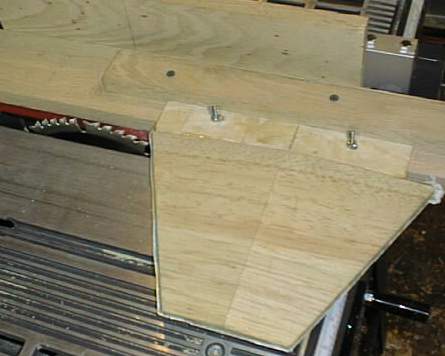
This was designed to be used with my table saw. It did a very nice job of trimming the inside of the fin as seen here in this closeup when I flipped the jig over.
 |
 |
I then sanded and filled them.