When I started building speakers, I was forced to store my "stuff" in my car trunk, and use radically different techniques than I now do in a proper shop. You CAN do most of the things with hand tools that you can do with proper power tools. The trade-off is time. It takes a week to do what can be done in a day in a proper shop.
If you are forced to make do with hand tools, here's how to do it:
MINIMUM EQUIPMENT LIST:
Unless the largest width/depth is greater than 12", my material of choice is 12" x 48" MDF shelving. (Be aware that you are going to throw away about half of your material. This is the price of not being able to do accurate ripping of larger panels.) You want to lay out your cuts so as to assure that all front/back/side panels have a manufactured long edge and a manufactured edge at the top (or bottom, your choice). This will give you the best change of winding up with a square box. (OK, the crosscut edge will not be exactly square. But it will be better than you can do. If you chose your shelving properly, they all came from the same panel saw and are equally out of square!)
Choose two of your shelves for the sides. (This assumes the front/back overlaps the sides. Otherwise, reverse the logic). Put them together, on edge. Line up the ends and check for square. Flip one over or end-for-end until you get a perfect match. Now MARK the good edge and the top edge. Mark the width and rip the board. Leave 1/16" to 1/8" outside of your like, depending on how good you are with a hand saw. Remember that your cut will not be square and you will be planing the edge true. Mark the length with a framing square and cut to length. Rip the second side and use the first side to mark the length on the second. Crosscut to length. If the back panel fits inside the side panels, then do not true the edges now. if the back overlaps the sides, then the side panel edges need to be trued now.
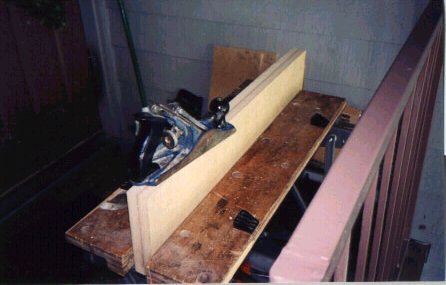
Place the two sides, true edge down on the frame of your Workmate. Clamp down tightly. Plane the edges down to the line. Check for end-to-end true with a straight edge or the true edge of a piece of scrap. Be sure that the edges are square with the sides. Don't worry with the length now. We will true the ends later. The sides are now done.
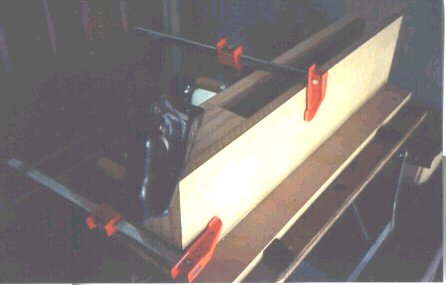
Square the partitions and bottom by clamping them between the sides. True them with a plane.
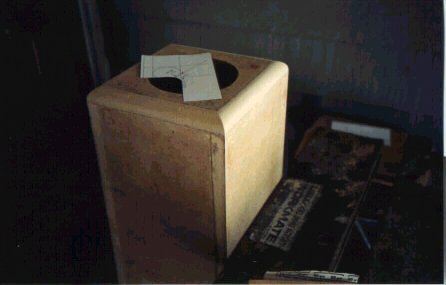
Mark and rip the front and back. Again leave about 1/8 outside the line. mark the length with the first side panel and cut to length. (All four panels were marked to the same length!) Do not true the edges of the front at this time. If the back overlaps the front, don't true it either. Finally cut the top large enough to overlap at all four edges.
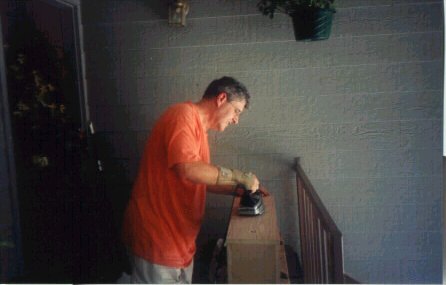
Now its time to to dry fit everything. I screw and glue, using 1 3/8" course thread drywall screws on 6" centers, yellow PVA glue, without battens. Drill a pilot hole the full depth of the screw, and then drill the outer panel the full diameter of the screw. This allows the screw to pull the panels together. Screw the box together without glue, checking that everything fits and that there is ample overlap for final finishing. Once you are satisfied, remove the screws, apply glue and screw everything back together. Let the assembled box set overnight.
I remove the screws after the glue sets. I don't feel that the screws add any strength to this type of construction. I fill the holes with light weight spackle. If you want to leave the screws in, be sure to countersink the head, and then fill the holes. You run a better chance of having a pop-out it you leave the screws in. Your dime!
True up the edges with a plane. By planing the edges to fit at this point, you get at least as good an edge as you would using a table saw to do your cuts. And note, the planed edge is every bit as good as if you had used a trim bit in a router.
Now let's put a 3/4" round-over on the top. Start by marking the diagonals across the top. Then mark the edges at 7/16", both top and side. Plan a 45 degree chamfer on the edges using the 7/16" lines as guides.

Next, place 22 1/2 degree facets on either side of the 45degree facet. You should now have 5 more or less equal facets.
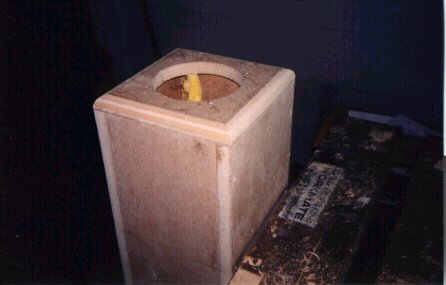
Finally, sand the edge to the final smooth contour. Use the developing sharp corners and the diagonal lines to guide your work. I cut a template in a file card to determine the file contour.
The last step it finishing the box. I used Band-it brand iron-on veneer from Lowe's. Works like a champ and is very forgiving about initial positioning. For most of my projects, I use 10mil paper backed veneer from Tapeease, applied with Titebond PVA glue, home-made iron-on, if you will.)