Our New Toys
Weider Crossbow
Well, I just turned 47 last October, and really, I'm not complaining too much. I'm still in pretty good shape, but it was all pretty much "Beach Muscle". As part of my program to run a marathon on my 50th birthday in the 50th state, I seriously needed to get serious about getting into shape.
I guess I watch too much late night TV, working graveyard, but I have been hungering for a Bowflex for the longest time. Just about the time, I start doing research on bottom line costs for a Bowflex equipped in the minimum configuration that I would want... along comes the Crossbow.
Hmmm... Crossbow is less than 1/3rd the price of a comparably equipped Bowflex, sliding seat for aerobic rowing, lat tower, leg attachment, all included. $500 versus $1500 plus for the Bowflex. I didn't even have to prepare a comprehensive report to convince myself OR the wife!
Anyway, we got a Crossbow as a belated Christmas present and have been working out on it on a regular schedule. The teenagers are starting to work out as well because our Crossbow is in the computer room. It is so convenient to knock off a few reps while waiting for a download or while burning a CD... and FUN! They would hardly ever work out with our other Weider weight stack machine or the free weights that are still in the computer room.
As great as this machine is, there is always room for improvement, here are the modifications I have made to my Crossbow to make it more user-friendly.
Click on the thumbnails to get a better view
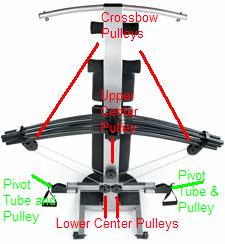
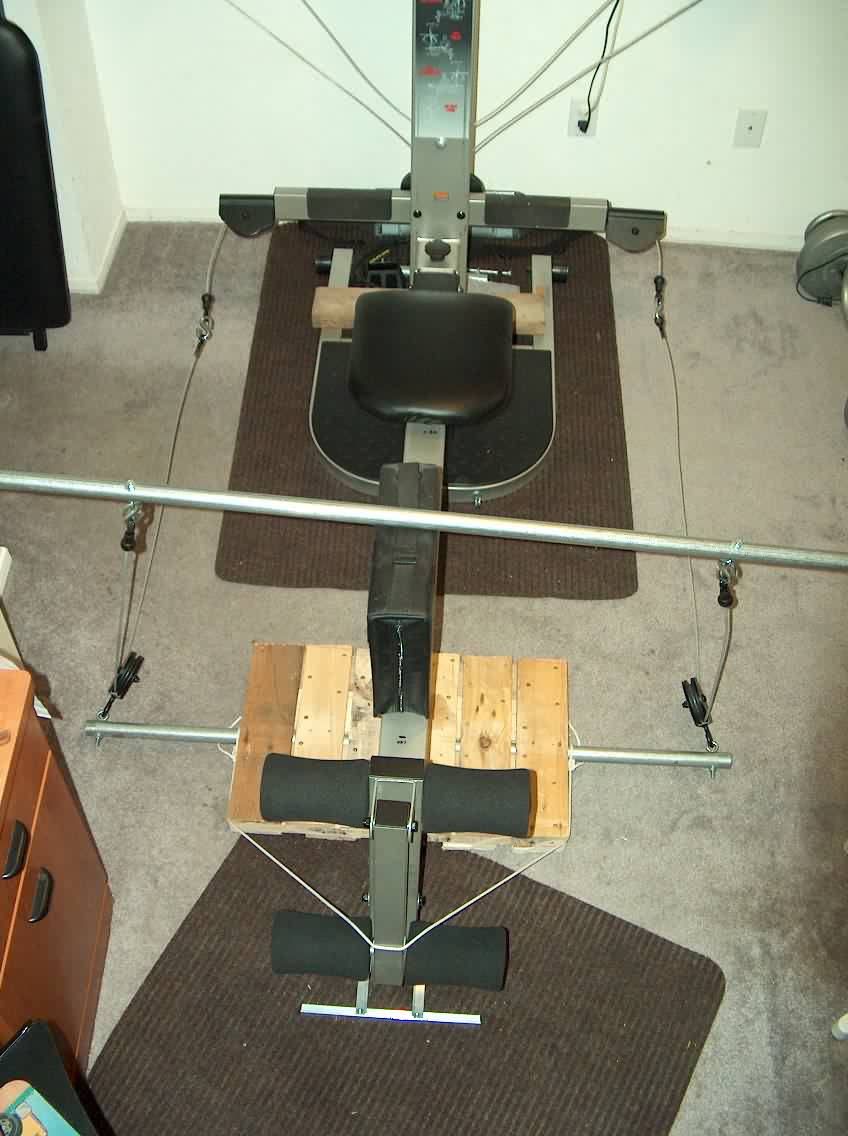
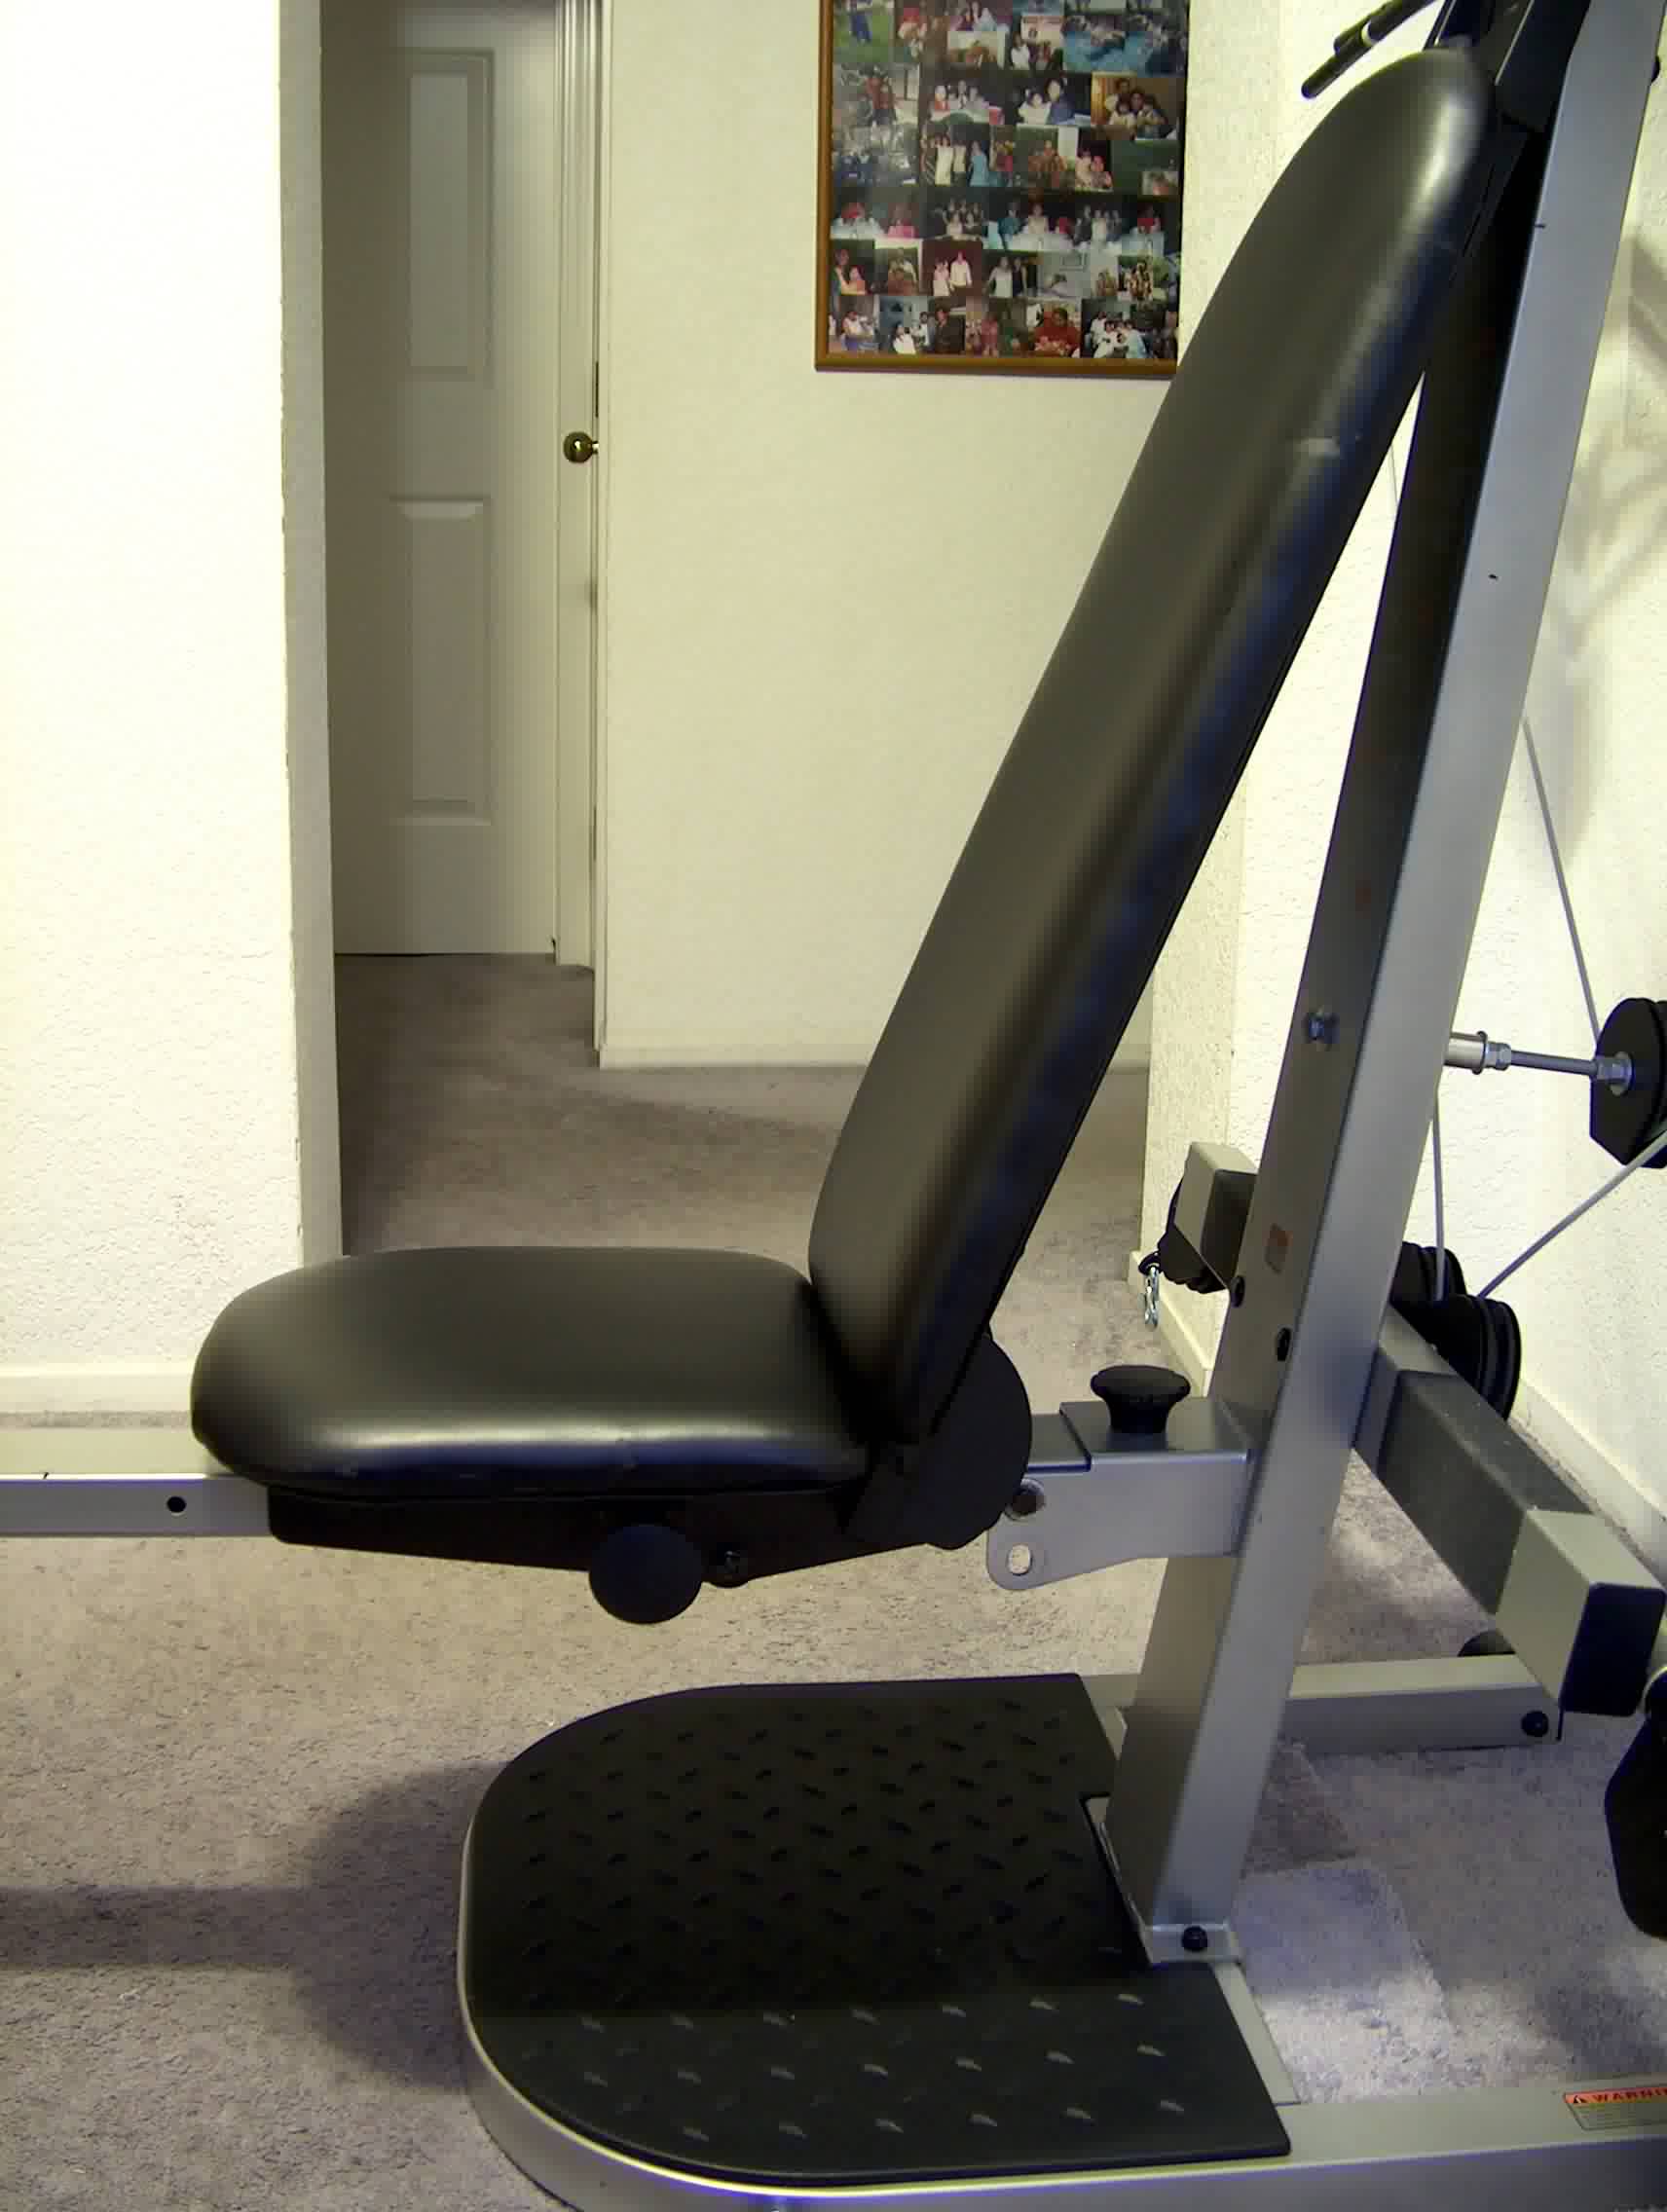
Back View
With my terminology
1. Adjusted the center pulley to allow minimal cable angles through the upper crossbow pulleys. The crossbow pulleys handle the most cable travel. The lower two center pulleys are fixed and cannot be moved without affecting the cable entering the pivot tubes. There is very little cable travel through the upper center pulley except when using a single side only such as concentration curls. For the most part, the center pulley only acts as the pivot point or fulcrum. I used an 3/8", 8' long carriage bolt and double-nutted the bolt to the tower and also double-nutted the pulley into the position I wanted. When tightening the pulley bolts, turn the pulleys by hand to ensure that they are not loose and that they turn freely.
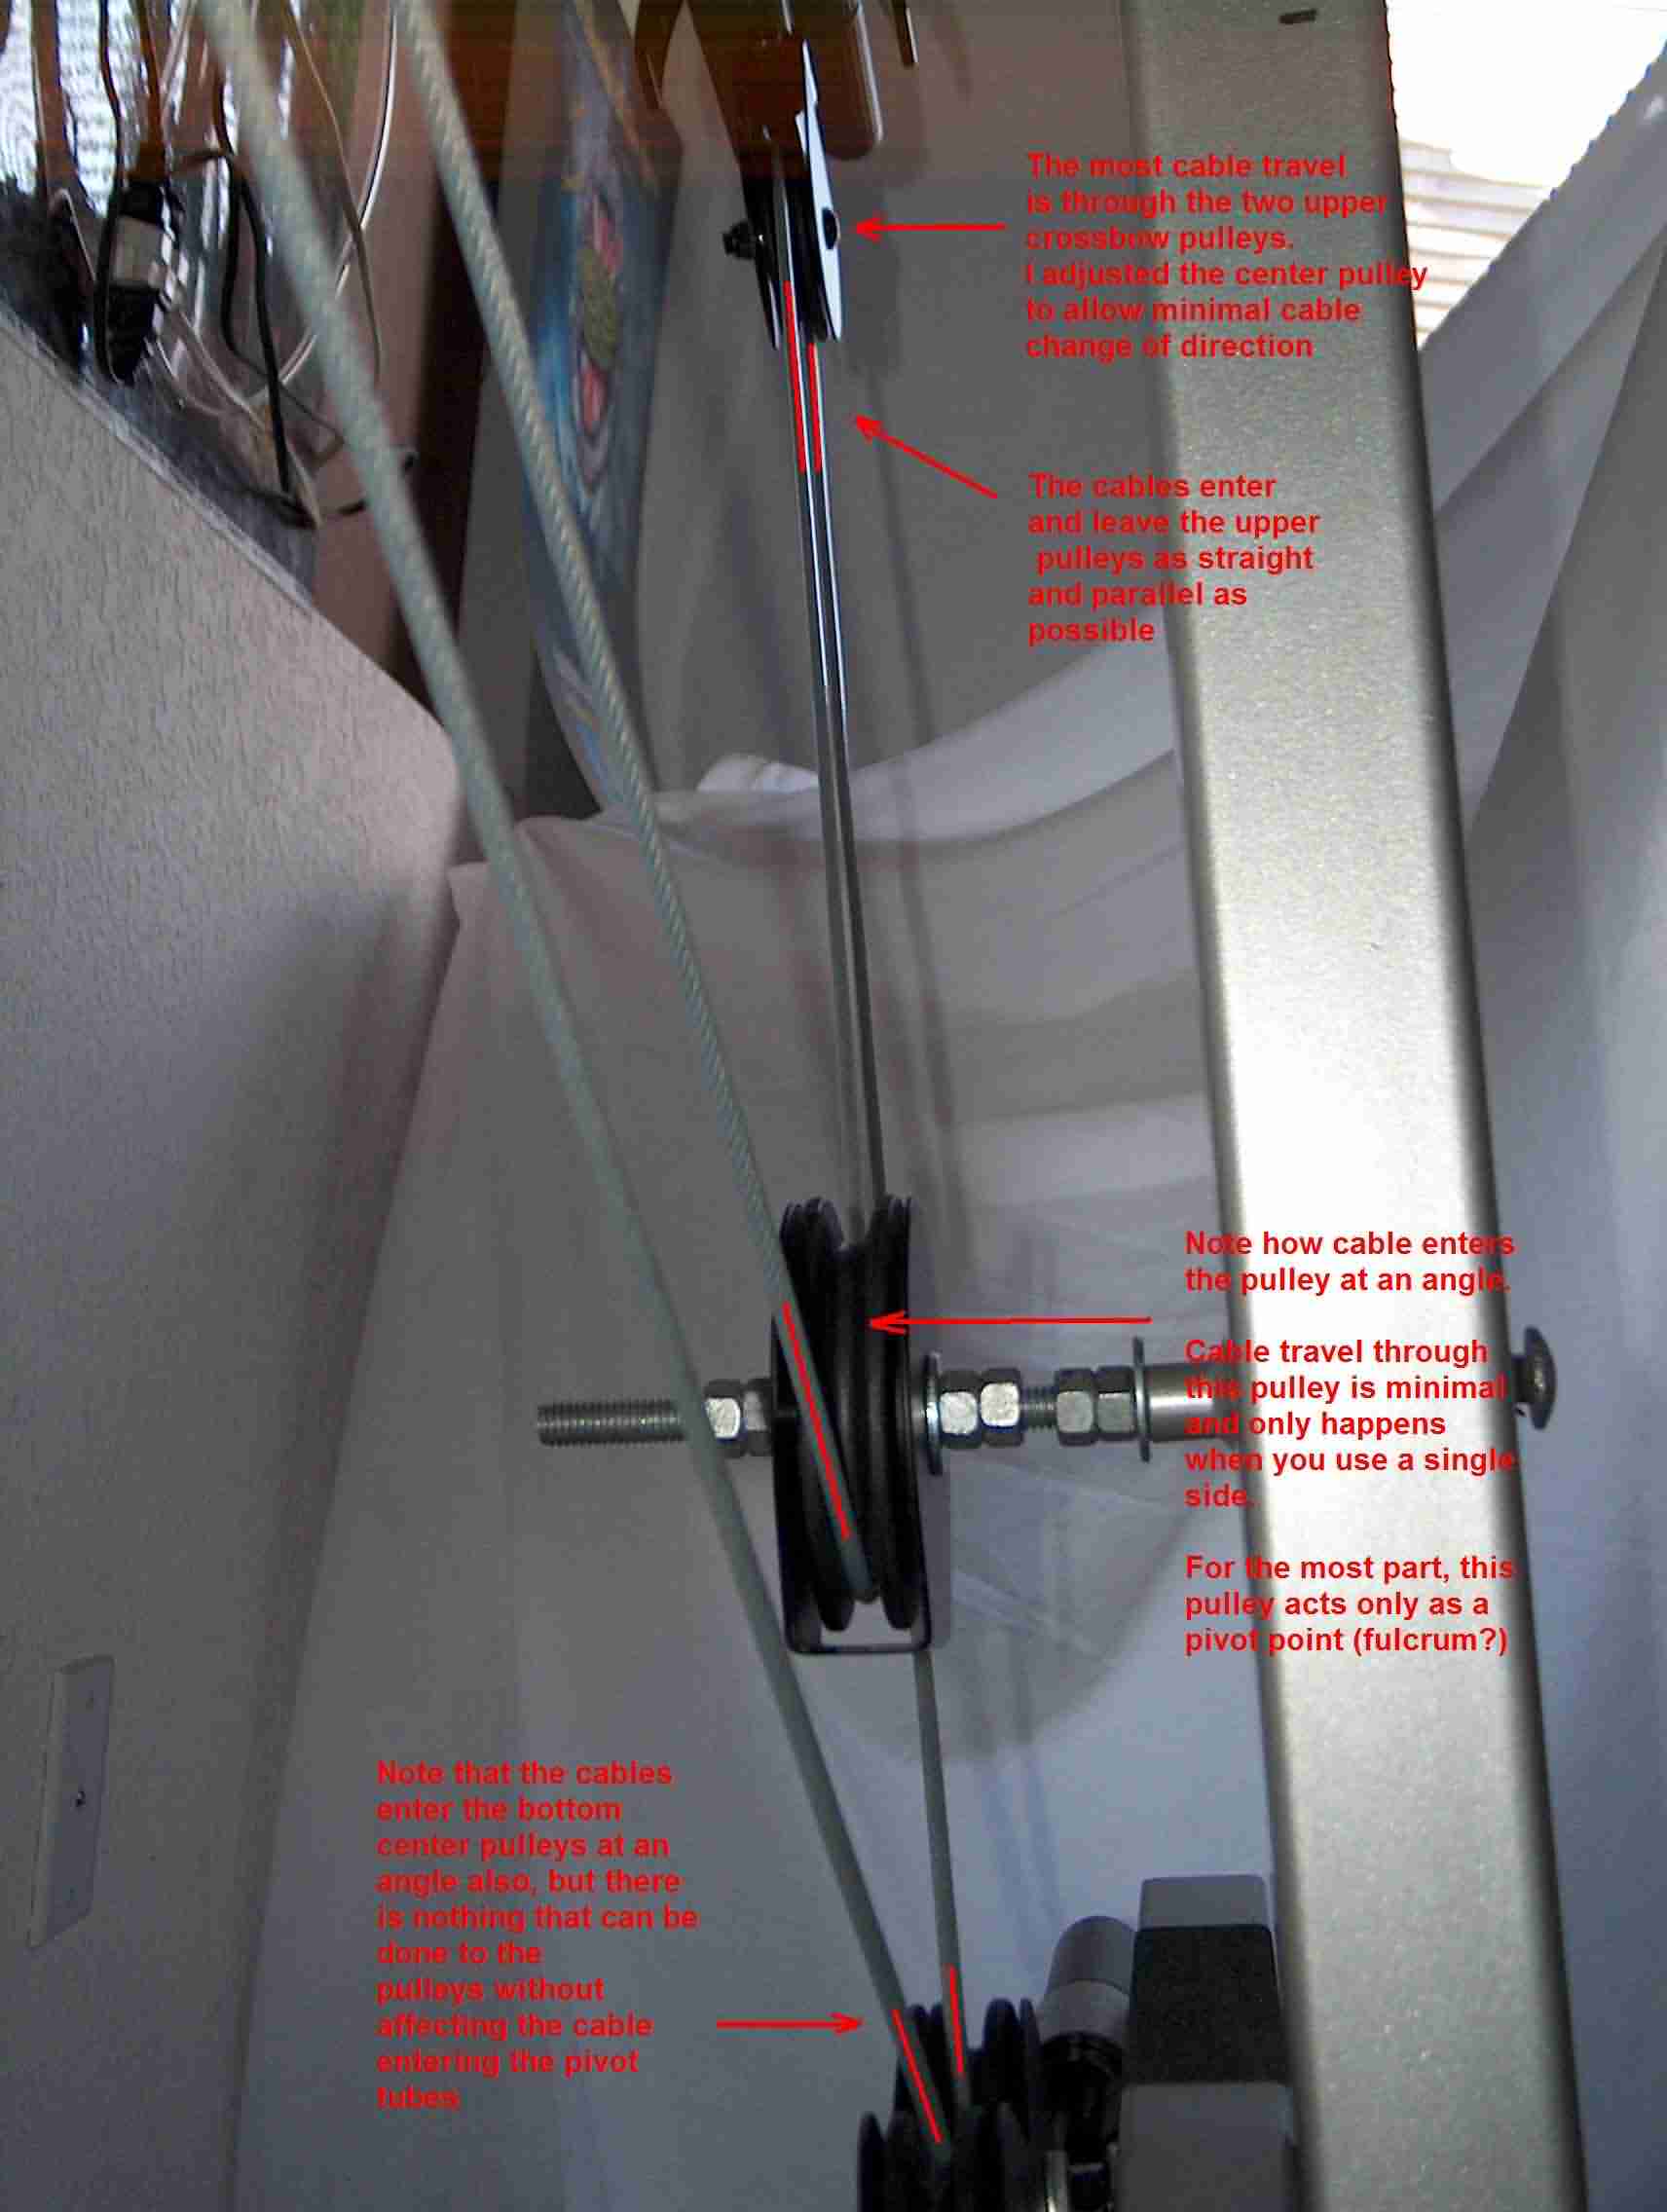
 This picture is a view from above to the right. This picture shows the cable angles for the
upper center pulley and the right lower center pulley. Note how the cable from
the right lower center pulley leaves at the optimal angle (going into the pivot
tube). Note how the cables from the crossbow pulley enter the upper center
pulley and the lower center pulleys at a slight angle.
This picture is a view from above to the right. This picture shows the cable angles for the
upper center pulley and the right lower center pulley. Note how the cable from
the right lower center pulley leaves at the optimal angle (going into the pivot
tube). Note how the cables from the crossbow pulley enter the upper center
pulley and the lower center pulleys at a slight angle.
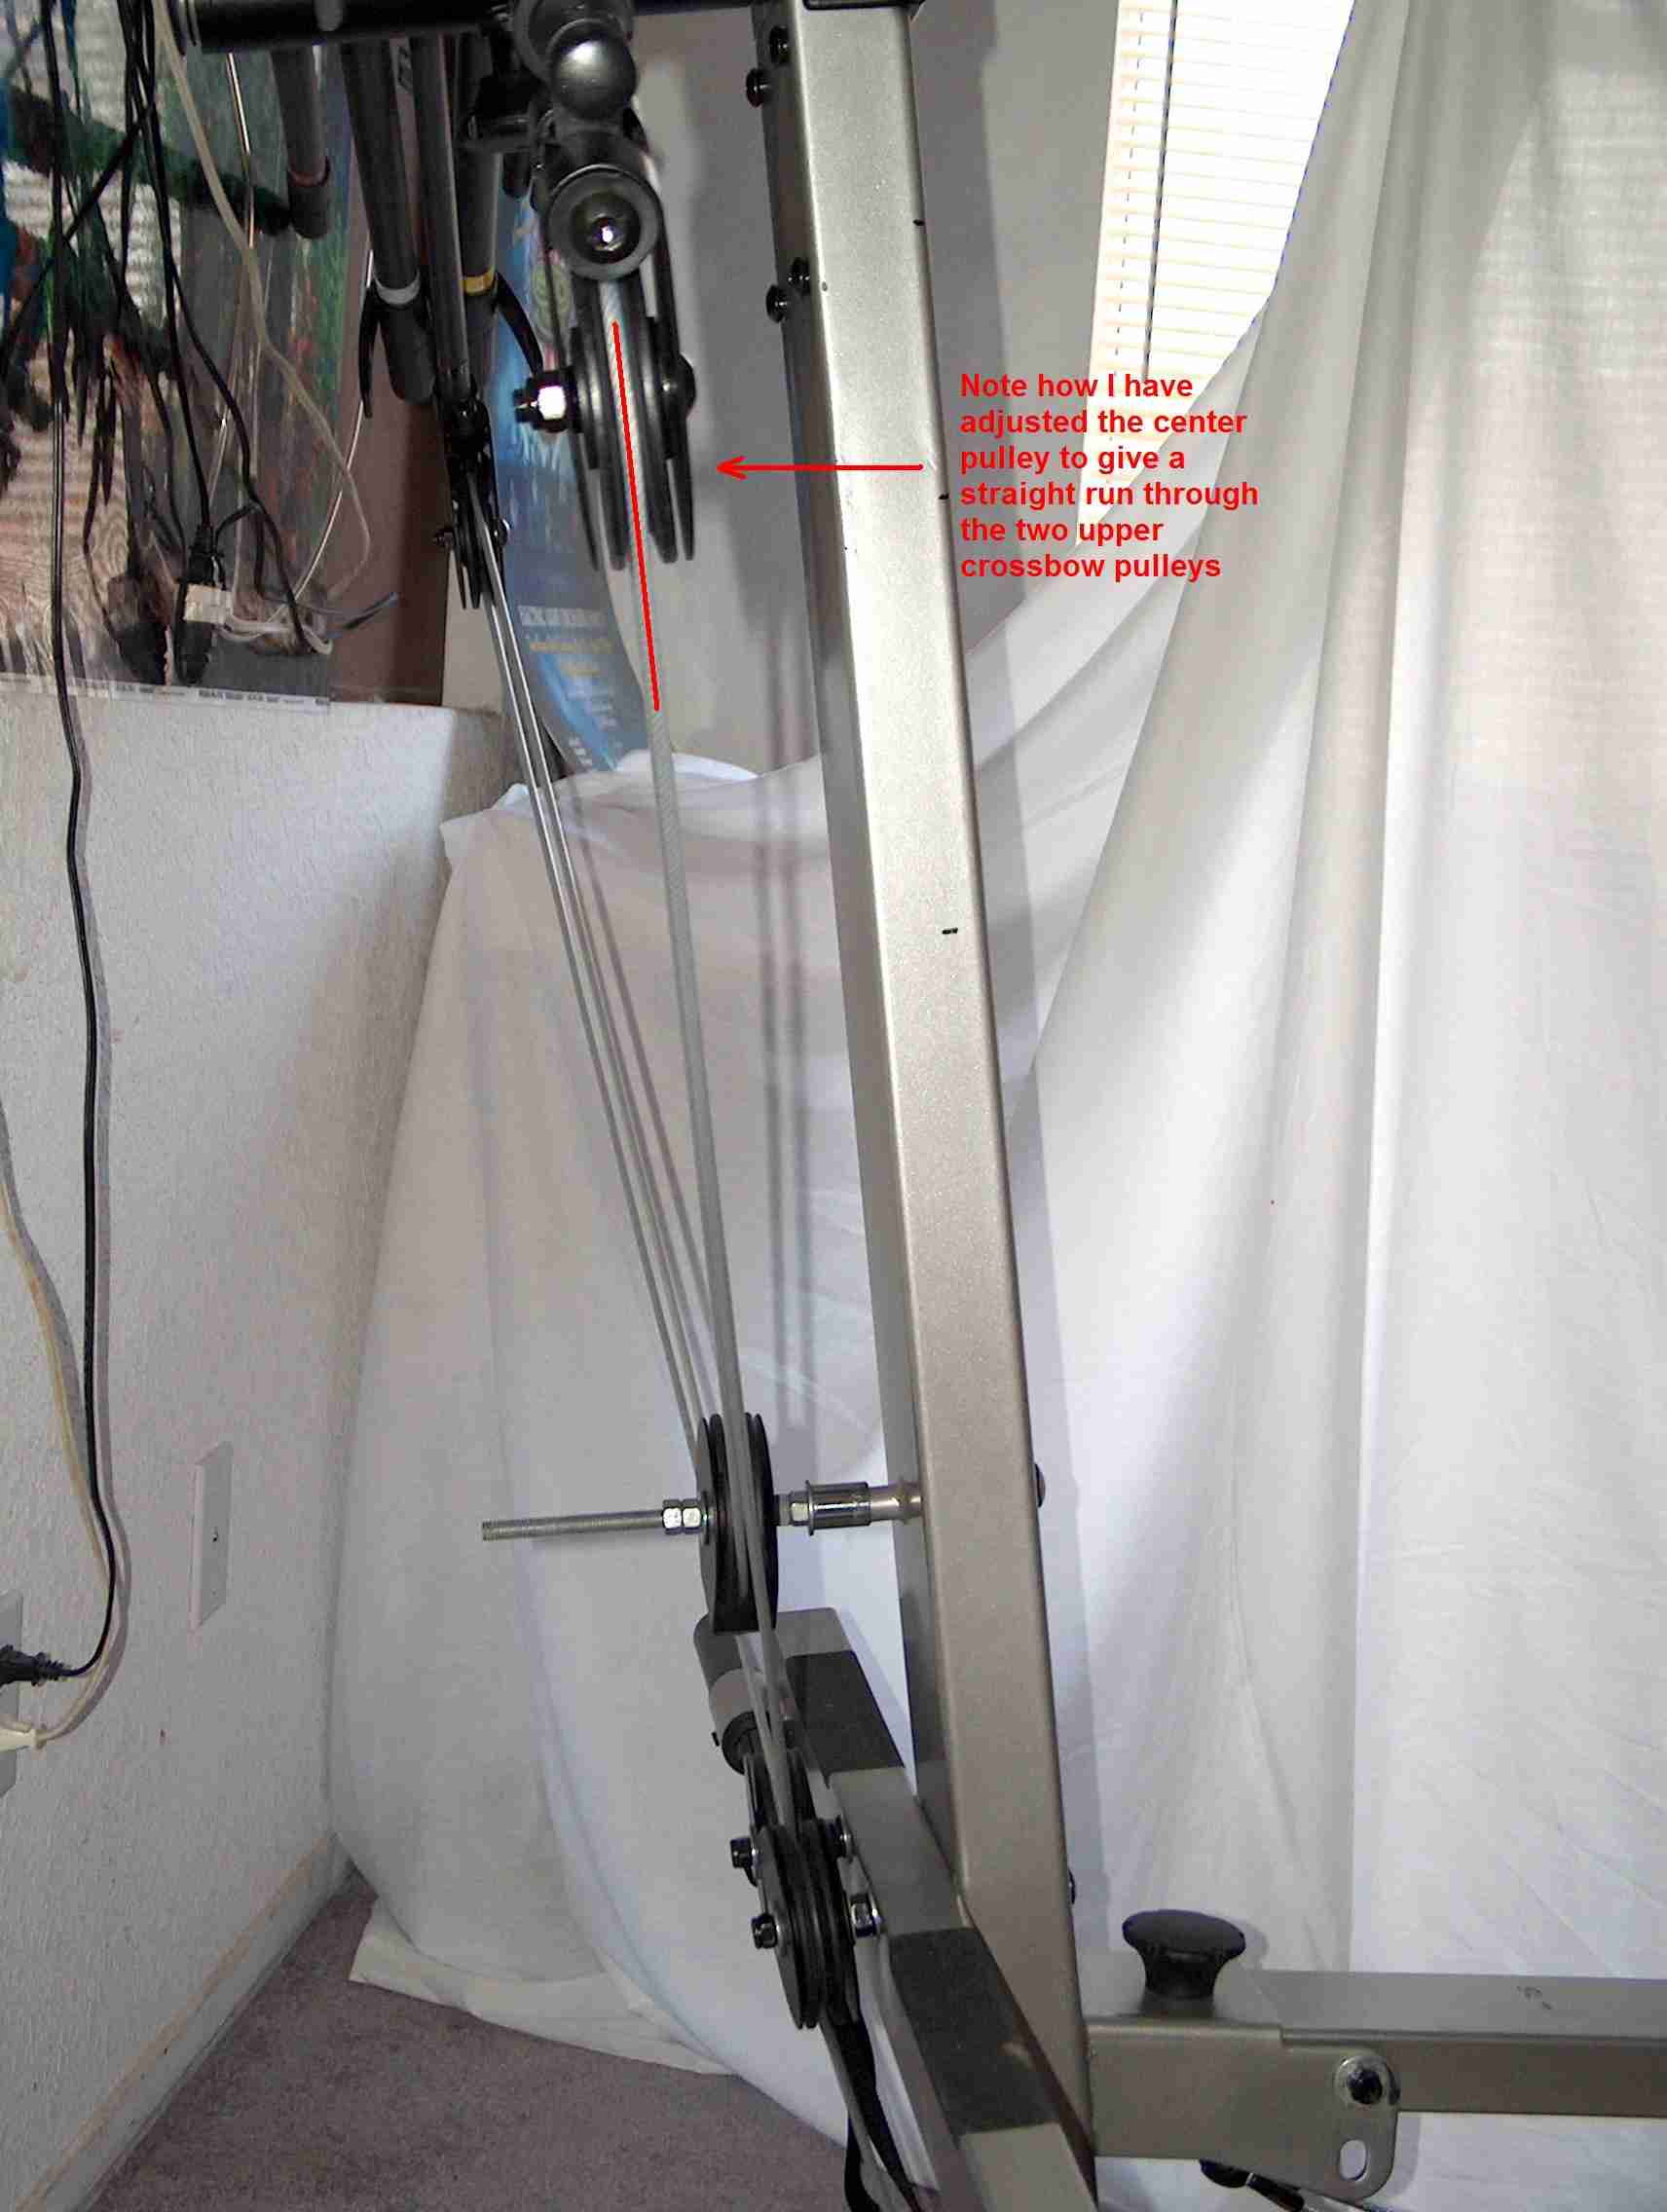
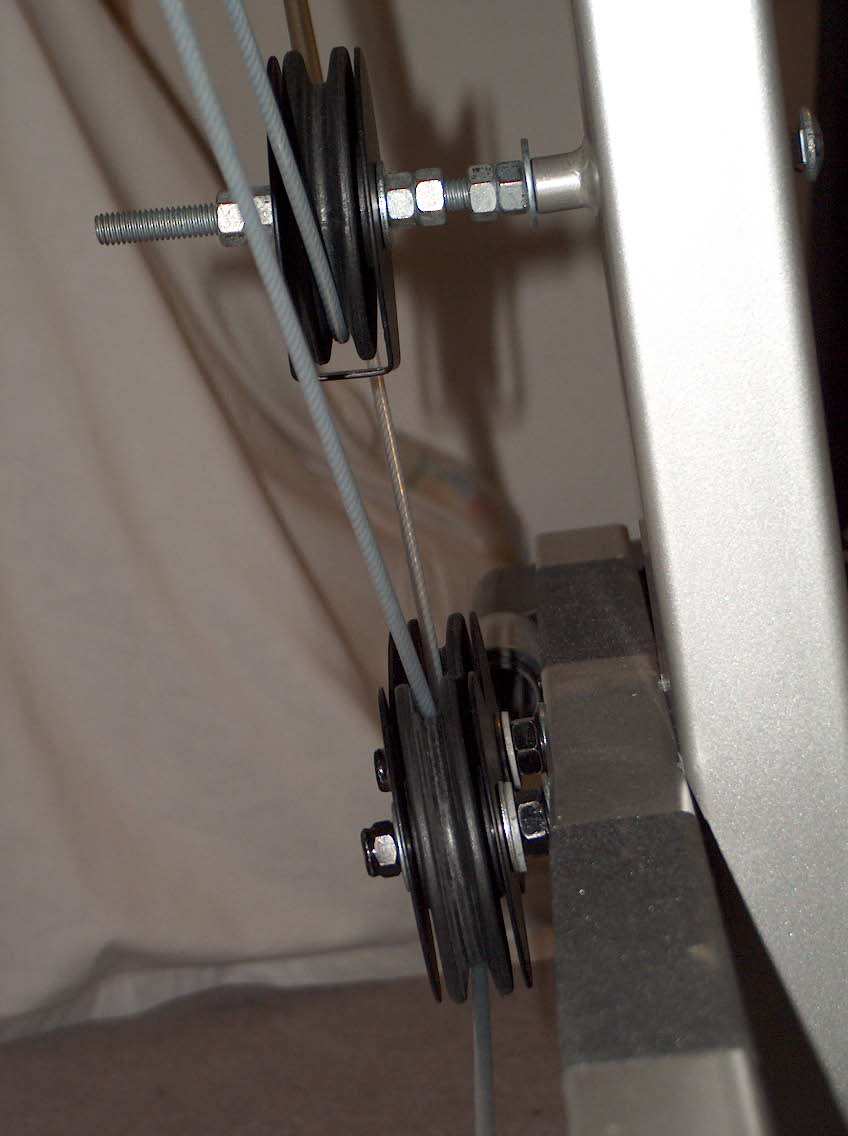 This picture is from the left side and shows the cable angles entering the
center pulleys. The two lower center pulleys are fixed in position and can not
be moved. I extended the upper center pulley so that it is in the same vertical
plane as the two lower center pulleys. Now the cable angles entering all the
center pulleys are identical.
This picture is from the left side and shows the cable angles entering the
center pulleys. The two lower center pulleys are fixed in position and can not
be moved. I extended the upper center pulley so that it is in the same vertical
plane as the two lower center pulleys. Now the cable angles entering all the
center pulleys are identical.
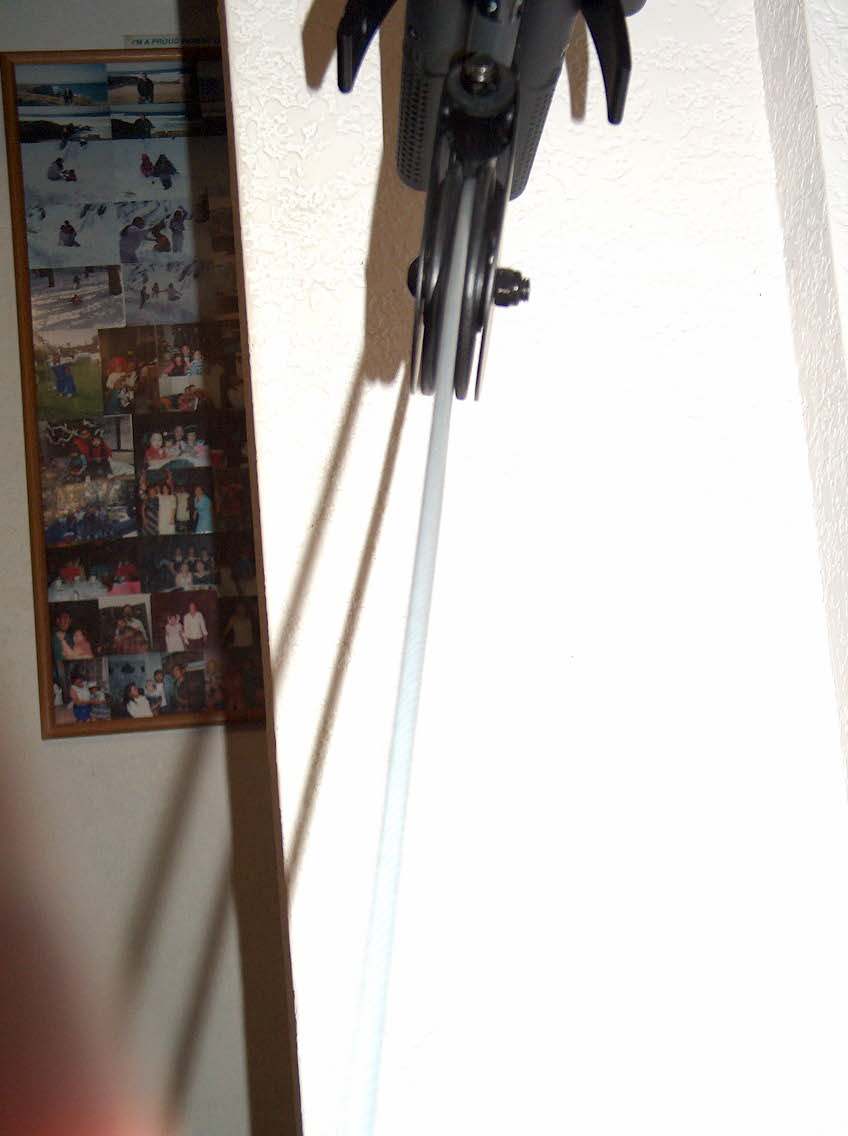
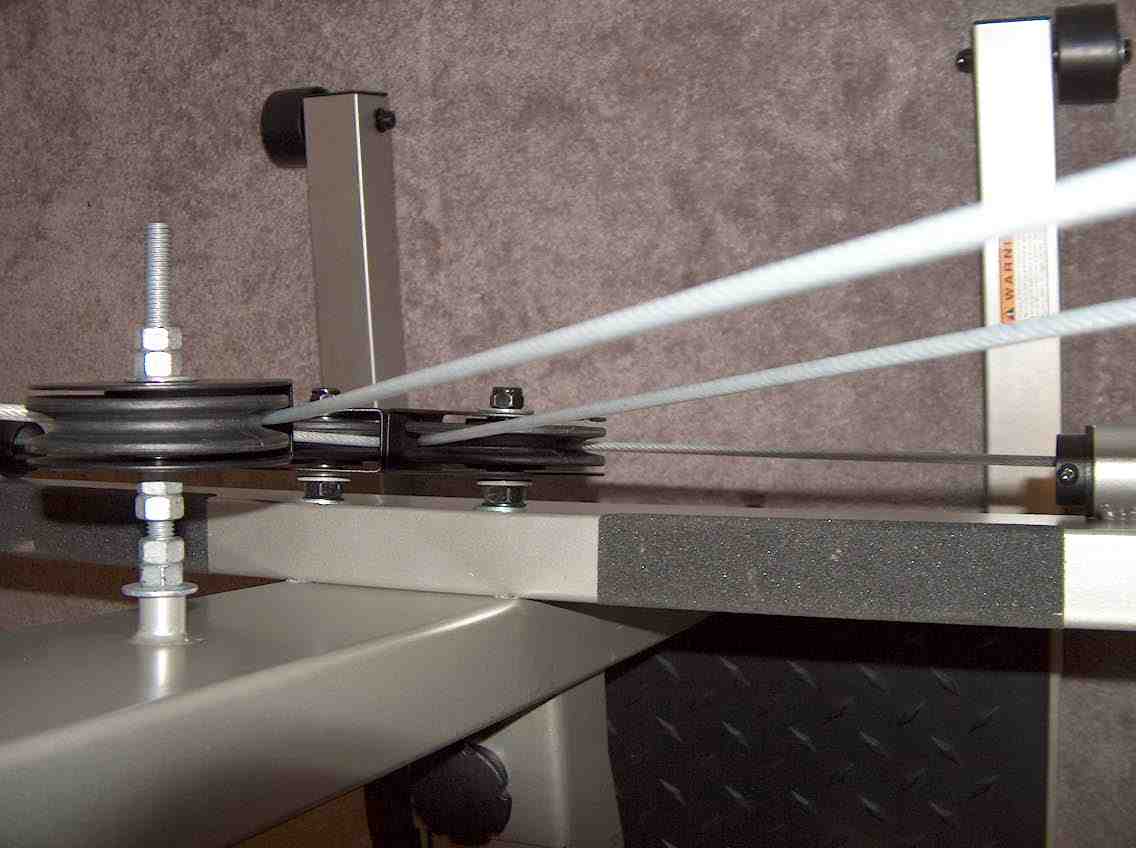
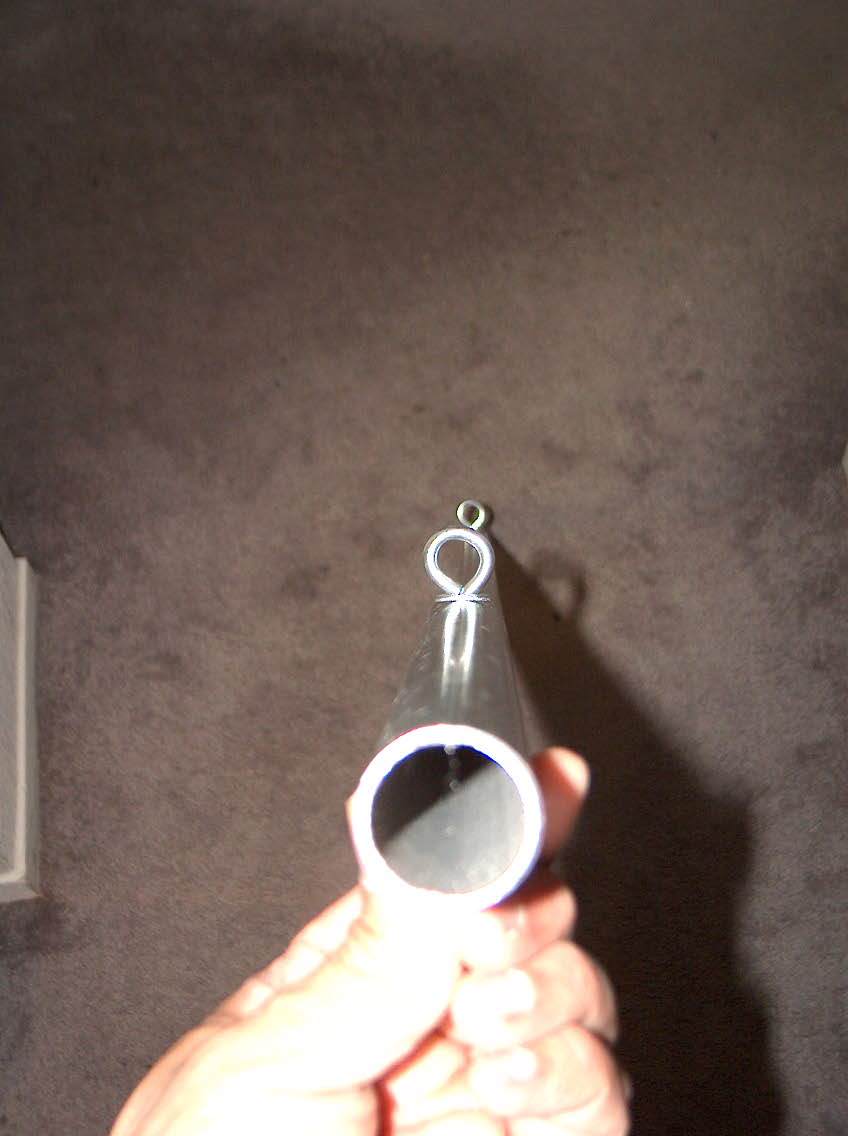
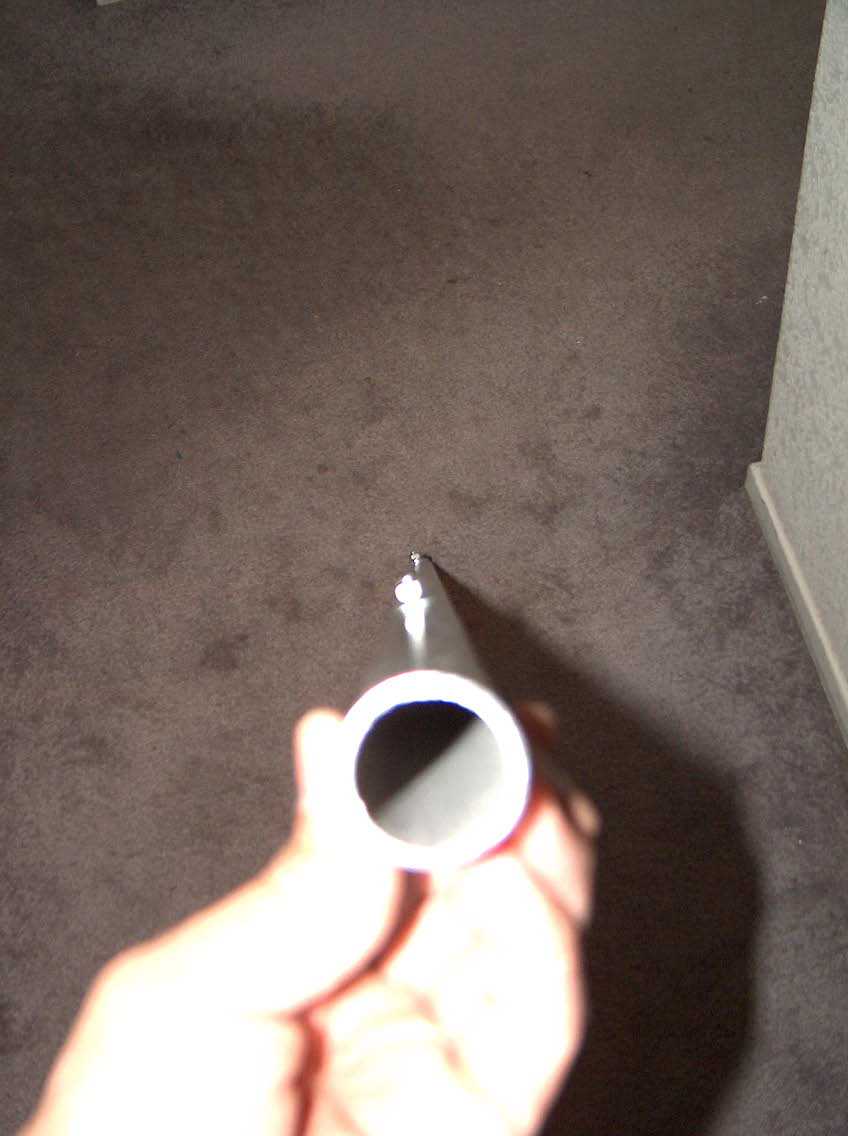
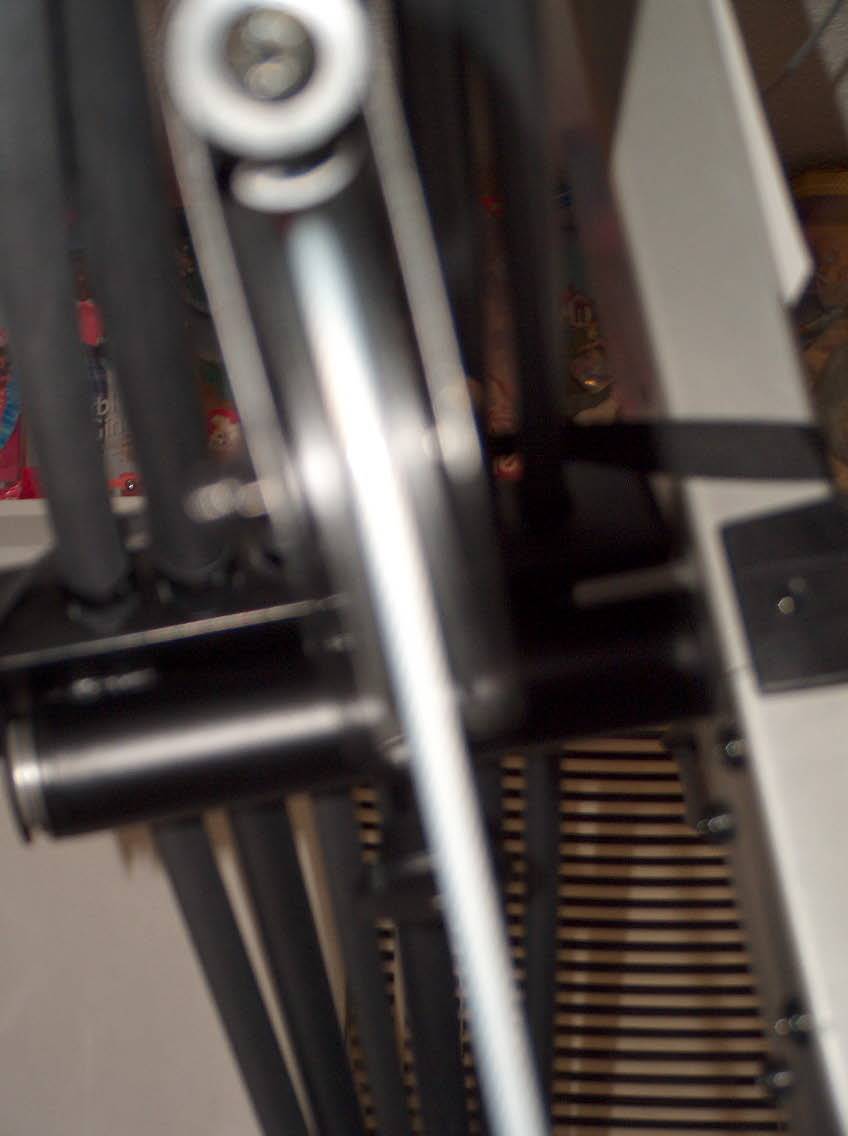 These two pictures are of the crossbow pulleys and shows how the cable enters
and leaves the pulleys. The cable travel is through these crossbow pulleys is
very important. Any binding at these pulleys may cause the cable to "jerk". The
cable angle is as close to zero degrees as possible. I eyeballed the angles
initially, but flexing the bows during normal workouts will change the cable
angles slightly.
These two pictures are of the crossbow pulleys and shows how the cable enters
and leaves the pulleys. The cable travel is through these crossbow pulleys is
very important. Any binding at these pulleys may cause the cable to "jerk". The
cable angle is as close to zero degrees as possible. I eyeballed the angles
initially, but flexing the bows during normal workouts will change the cable
angles slightly.
2. To alleviate all the rods rattling around, I taped each bow in the center with duct tape prior placing them in the holder and tightening it all down. Even the 10# and 20#, didn't see the need to remove bows to do a few off-machine exercises
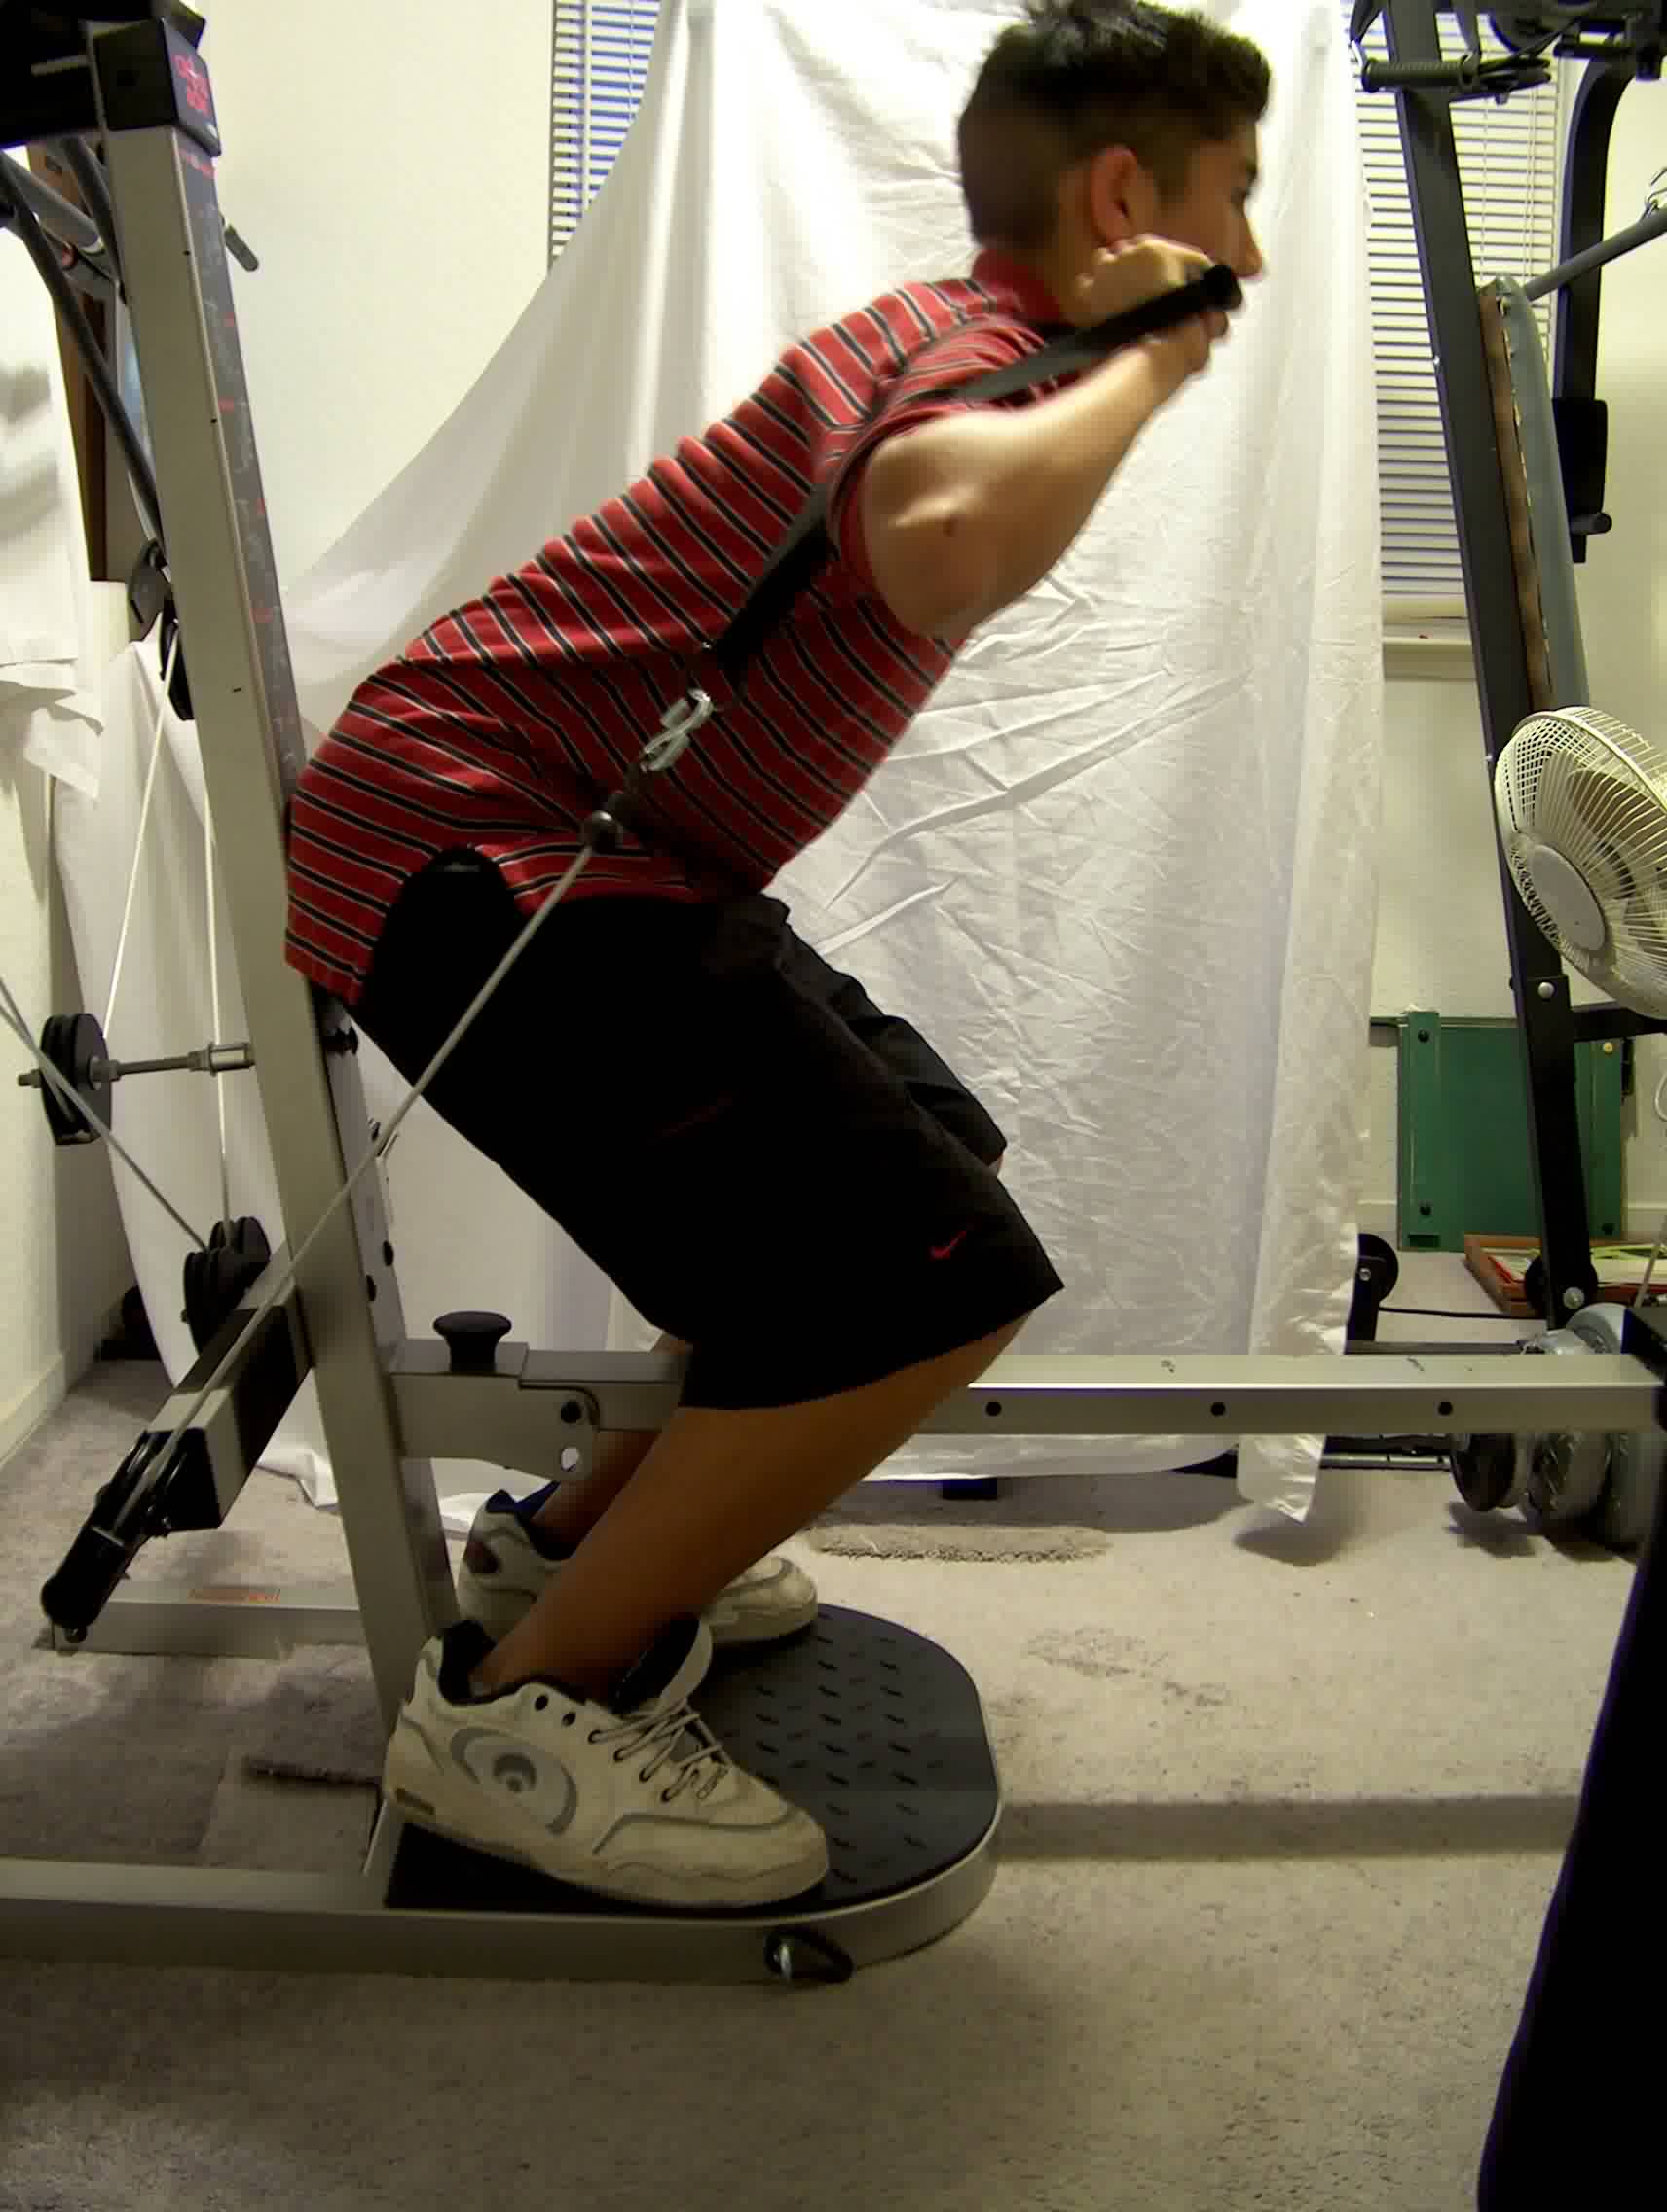
3. My squat set-up, inspired by the Bowflex Users Group. They had a good laugh with the recommended squat exercise that really didn't look effective and was just funny looking.
Original Squat Attachment Idea
 "Squat Idea #1"
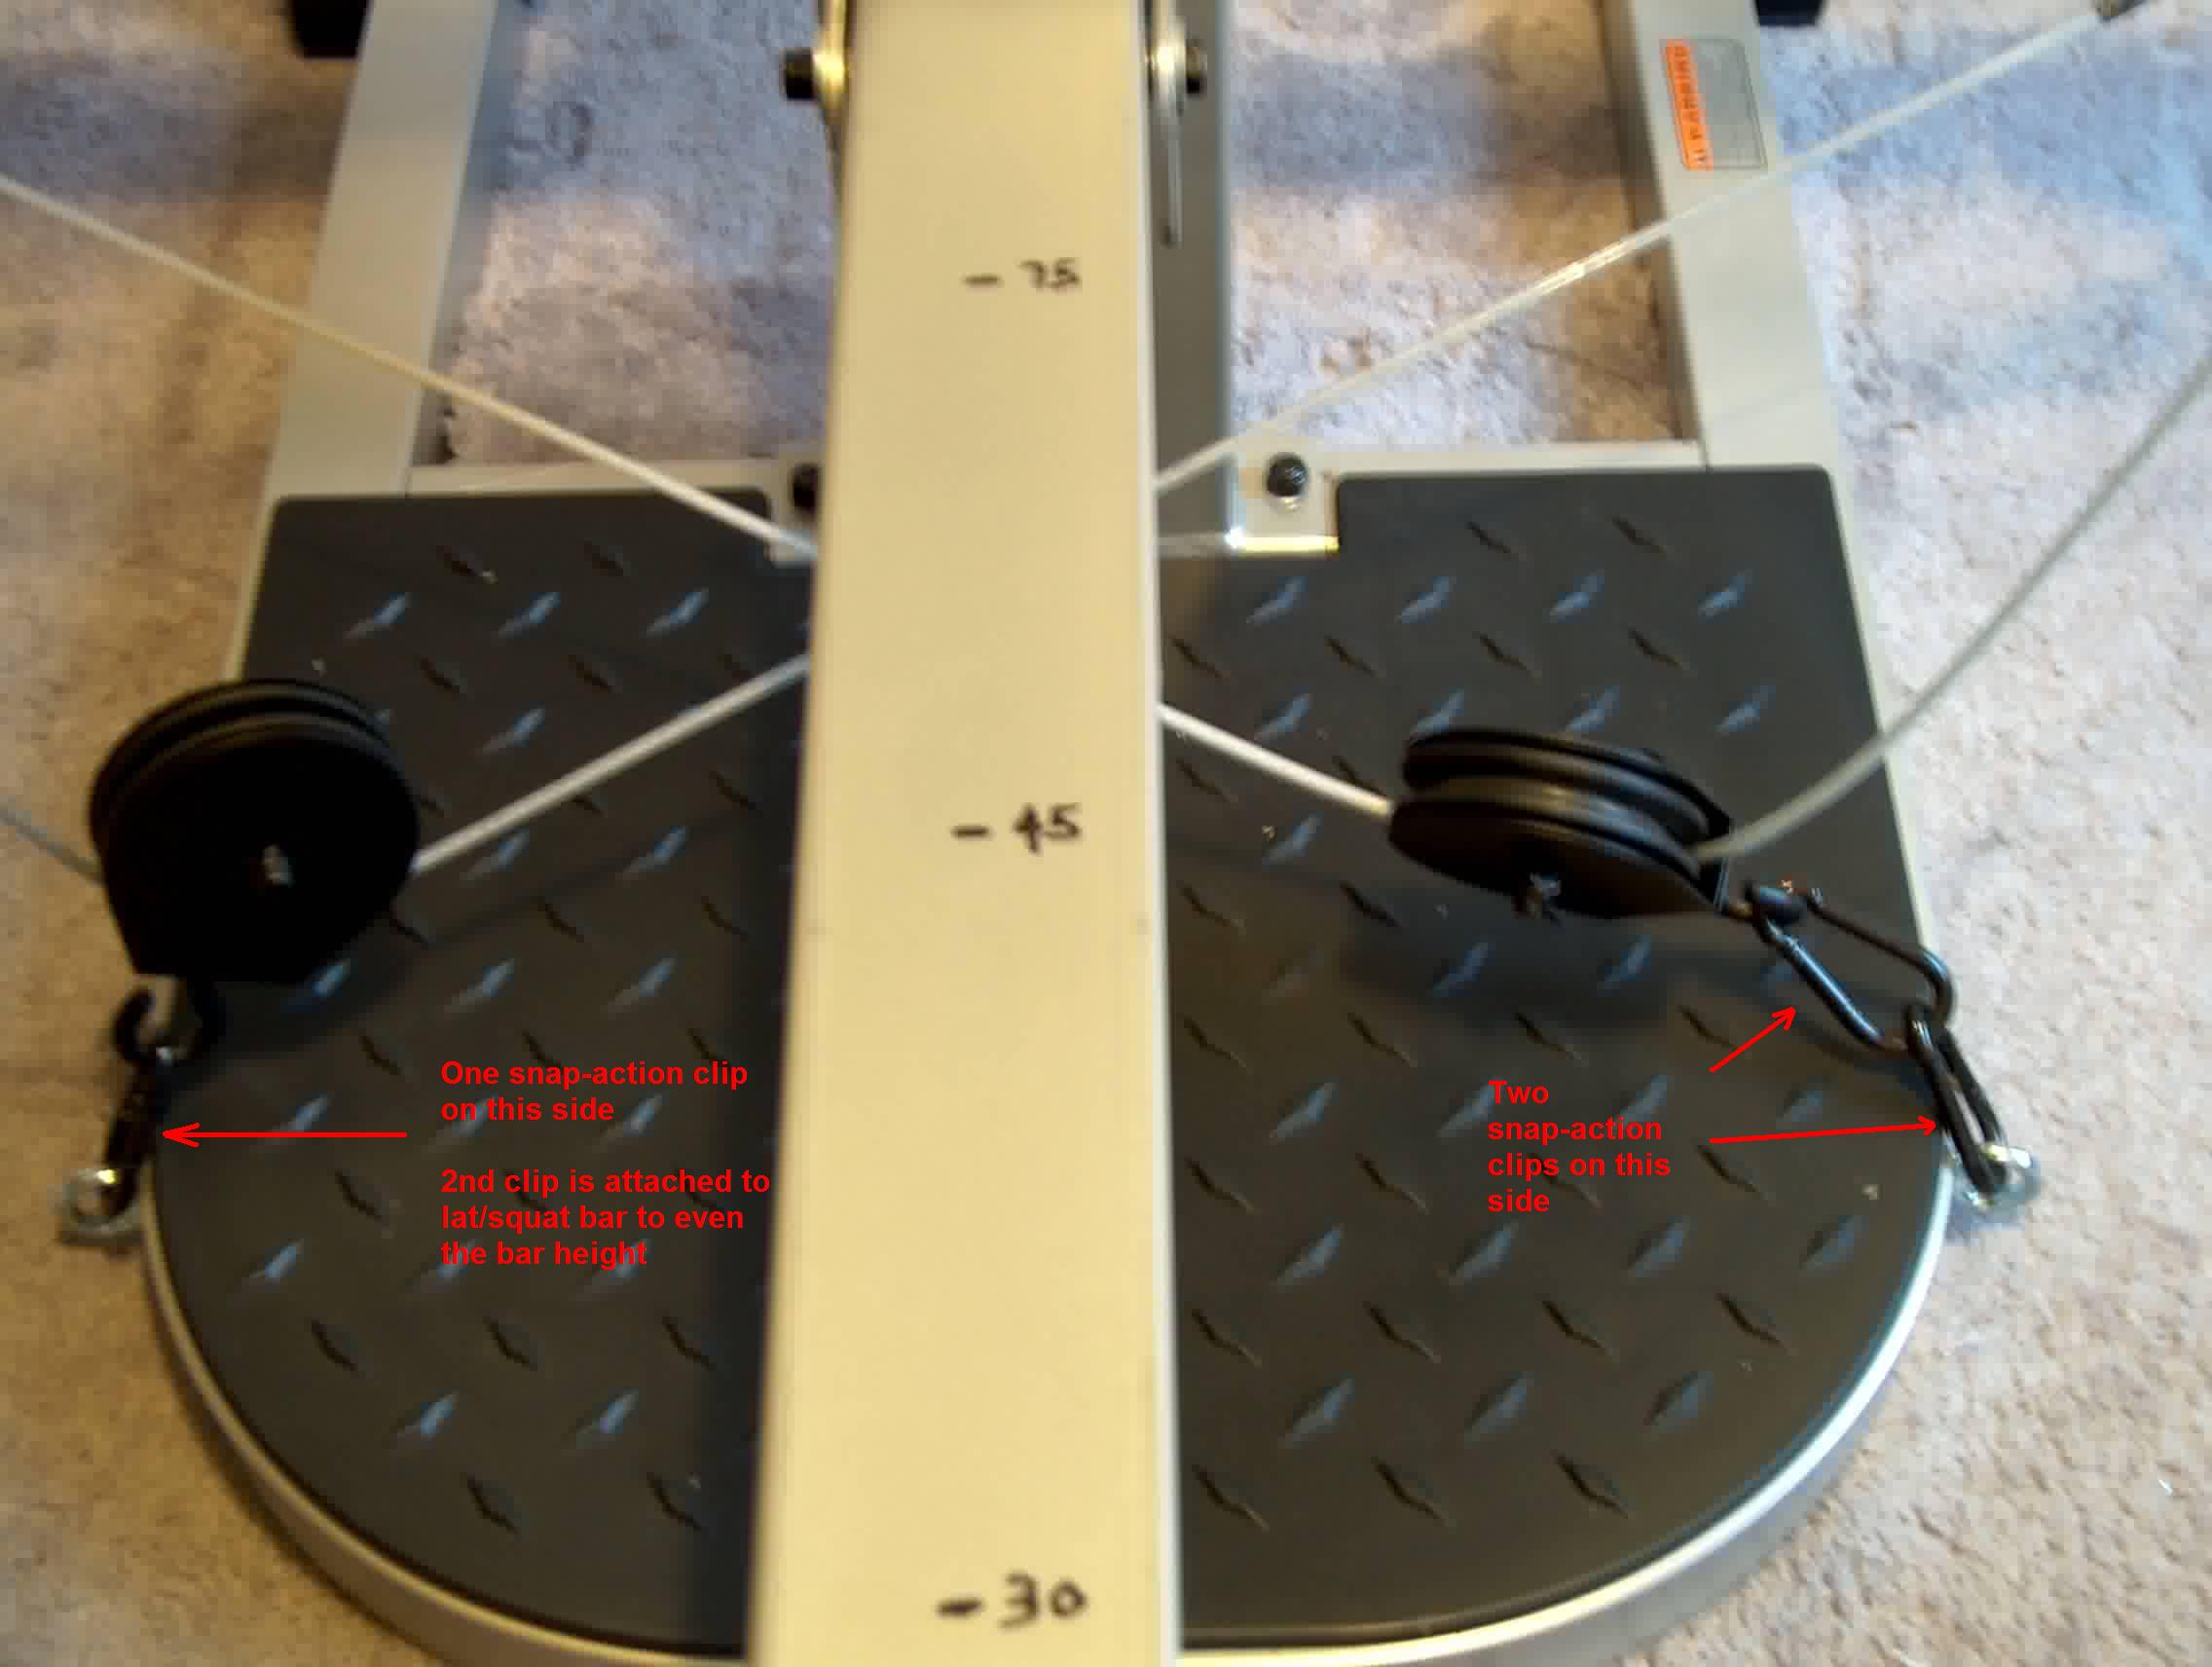
Put in two 5/16" 4in long eyebolts into the base near the front. Moving the upper pulleys and the already-connected cables to the new eyebolts gives the user a more natural way to do squats.
I used the upper pulleys and the short cables for this mod. I had to criss-cross the cables in order to get enough length and then being 5'8" I had problems with running the cables to their stops when fully extended. In the "Squat 1" picture, you can see that I used 2 snap-action clips on the right side and one on the left. This is to give the right side a little more height and helps the cables from rubbing as they cross. This makes the lat/squat bar lop-sided, but this is corrected by adding the other snap-action clip to the left side of the lat/squat bar
 #1 son, Steven showing original squat form
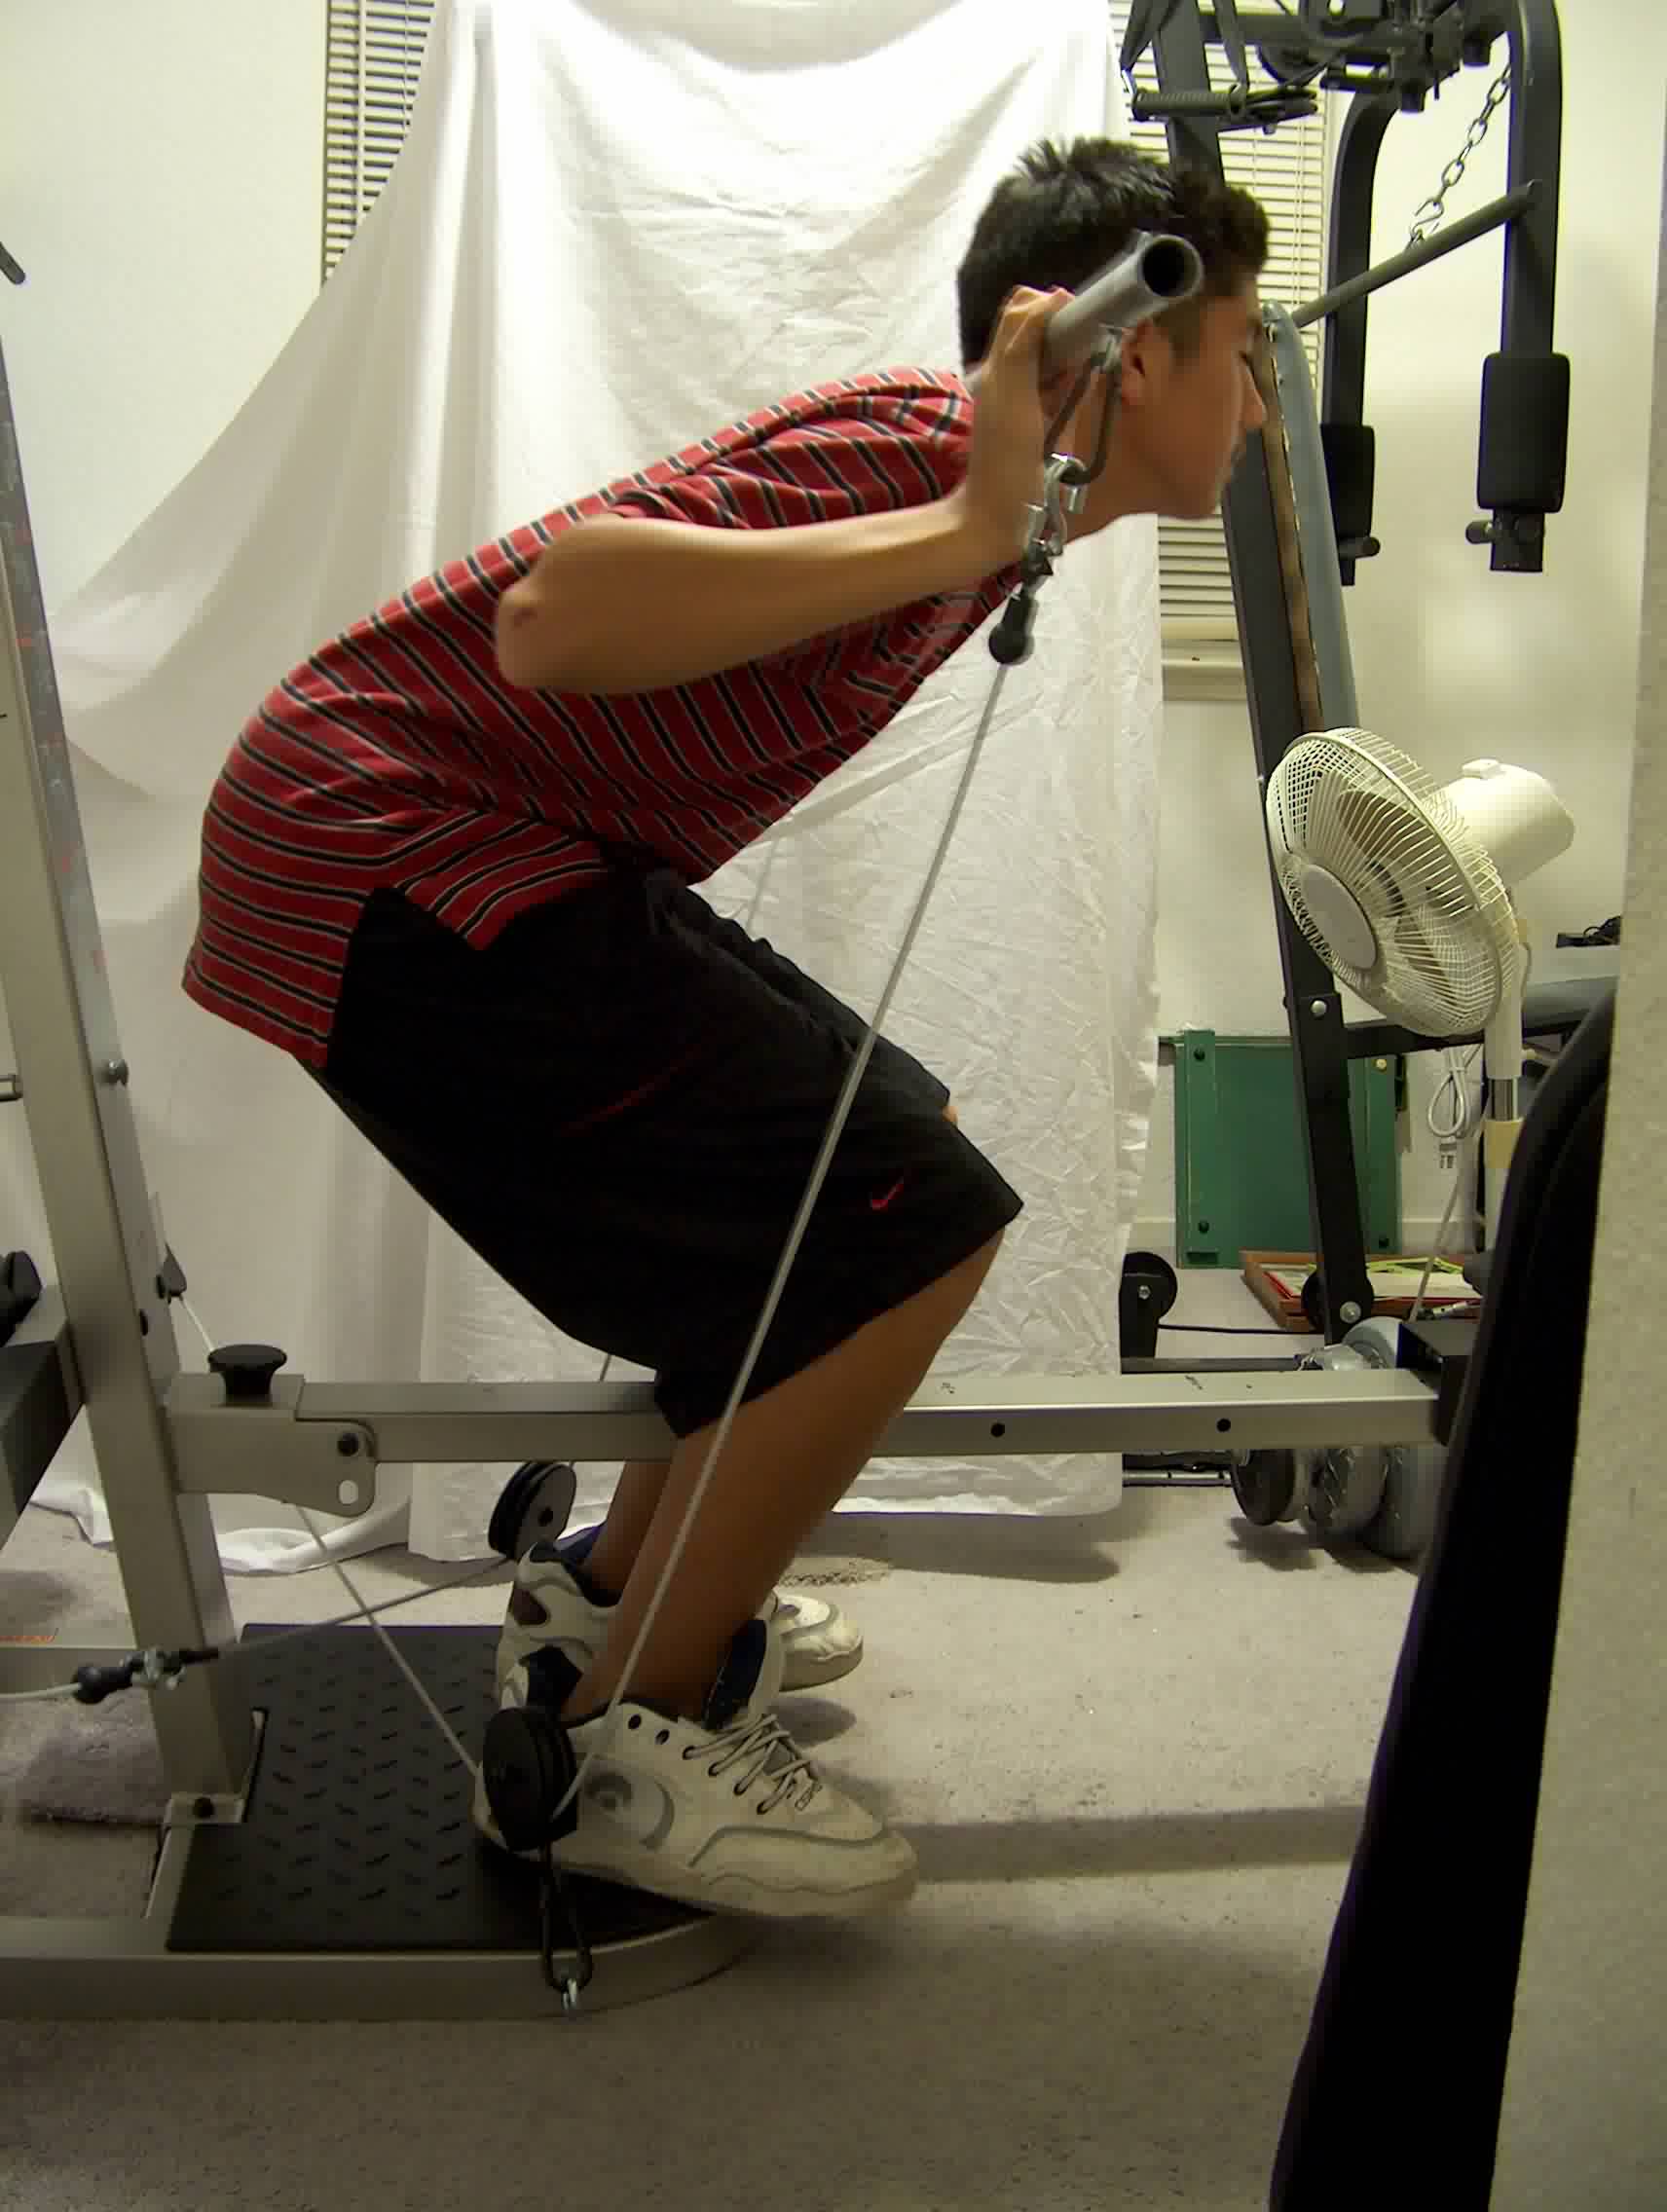 Steven showing squat with new set-up. Note the cable angle, It does straighten
up some when fully extended.
Steven showing squat with new set-up. Note the cable angle, It does straighten
up some when fully extended.
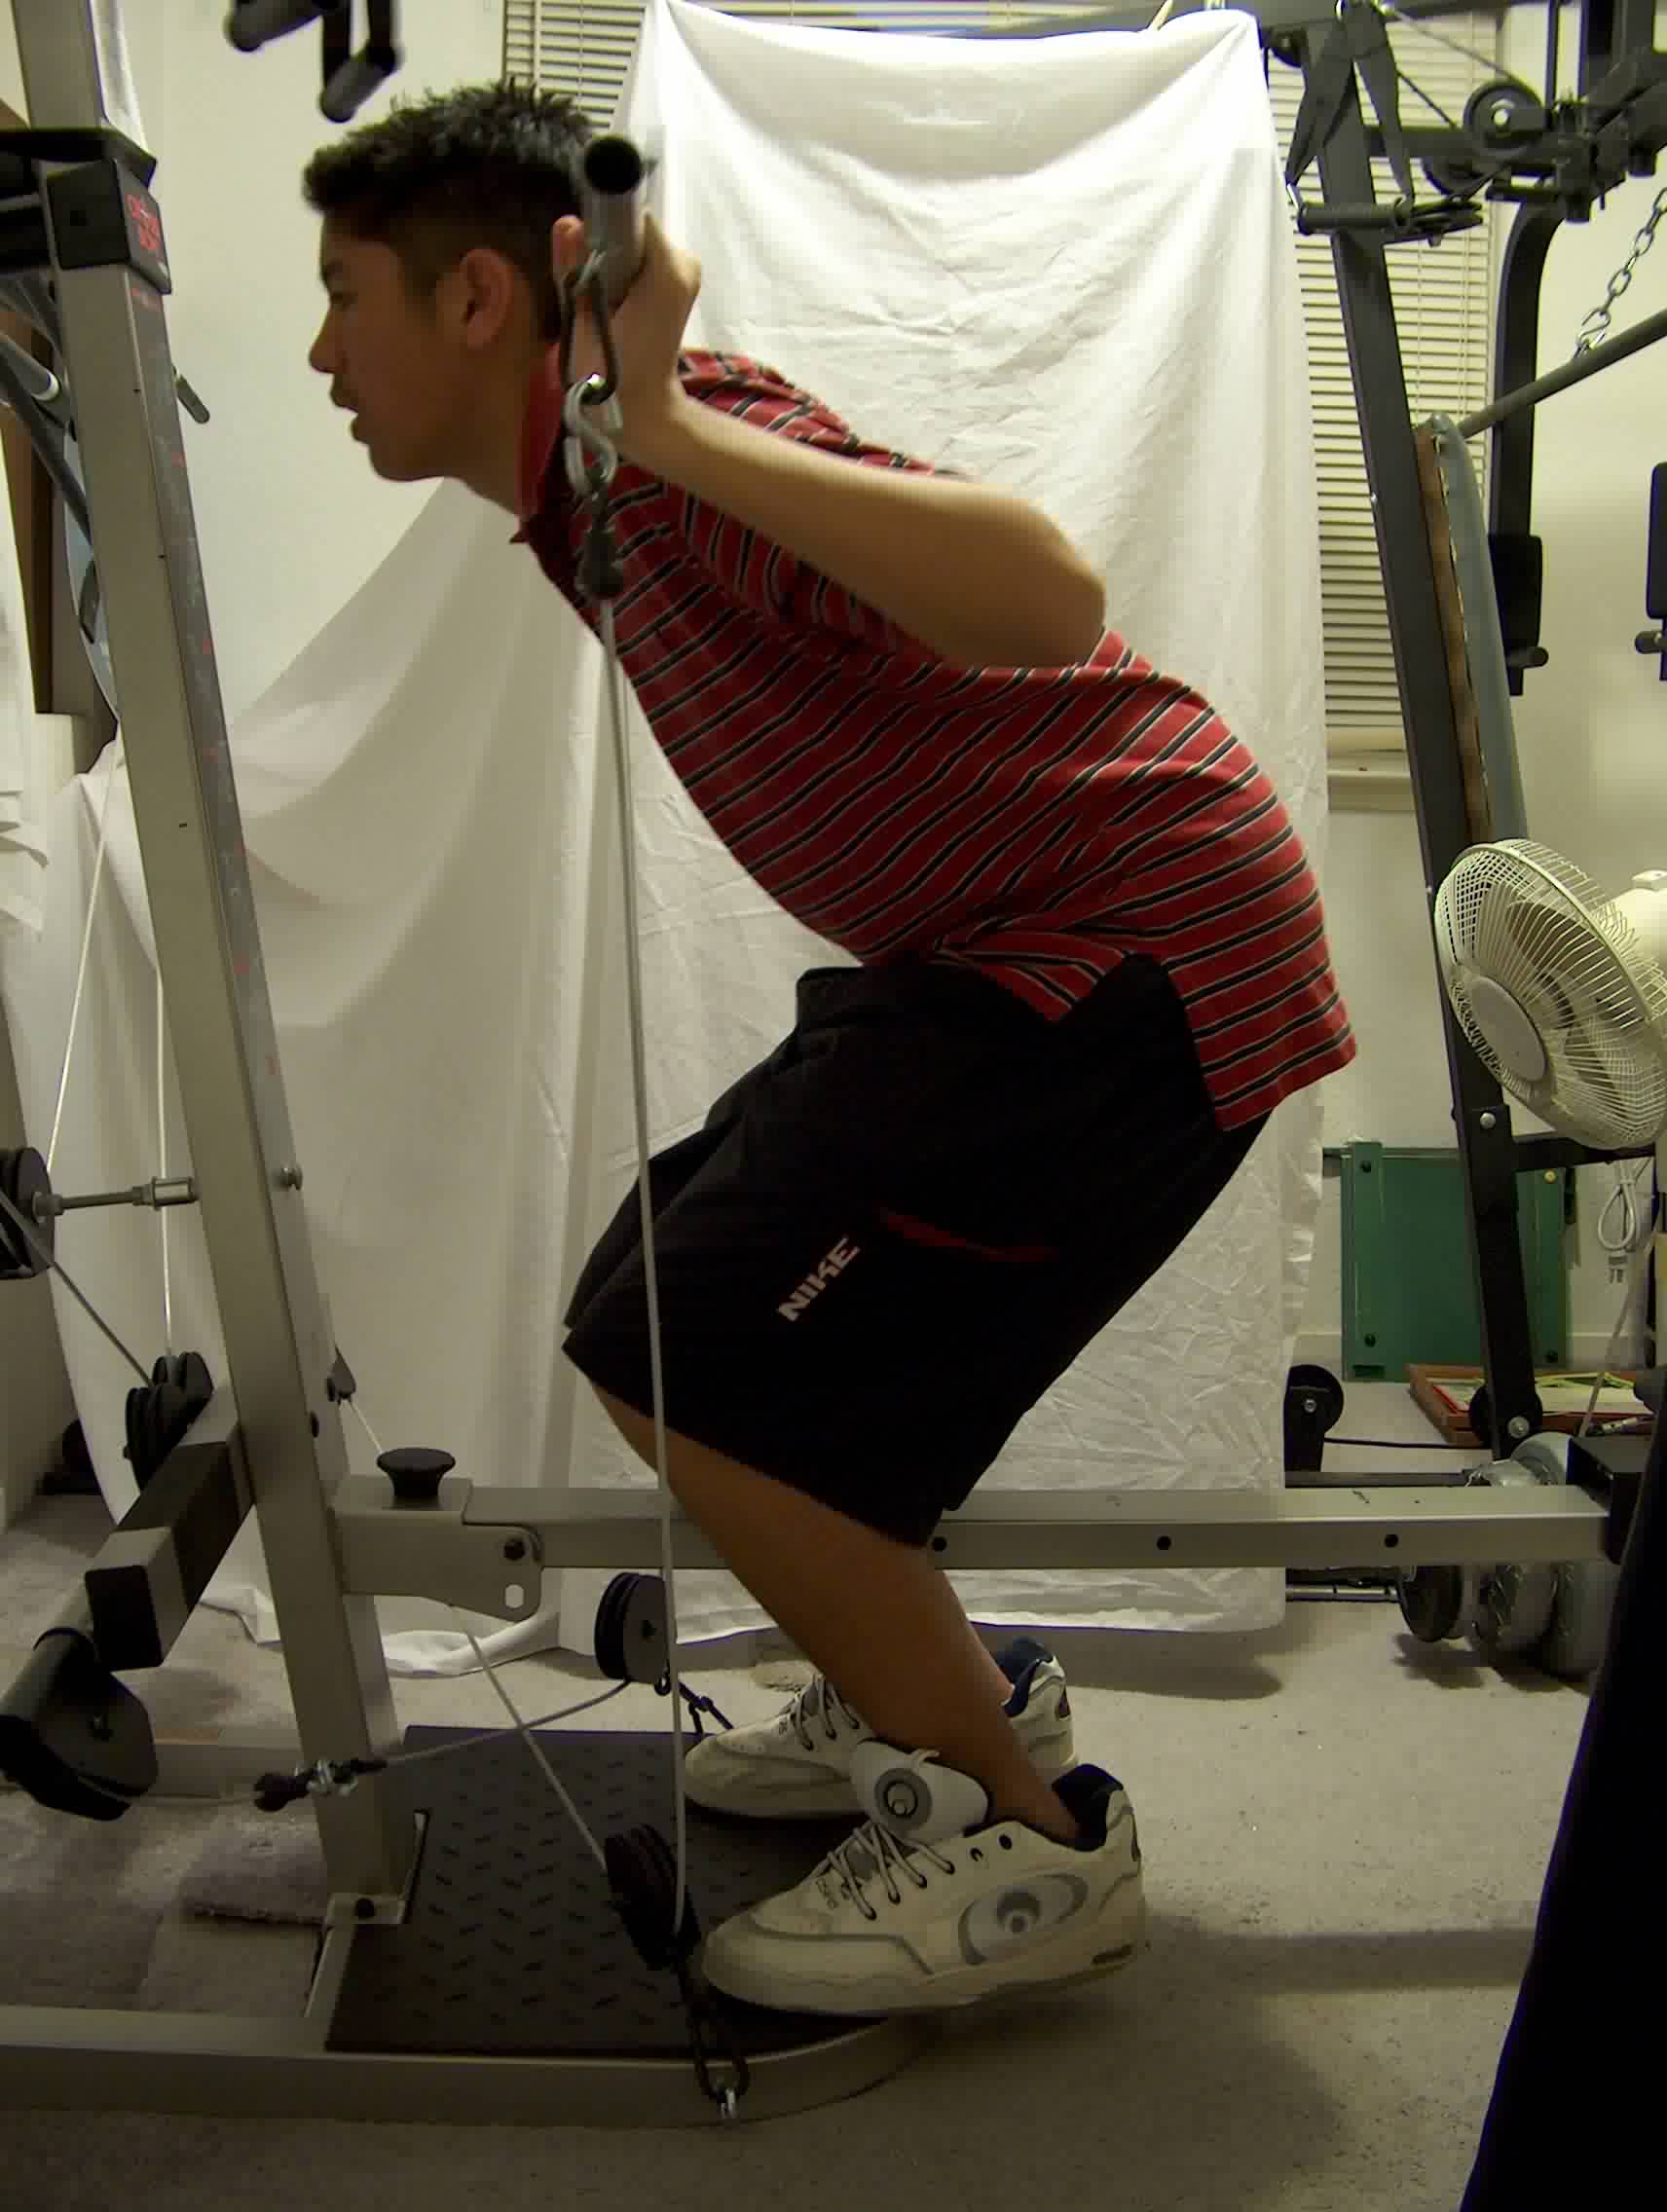 Steven doing squat facing the tower. The cable angle is almost vertical. I have
done them this way also and the cable stays vertical throughout the exercise.
Looks like this may be the way to do squats.
Steven doing squat facing the tower. The cable angle is almost vertical. I have
done them this way also and the cable stays vertical throughout the exercise.
Looks like this may be the way to do squats.
This new squat set-up is also good for military press, but starts out too high to be of any value when doing bent-over rows or bench press.
Squat Idea #2
 "Squat 2"
 "Attaching the Squat 2 idea"
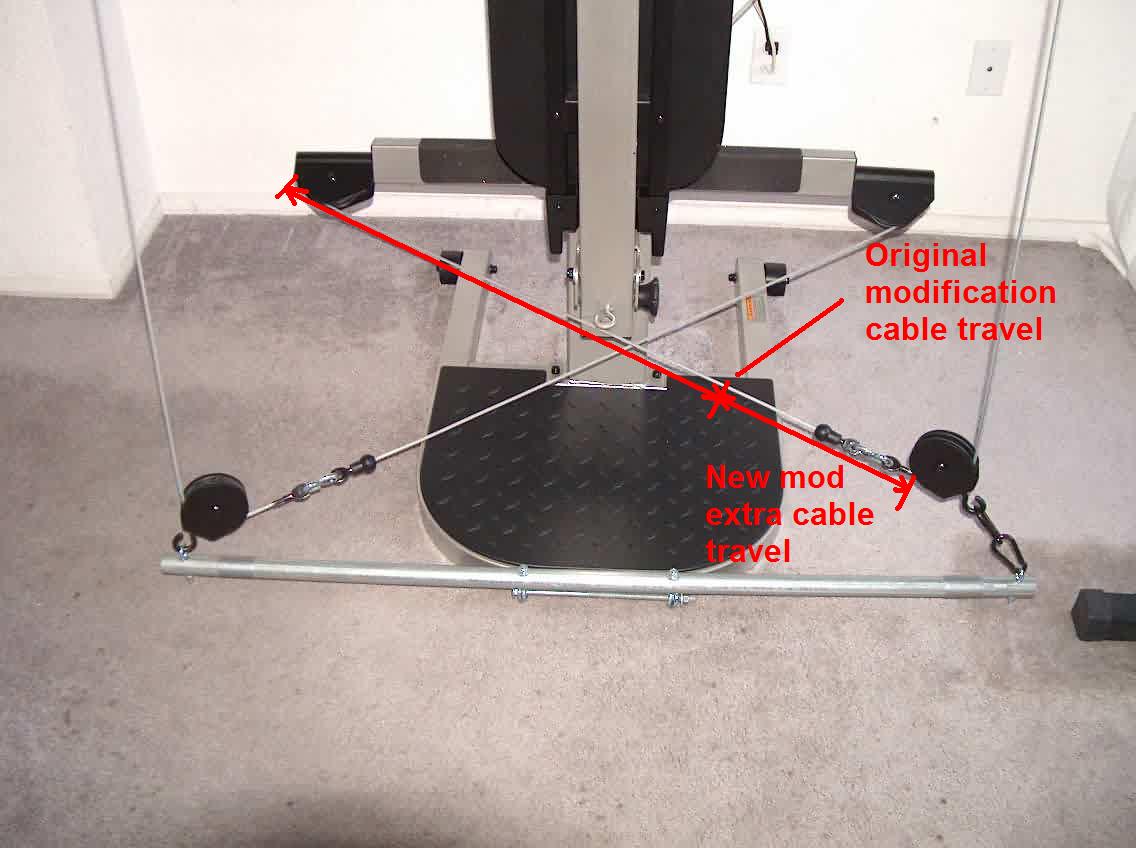
As noted before, being 5'8", I could run the cable into the stops and wondered if taller people would be able to use the original squat modification. By moving the eyebolts to the front of the base and attaching a 4 ft, 1" conduit, I was able to move the pulleys out further allowing more cable travel. I used the two snap action clips on the right side to allow the right pulley to sit higher and help the cables from rubbing together when they cross. I used a 10" 3/8" carriage bolt through the eyebolts to attach the whole thing.
This squat set-up has a range of about 26" to 53", roughly 27", in order to move that range up, I would use a short piece of chain from the cable end to the lat /squat bar. I would think that 1 ft of chain would allow more than enough adjustment. In order not to slow down the circuit training benefits, I lay out the squat attachment and pulleys beforehand
Squat Idea #3
 Basic Layout
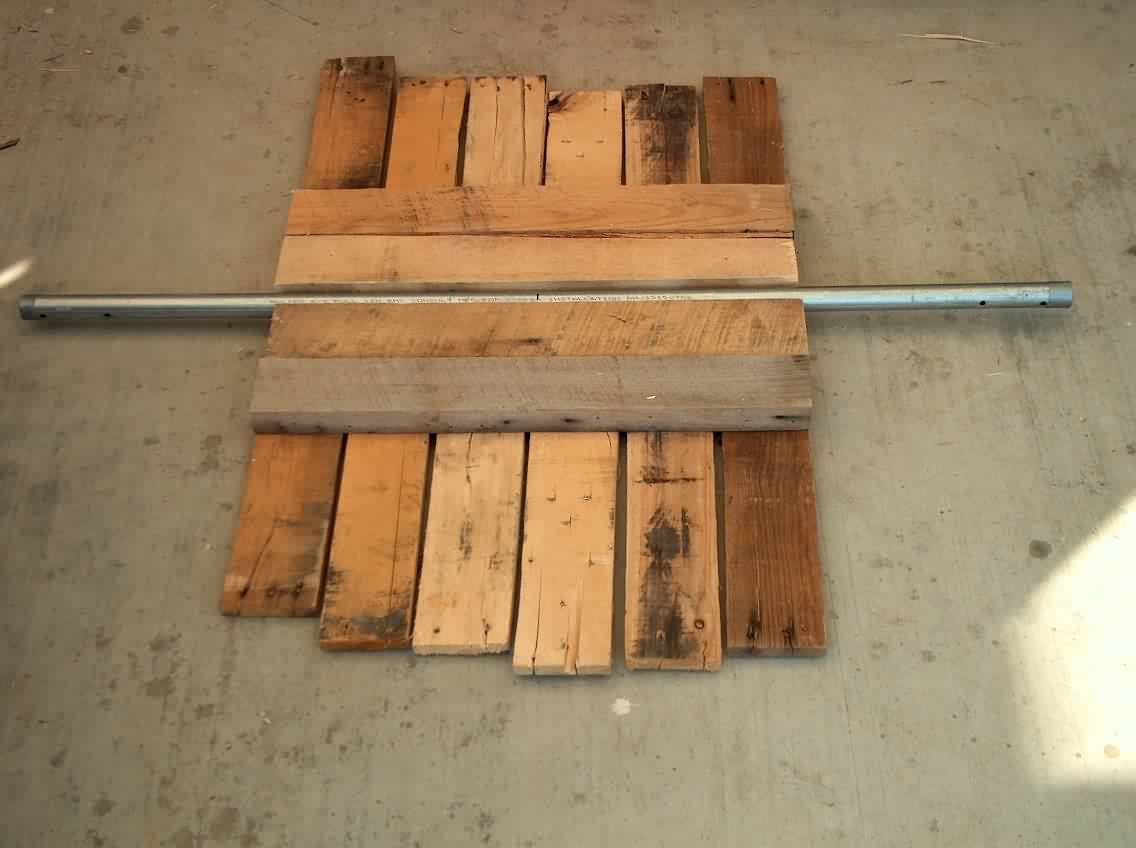 Laying out the top
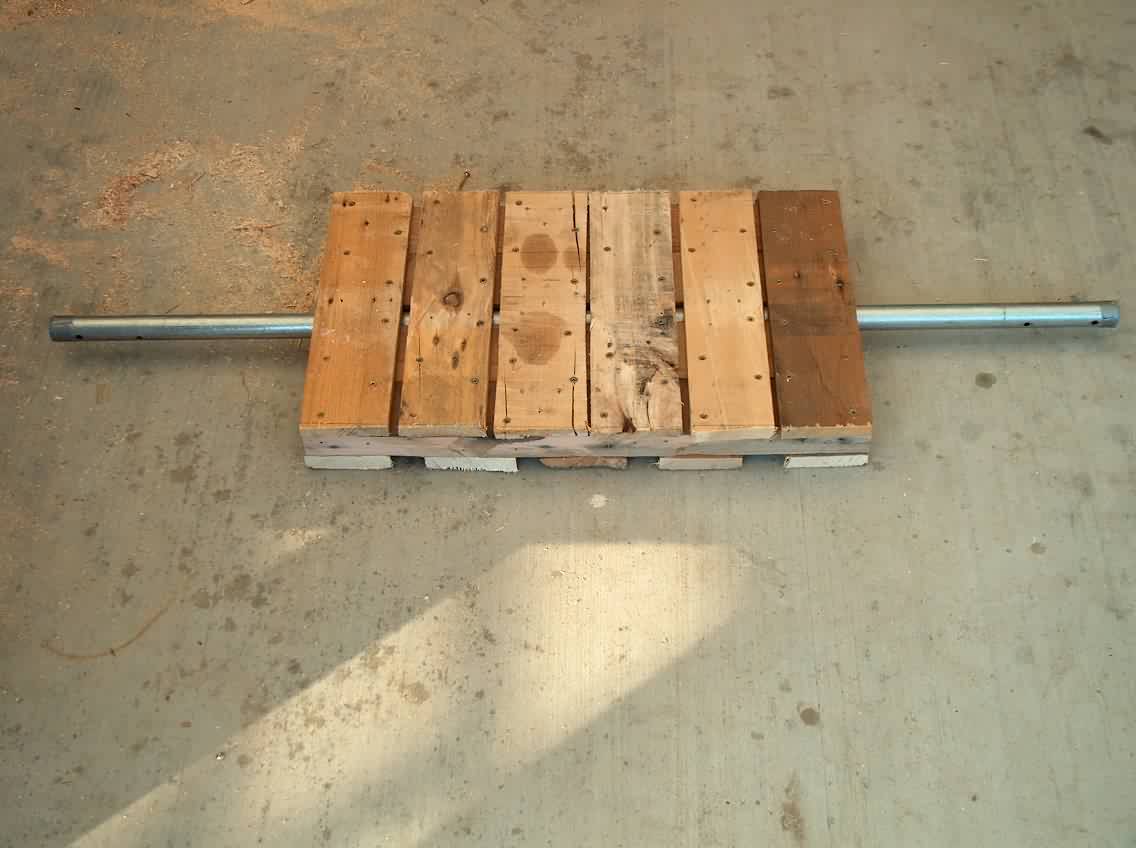 Finished Squat Platform
 Squat Platform - Ready for use
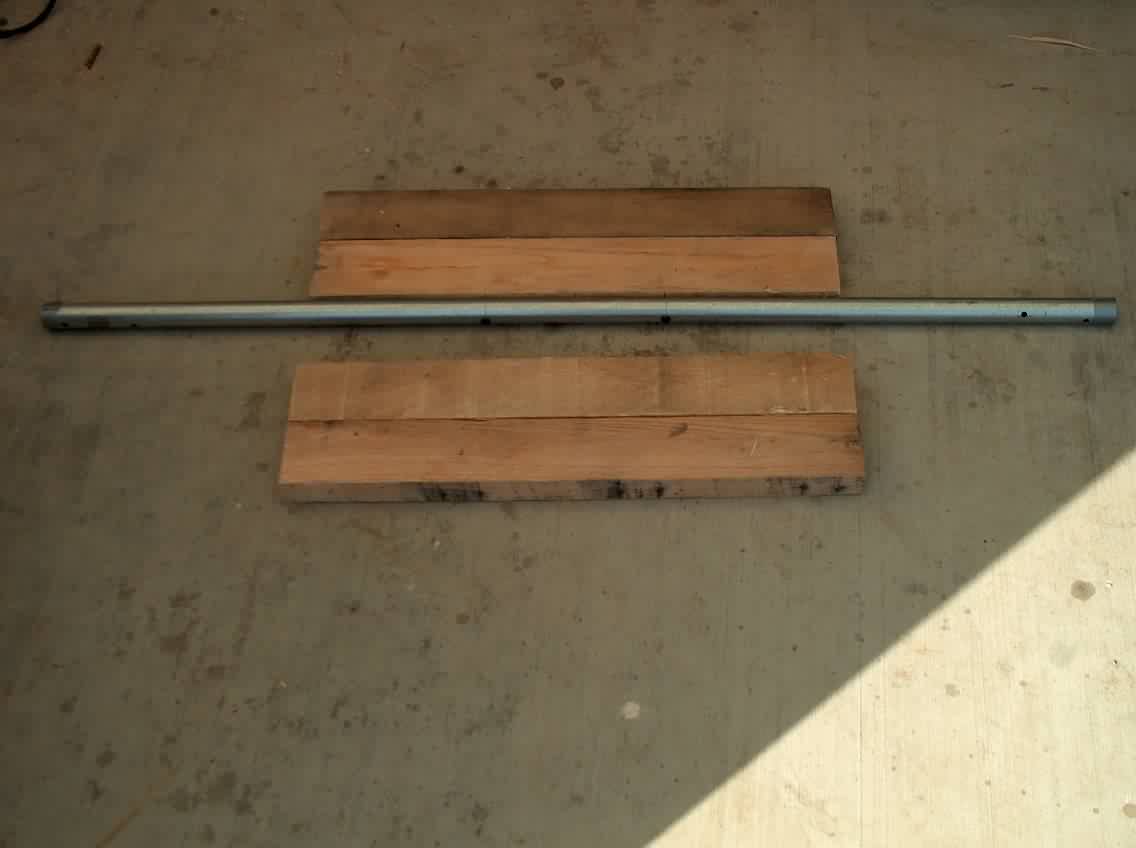
The third squat idea is a very basic adaptation of the Bowflex Squat Platform which sells for about $150. Mine looks very rough because I used the wood from the pallet that held our new treadmill. I used the conduit from the previous squat ideas.
This squat idea has some inherent problems. There is the problem of fastening it to the sliding rail or foot. The light weight causes the platform to rise up with the squat bar. Making the platform heavier would introduce more problems with moving and storing the platform.
It is very difficult to do the Military Press. Sitting on the seat, there is no way to get enough foot pressure on the platform to prevent it from rising up. I have tried to use the platform for a week and for the record, I will be reverting back to Squat Idea #2
Note: We bought the Smooth 5.0P treadmill with the $1000, we saved by buying the Crossbow instead of the Bowflex.
4. Home Depot Lat Bar - around $5.00 + tax
I used 1" electrical conduit for the squat attachment and the lat / squat bar. A 10ft length of conduit was $3.84 at Home Depot. I cut off a 4ft piece for the #2 squat idea attachment and 5ft for the lat / squat bar. The upper pulleys are set 3ft apart so I used that measurement on the lat / squat bar starting 1ft from each end for "handles". I used 1/4" size eyebolts that are 2 1/2" long. They cost $.70 for two w/nuts and then I spent another $.25 or so for assorted washers and lock washers. Sight down the pipe to line up the eyebolts.
 The eyebolts really do line up. The camera was off angle slightly. Sorry!
I had a 1ft piece left over and made a "T" bar, (Triceps bar), just put an eyebolt in the center and attached a short piece of chain.
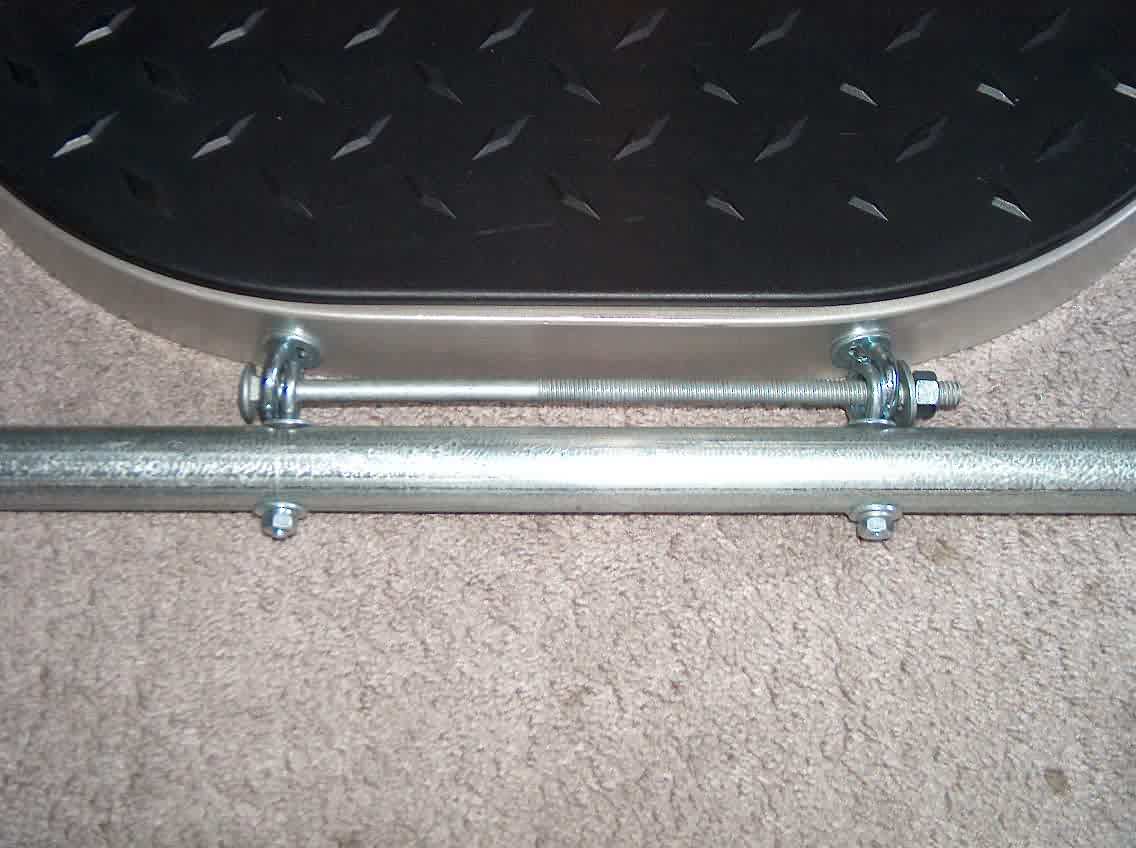
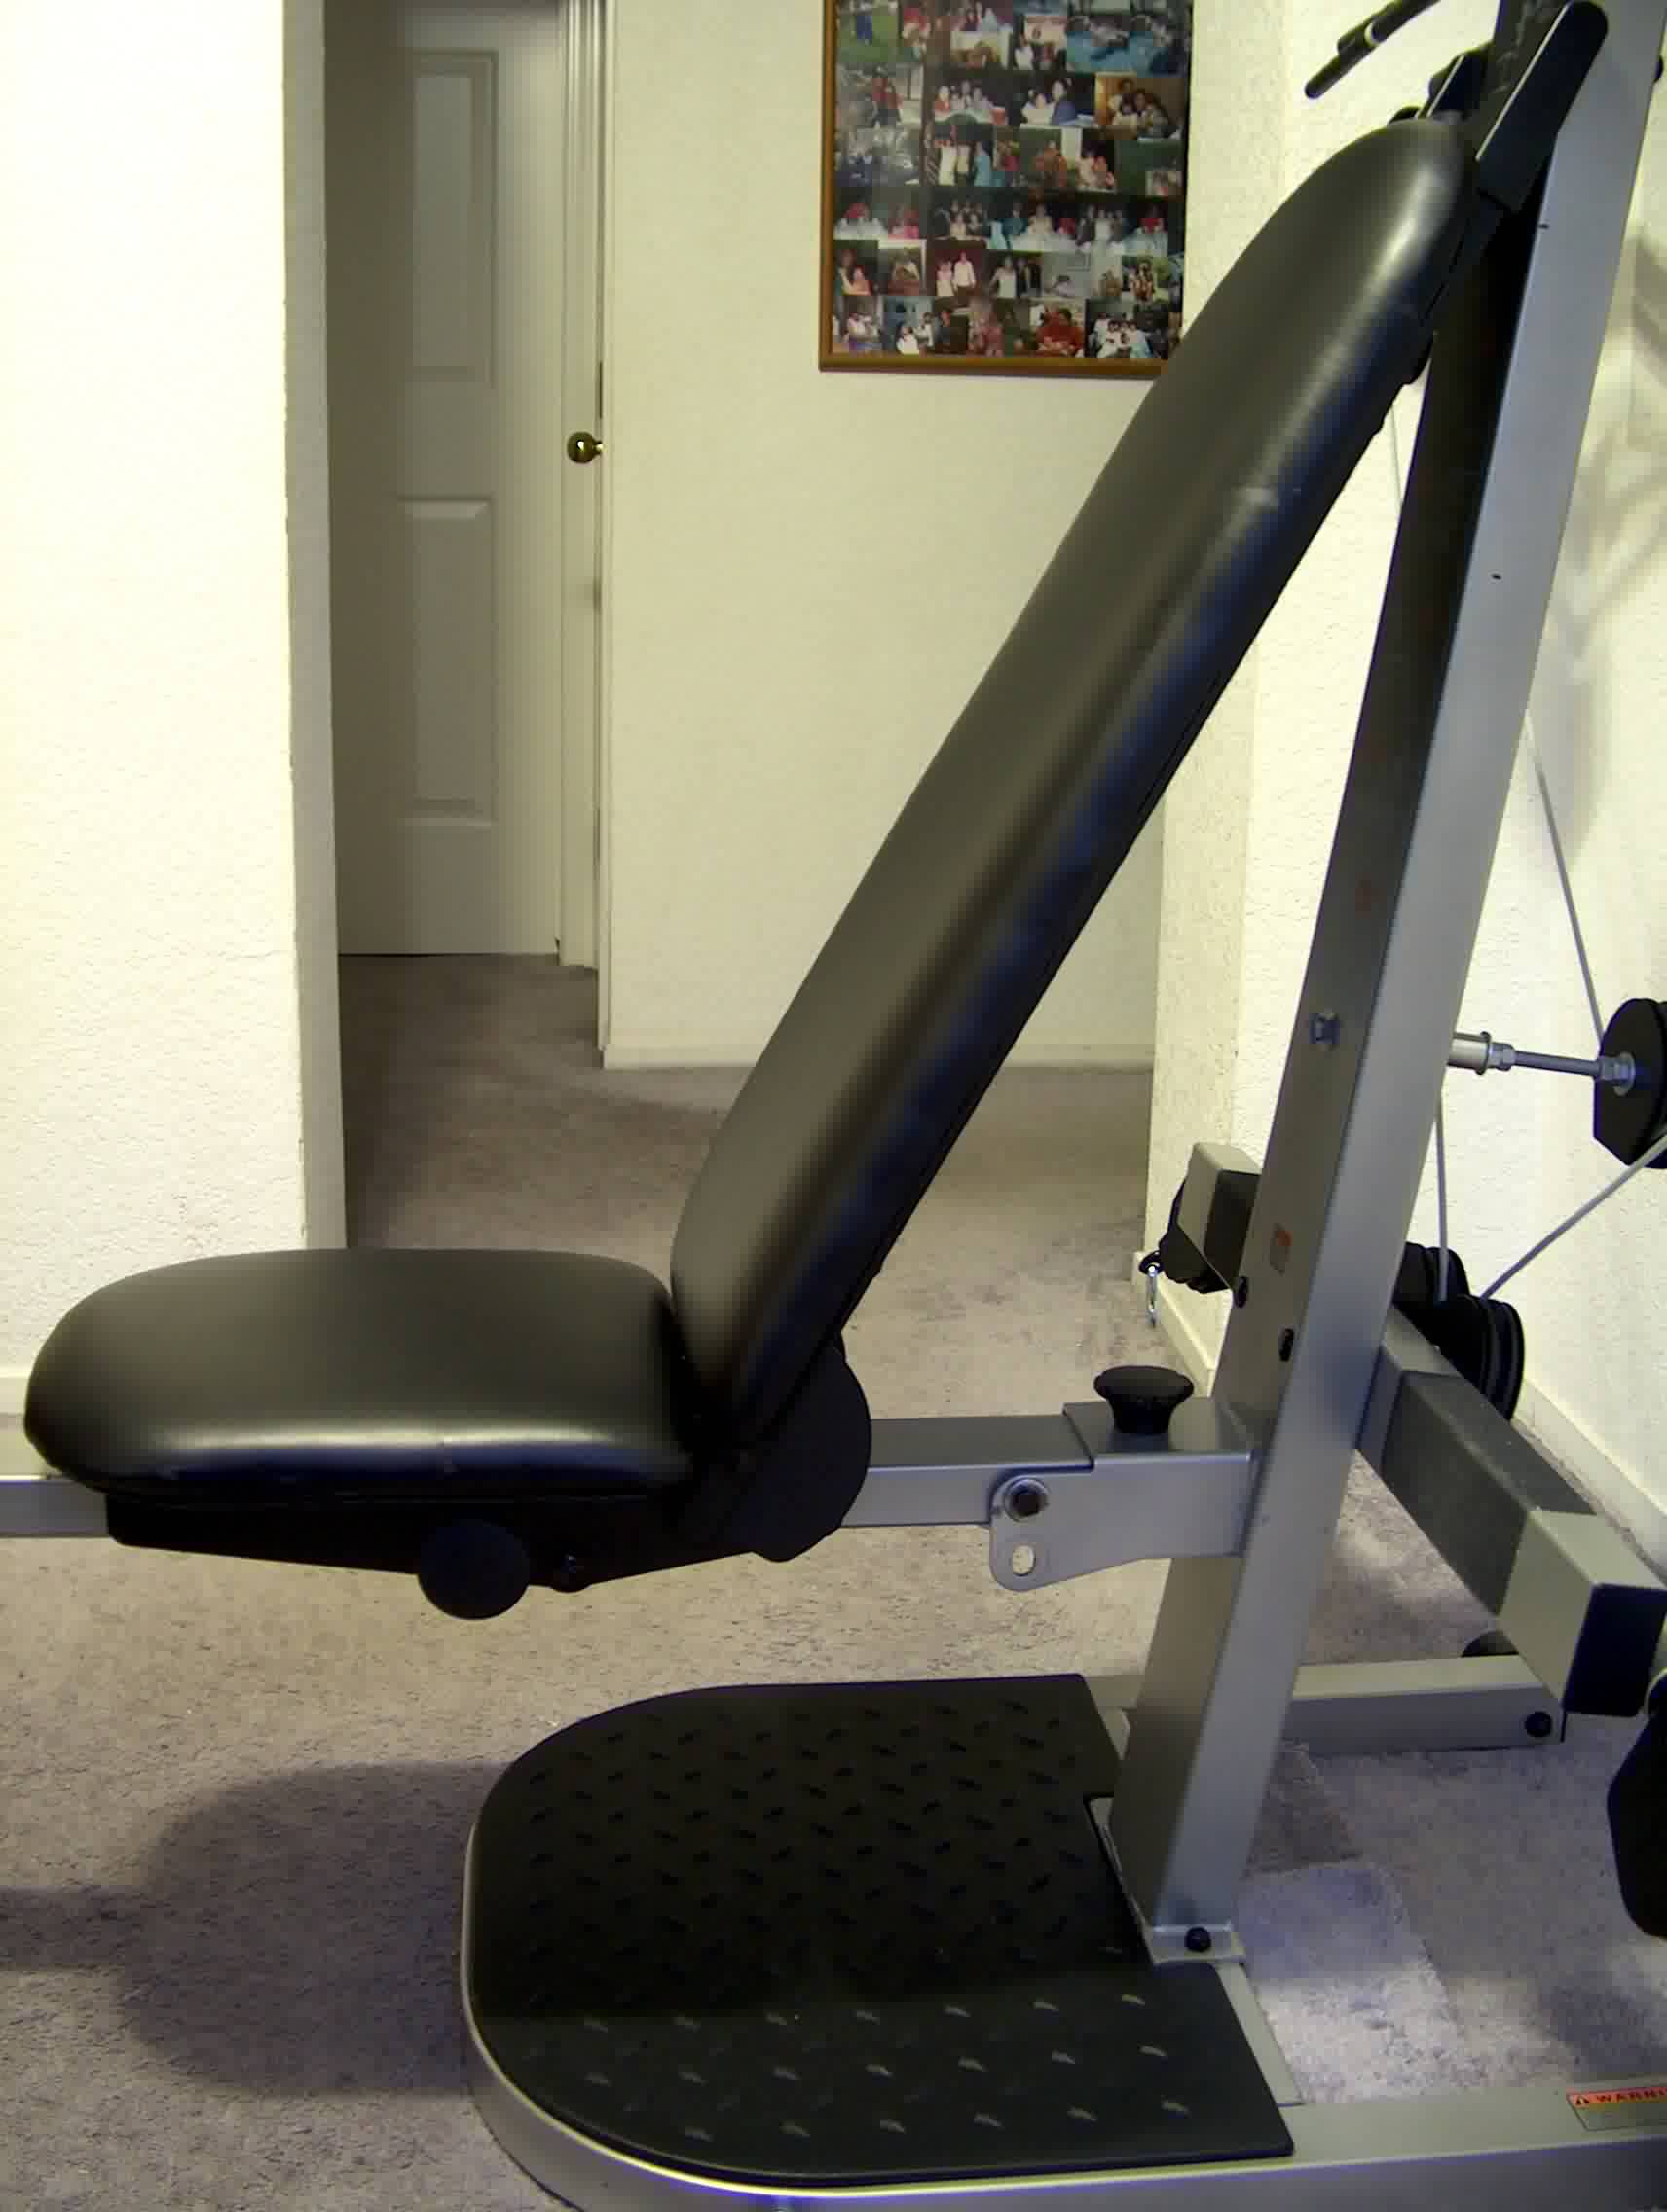
5. Drilled two holes in the sliding seat rail. The first hole allows the seatback to sit more vertically and closer to the tower. The second hole allows the seatback cap to fit more snugly to the lat tower when the seatback is in the flat position. (Put the seat in the desired position and then mark the rail from underneath, noting the position of the seat release knob.)
 Before 1st hole
 After 1st hole
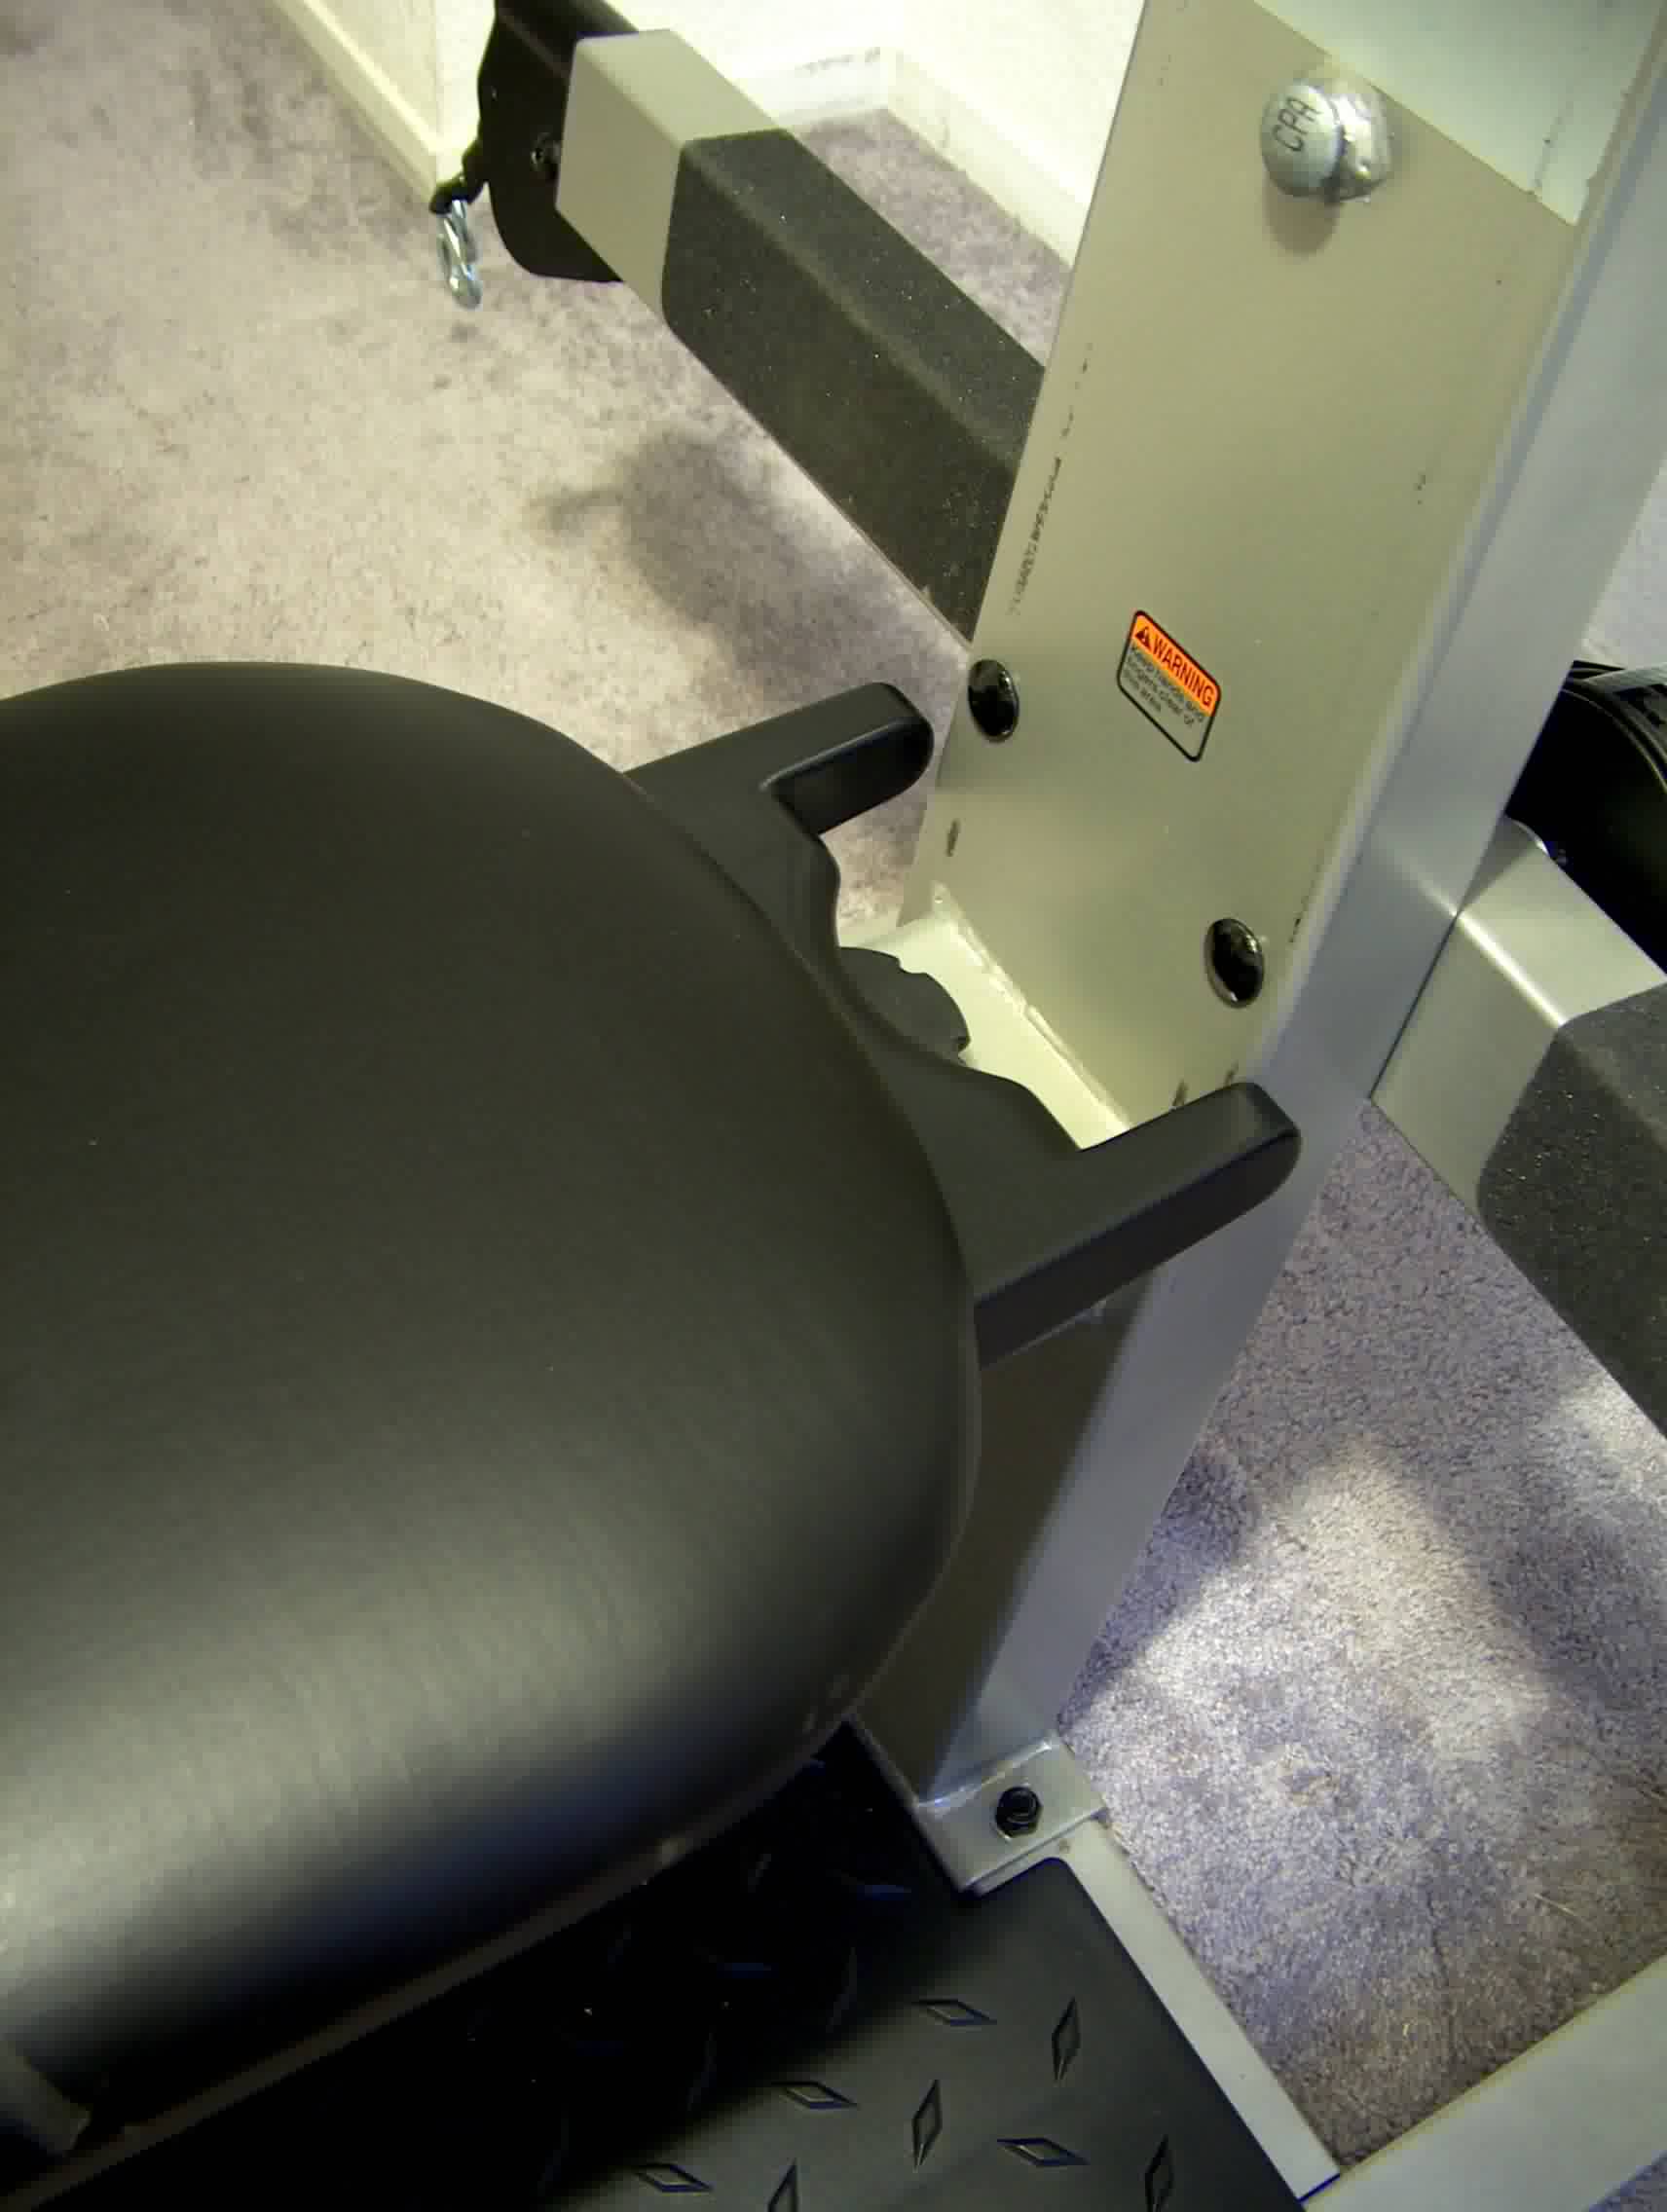 Before 2nd hole
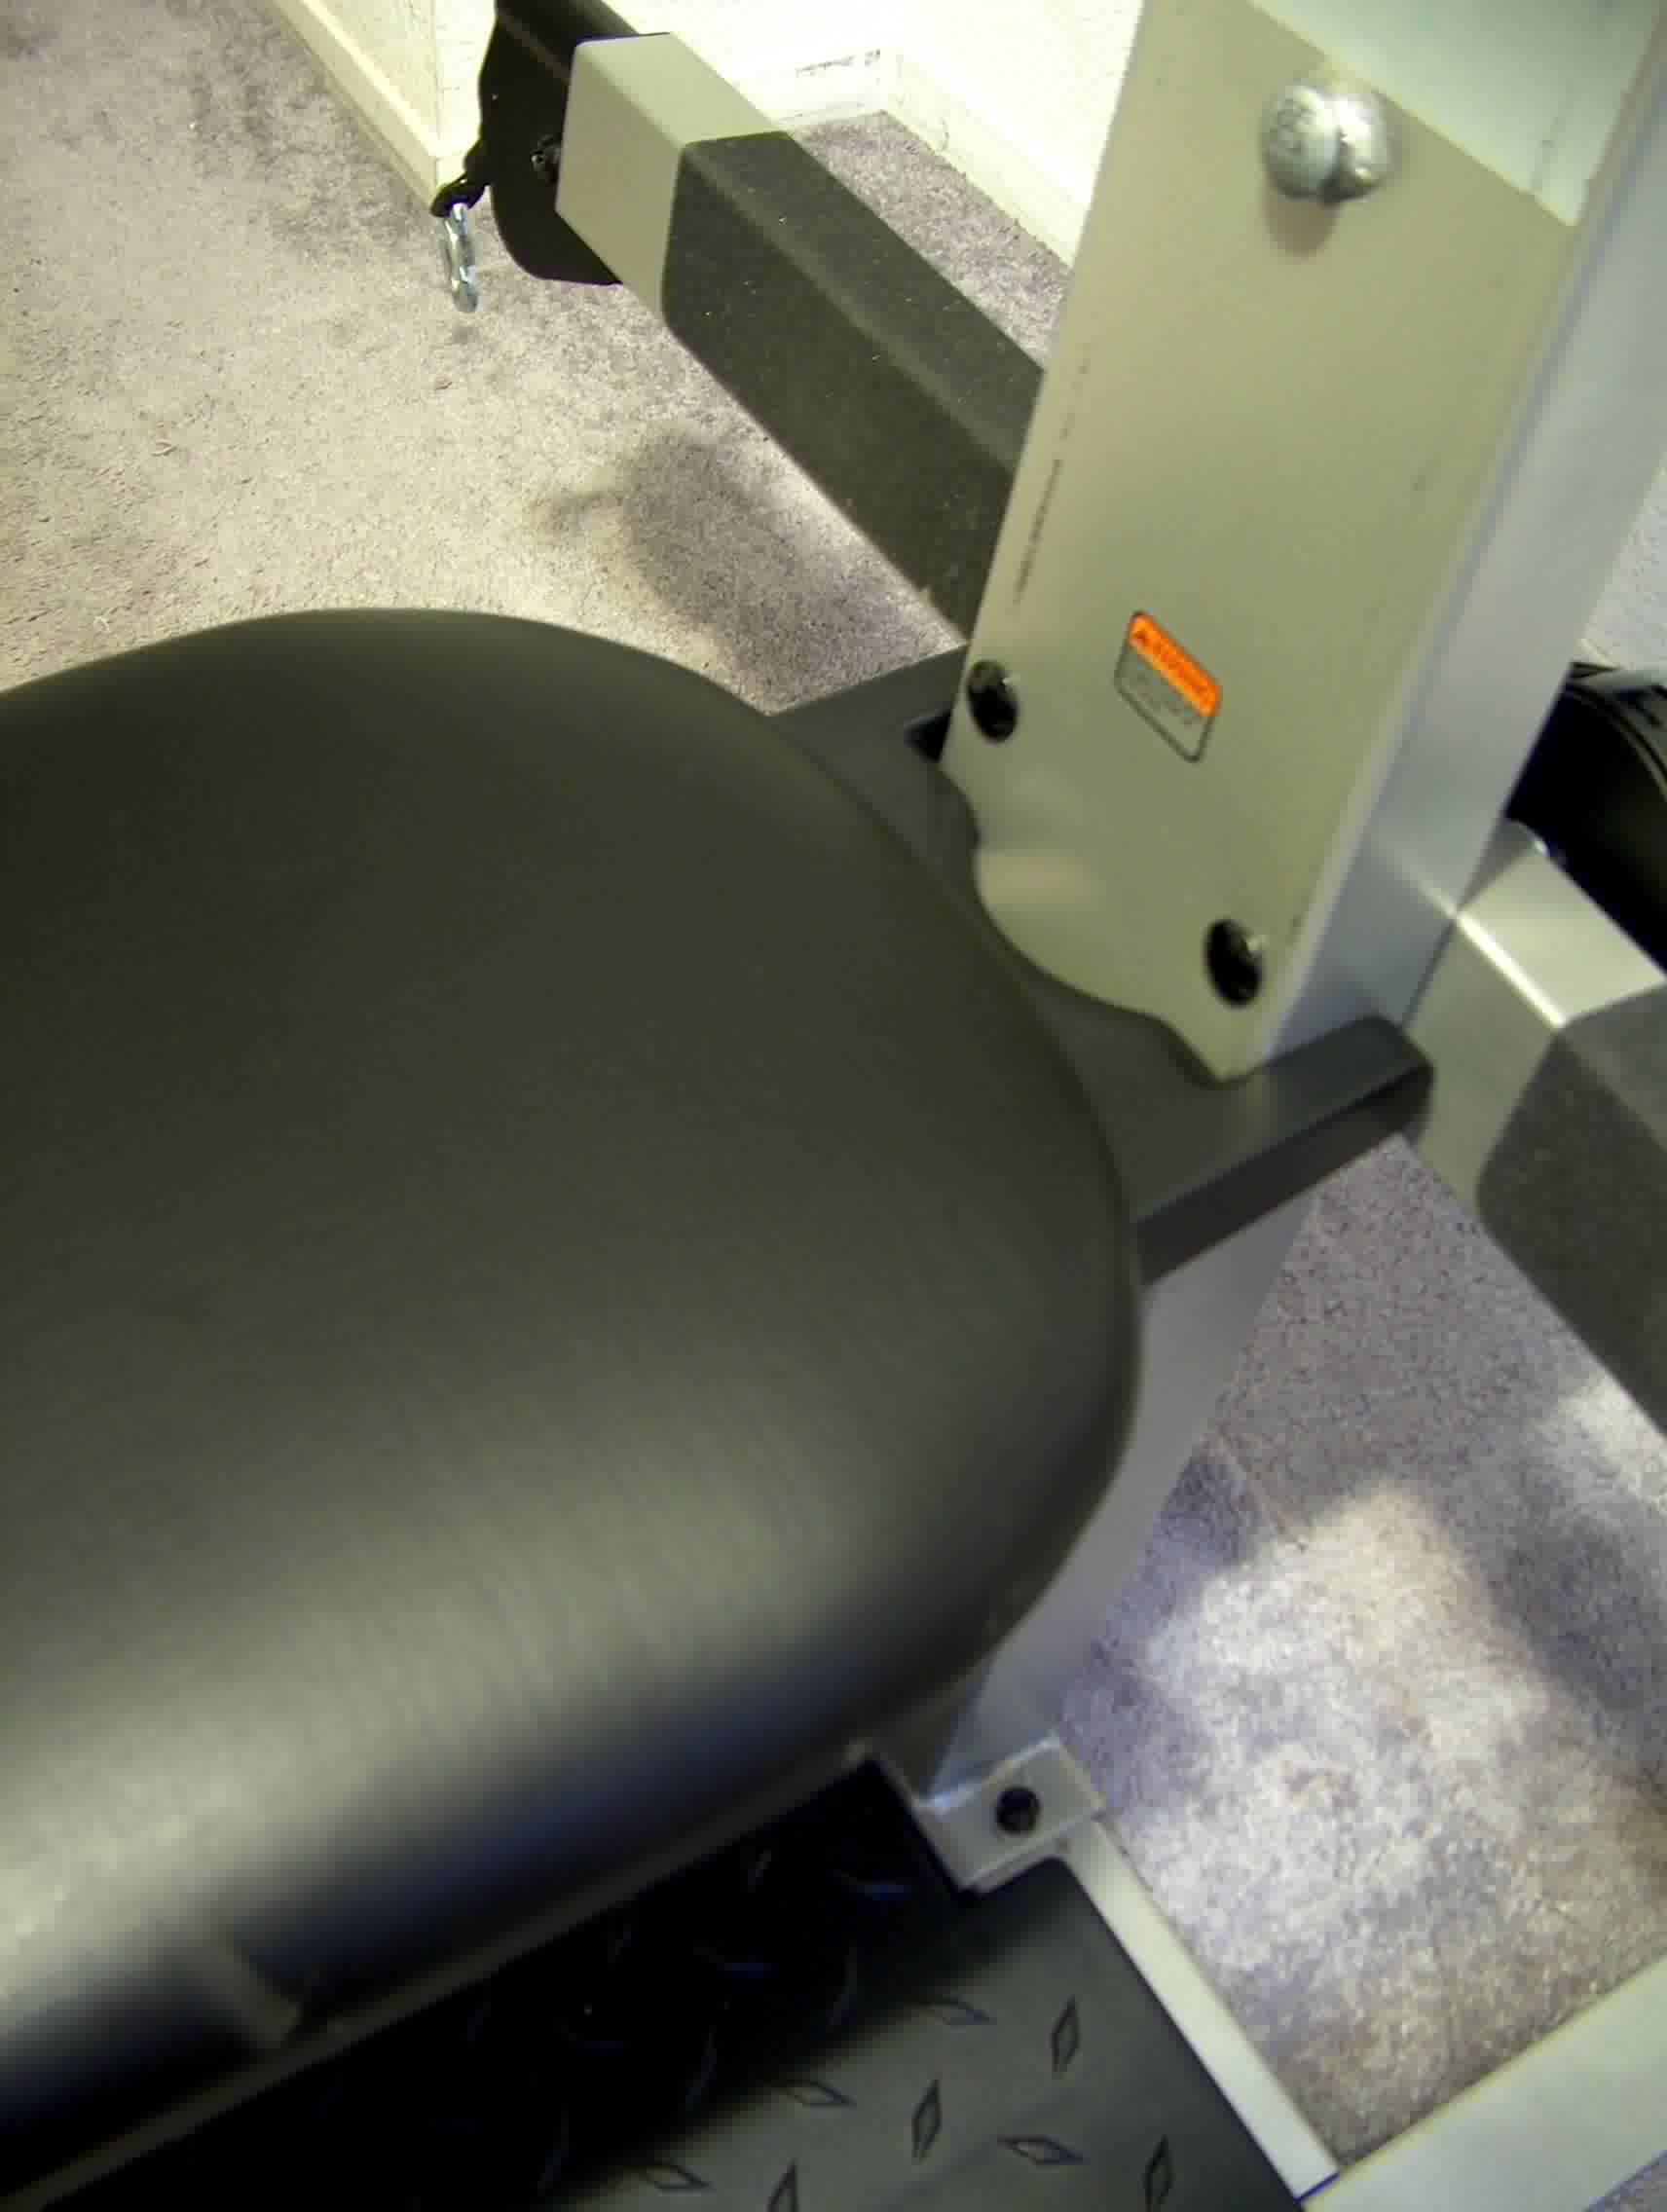 After 2nd hole
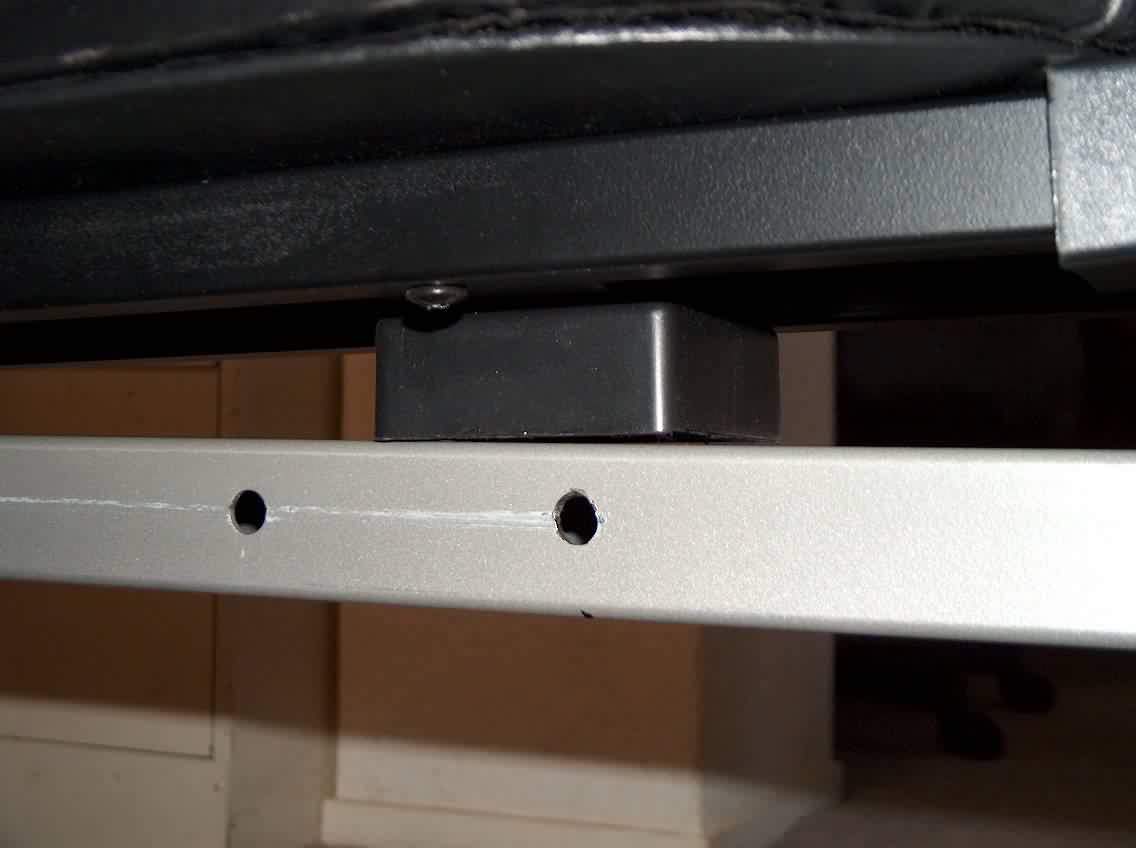
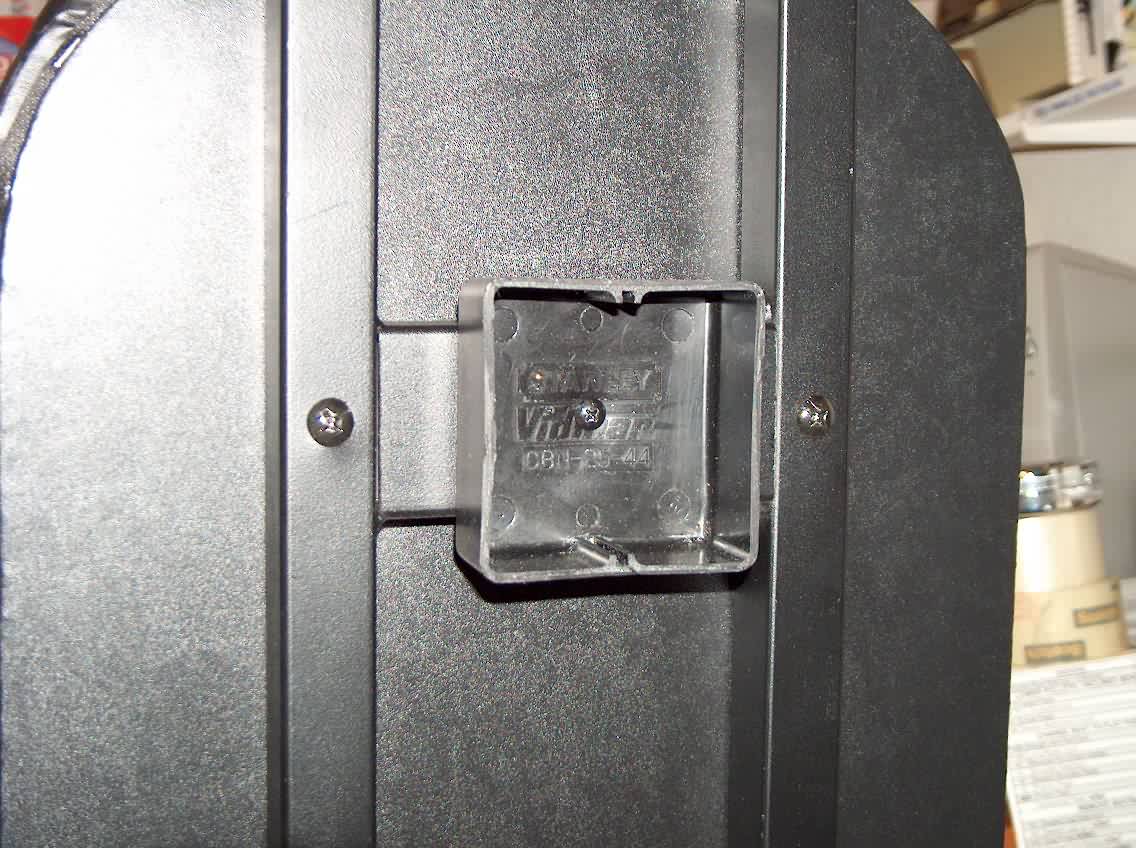
After drilling the second hole, the plastic end cap of the seatback would rest on the securing knob for the seat rail, I attached a little plastic box in place of the little rubber bumper. The bumper box is the same width as the seat rail. Previously, I had thought of just using a block of wood.
6.
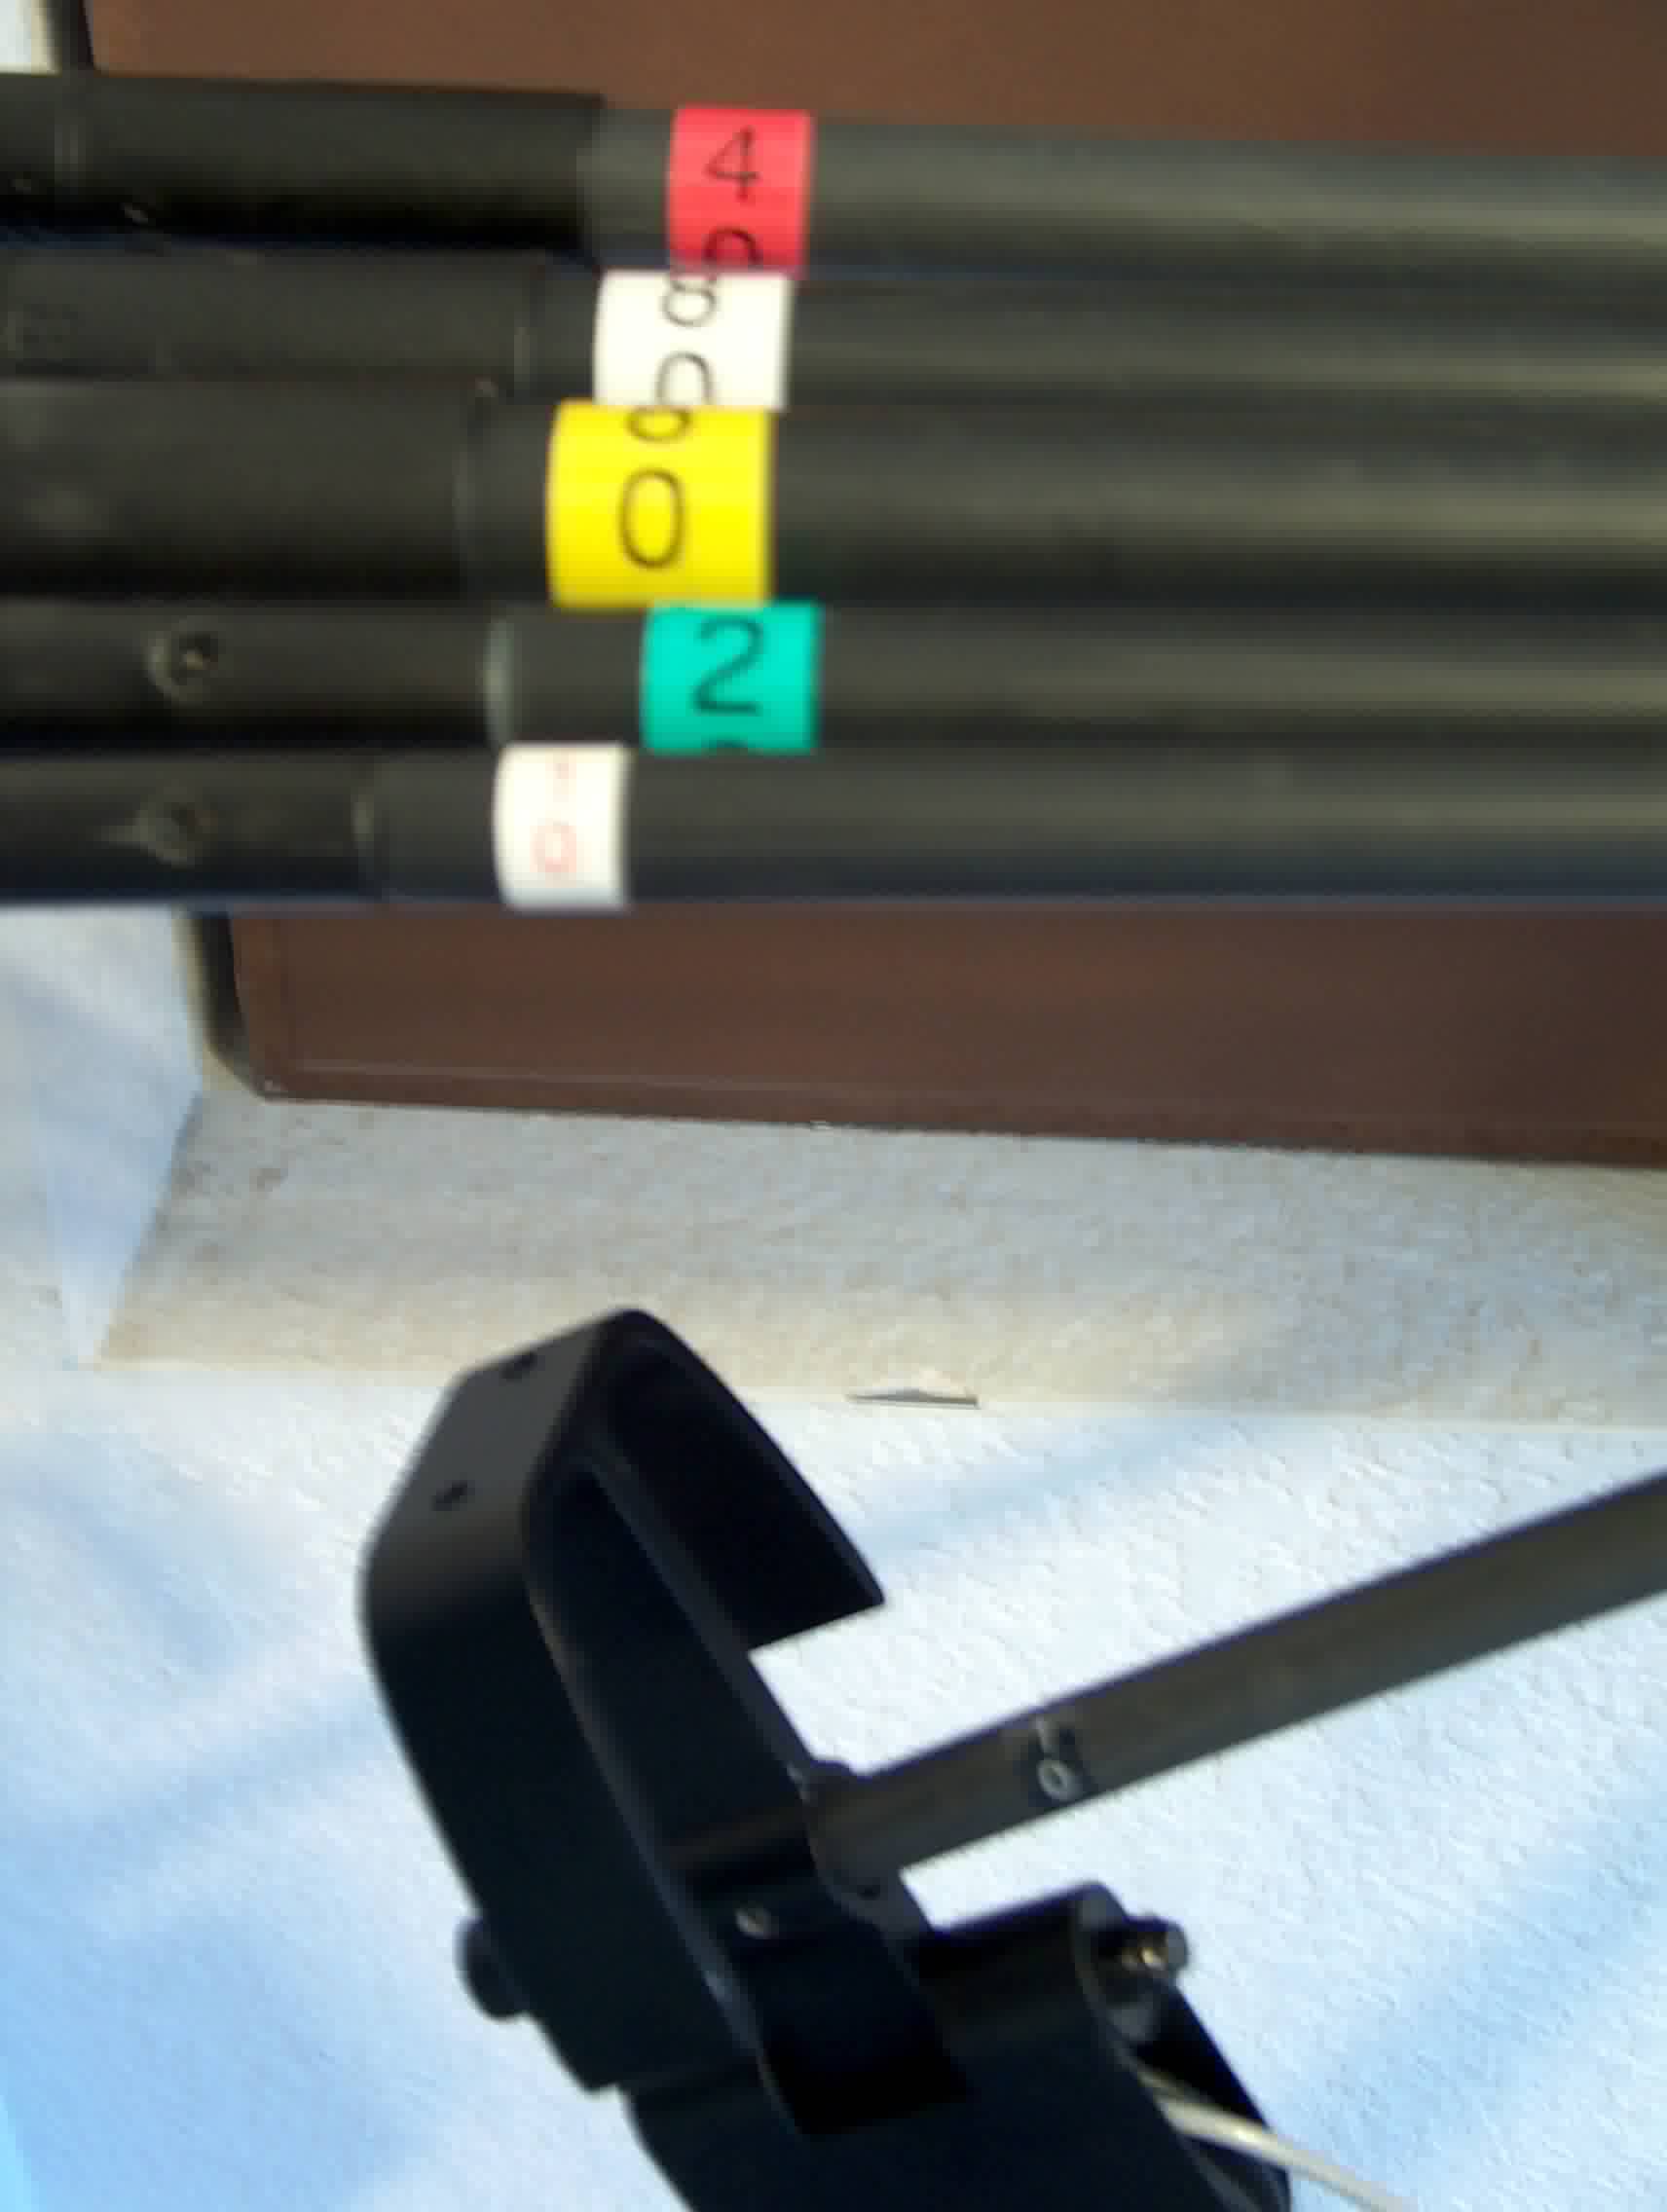 Differentiated the
power bows by using color-coded labels.
Differentiated the
power bows by using color-coded labels.
7.
Marked on the seat
rail, positions of the seat and noted inclination angles, also made similar marks on the
tower
8. Exchanged the snap action clips for some heavy duty "S" hooks
9.
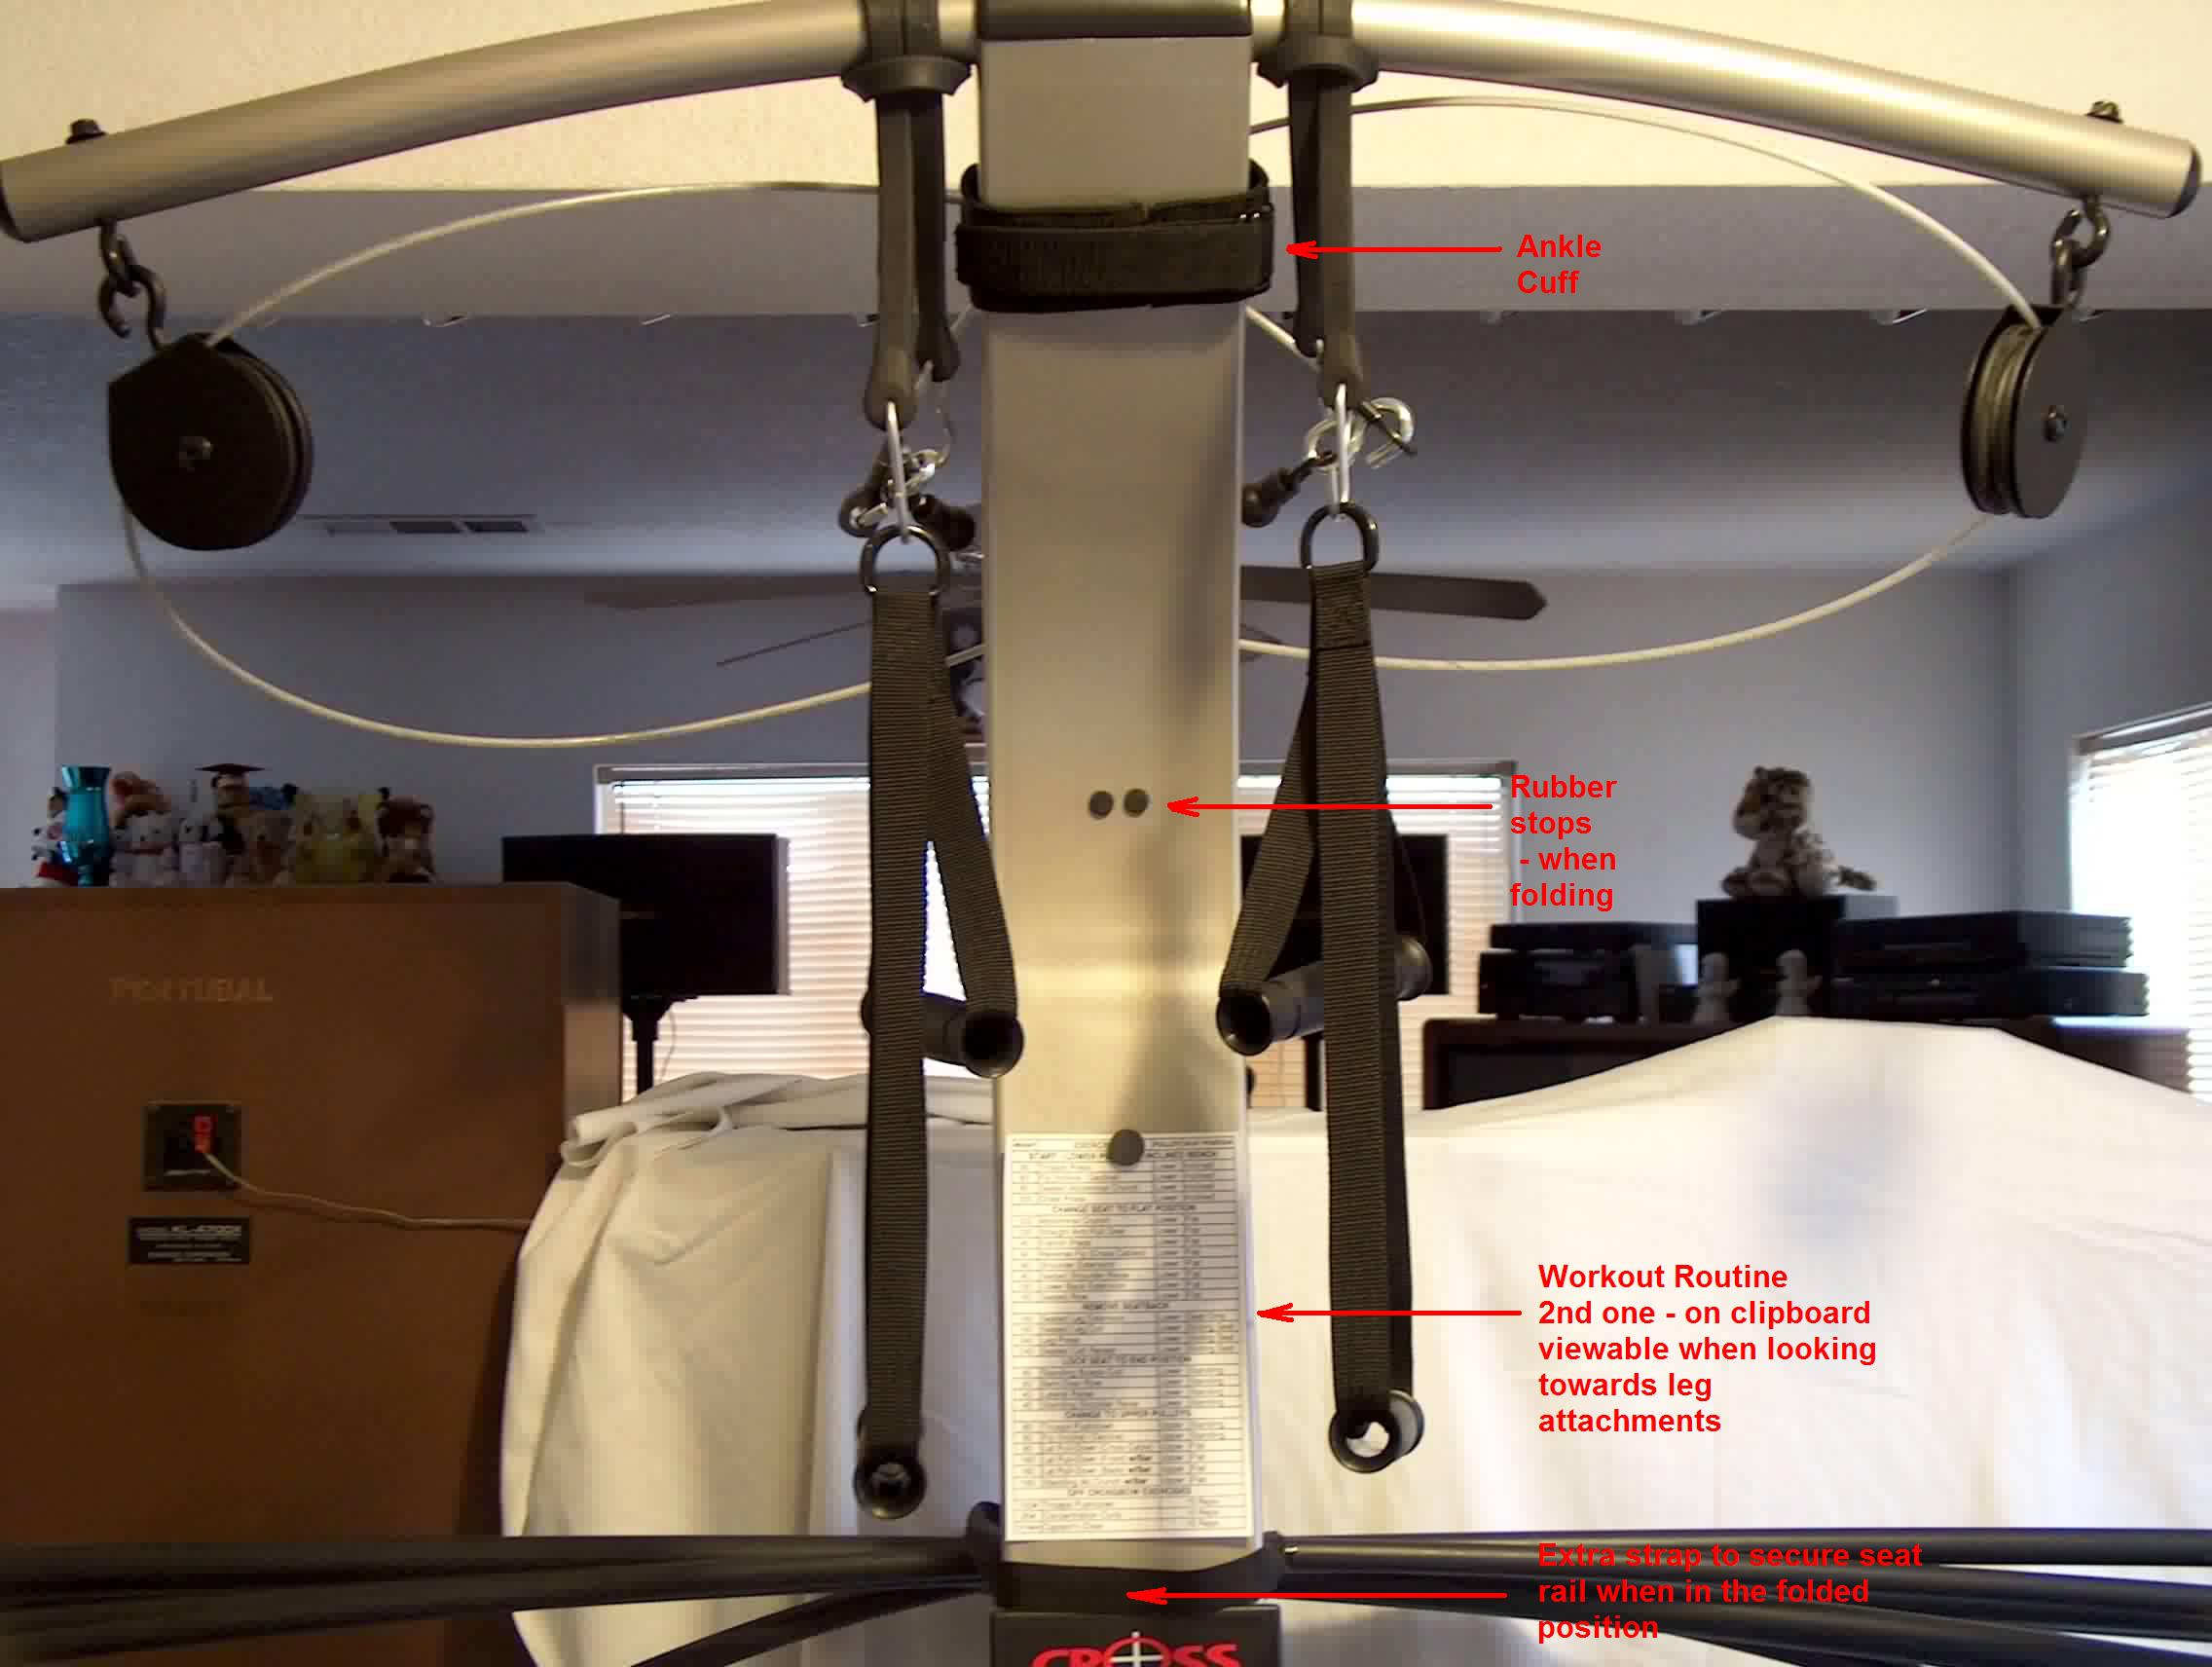 Temporarily put up
two bungee cords on the lat tower to hang all the unused accessories... I am
debating whether to put in some hooks on the backside of the tower to hang all
that stuff. Looks cheesy but I haven't seen any workable solutions so far.
Temporarily put up
two bungee cords on the lat tower to hang all the unused accessories... I am
debating whether to put in some hooks on the backside of the tower to hang all
that stuff. Looks cheesy but I haven't seen any workable solutions so far.
10. Our Crossbow is in the computer room, where it has been determined to sit as a permanent fixture. If we had to move it on a regular schedule, I would change the wheels to ones with a bigger diameter to aid in rolling across the carpet.
11.
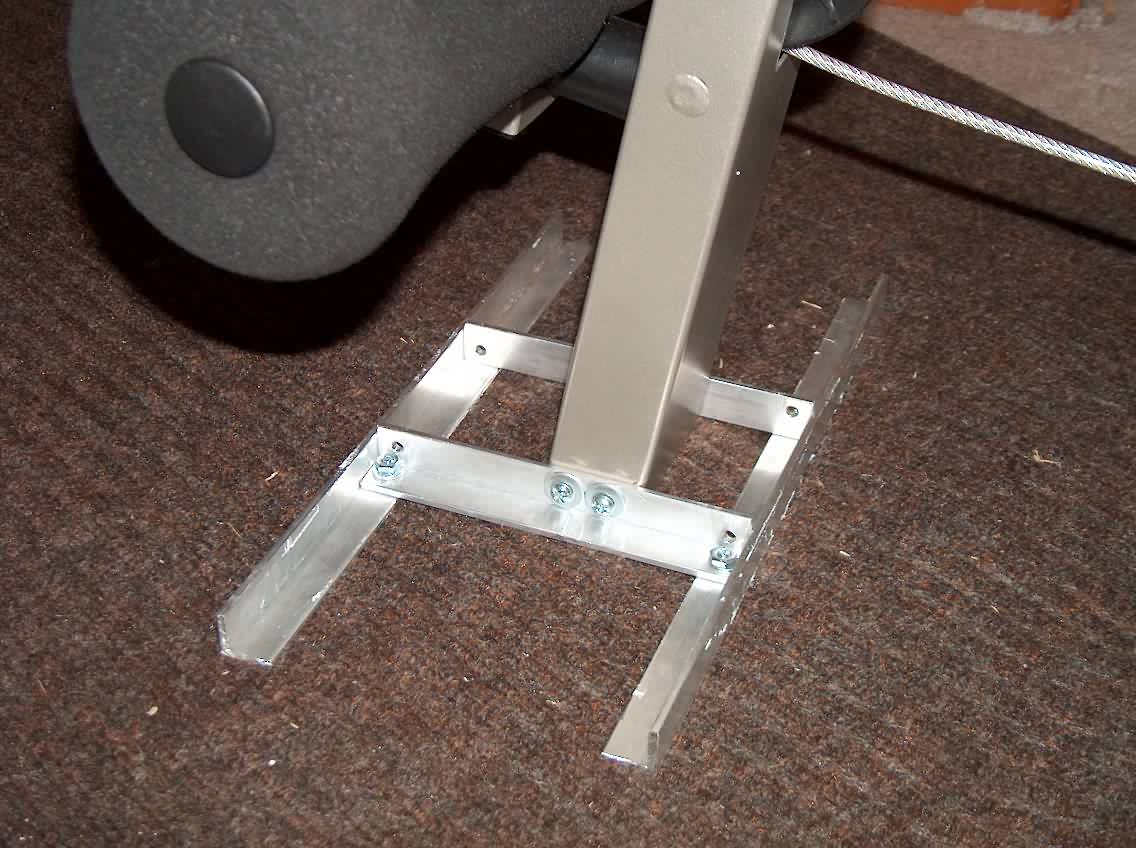 I didn't really have a problem with single support post at the leg attachment
area as being wobbly and unstable. But seeing references to that and how they
put a "T' bar on the newer models, I had some aluminum angle iron and some spare
time, and made my own version.
I didn't really have a problem with single support post at the leg attachment
area as being wobbly and unstable. But seeing references to that and how they
put a "T' bar on the newer models, I had some aluminum angle iron and some spare
time, and made my own version.
12. One user took to anchoring his lat tower to the wall in order to prevent it from tipping over.
13. Users having problems with the seat scratching while sliding may want to examine the mounting hardware for the seat release knob, ensure that that nuts are mounted on the outside
14. Exercise hints
For Concentration Curls, I like to do them kneeling at the leg extension and using the upper leg roller as a brace. Also, Lying Bicep Curls are a favorite way of isolating the biceps for me.
For the Lower Back Extension, use the belt. Position it up around the shoulders and lean back.
Attach the Lat Bar directly to the lower pulleys to do Bent-Over Rows, Shoulder shrugs and Standing Calf Raises
There is concept of SuperSlow lifting, also called the Power of 10. In essence, each exercise is done to a count of 10 seconds up and 10 seconds down. You set the weights so that you reach complete muscle failure within 8 reps. This is supposed to increase the strength gains but I feel it negates the circuit training benefits.
The Bowflex manual recommends a 3 second count up and down, while the Crossbow manual recommends a 4 second count up and down. I got bored doing my whole routine in SuperSlow, but I have incorporated SuperSlow in my last sets of Bicep and Triceps exercises because even though my arms look good on the beach, ie "Beach Muscle", they weren't worth beans in the gym.
For more information:
http://www.superslow.com/ Zickerman's site
http://www.power-of-10.com/ Ken Hutchin's site
http://cbass/SLOWFAST.HTM An evaluation of "superslow" versus "fast" lifting by Clarence Bass
**************************************************************************************************************
Here is a Excel spreadsheet that I have played with. The first sheet has a weekly tracking form. The second sheet breaks down the exercises into seat position and pulleys used. The third sheet is a sample workout using the information from the second sheet to create a routine that minimizes resistance, seat position and pulley changes. The fourth and fifth sheets are splits routines grouped into the seat position and pulleys used.
You can also get this spreadsheet at the Weider Crossbow Users Group at Yahoo Groups, Look in the "Files" Section

Hope you found some helpful tips, much more to be added...
Good luck on your fitness programs, If you have any questions or comments about anything here, please feel free to contact us
[email protected]
or [email protected]

Go to "Our other new toy - HP 850 Digital Camera"