| Moving to Geocities - Screenshots |
|
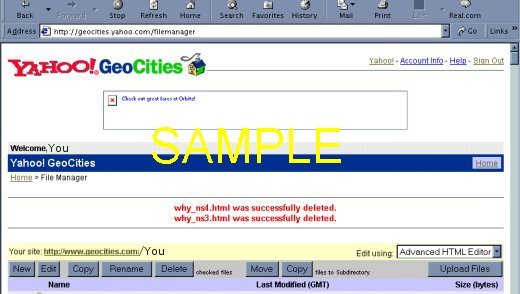
Now, if you haven't done so already, get your Yahoo! ID. Your Yahoo! ID is used for everything Yahoo! such as email, GeoCities, Yahoo! Briefcase, games, personalizing the Yahoo! page, etc. Your signup username becomes your Geocities address, so when you sign up choose a name wisely. If you already have a YahooMail account and don't have a Geocities account, you can use the YahooMail name to get your new Geocities account. Just be logged in, then on the main mail page click on Account Info. On the account info page under Public Information, click on the "Build your own website" link under the Yahoo! GeoCities topic. Or log into your MyYahoo page and follow the GeoCities link in the Connect category. Now that you're ready, log into your Geocities account and go to your File Manager to familiarize yourself with it. Now click on the Upload link to upload your files from your computer. If you've opted for the upgrade account, you can use FTP to upload all of your files. You can also go directly to the Upload page from your main page. Remember, the only pages you'll be uploading are the ones with the plain .html extensions that you've modified or will be modifying. Disregard any of the pages with the .hc, ~ns3.html or ~ns4.html extensions. Here's a screenshot from the File Manager that shows the unneeded pages deleted. (An older offline version of SiteBuilder allowed publishing websites to other hosts. Homestead changed it after it went to paid hosting in 2001. But it published all of the pages created not just the plain .html pages.):
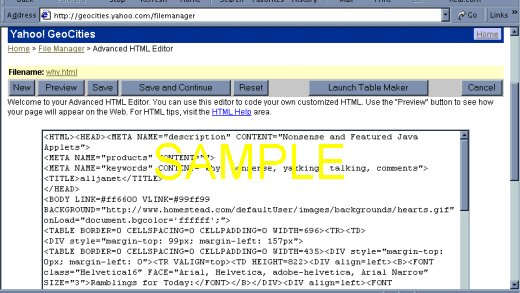
Now, you're ready to use an HTML Editor to delete the Homestead code. Return to the File Manager page. In the File Manager and working one page at a time, make sure your File Manager shows Edit using HTML Editor or Basic HTML Editor (see above the Upload Files button on the lower right of the screenshot). Put a check mark next to the first page you want to work on then press the Edit button (see the lower left in the screenshot). You'll now be in the HTML Editor, ready to make your changes as outlined in the first two pages of this tutorial.
Make sure all of your page links are corrected to your new web address. Your page links should look like this: http://www.geocities.com/youraccount/page.html And other file links follow the same way. Once you've completed your changes, you can either Save and Continue (to edit) or Save your page. If you decide not to use the Geocities HTML editors but another, offline editor, you can open each of your pages in the browser, view the page source, and copy (CTRL-C) the page's HTML to paste (CTRL-V) in the HTML view of your editor. Or since you probably have NotePad open, just "Save As..." the page name to your hard drive. You can then work with it in NotePad. This will work if GeoCities is not where you want to host your website. |
Backor Close Window
|