
This is not how I do all my paintings, but it is one method I use to do some of them, including the one illustrated on this page. And you, too, with patience and dedication, can create beautiful paintings a lot easier than you ever thought possible. Of course, you'll need to learn how to pick a medium, mix colors, and use the proper brushes. But that's all part of the art of painting.
NOTE:You should not copy another artist's work. But we have all seen art students trying to paint the works of the masters in museums. So the following demonstration is purely a way for me to show you how-to create a painting from a photo you've taken of a scene.
Want to know how to mix colors? Buy a color wheel at any good art store. We all know how to mix green. You just add yellow to blue. But how do you mix brown? Get a color wheel if you don't know.
Next, find something you'd really love to paint. You can find subjects in art books, magazines, or in real life. If you like a particular scenic vista, such as the New York skyline, take a photo of it and use my method to create a beautiful landscape in oil, acrylic or watercolor.
For this demonstration of my method of painting, I'll be using a magazine illustration to create a painting in acrylics.
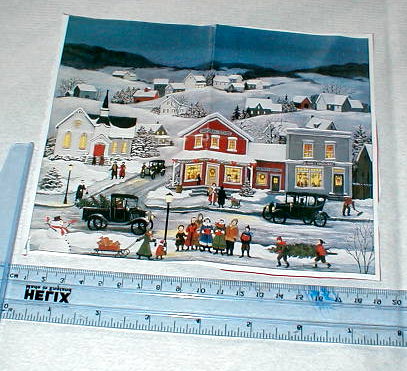
The image above shows the original illustration, which I cut out from a magazine. You can see how beautiful the colors and the composition are. You can also see its size, using the ruler I've placed under it.
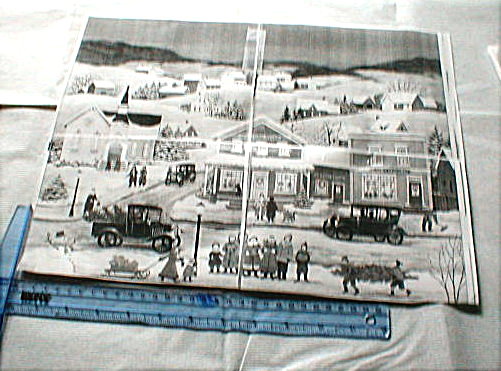
The image above shows a blowup I've made of the original illustration on my copying machine. To make it, I simply folded the original, full-color illustration into quarters, copied each quarter, enlarging each one 200%. I then taped the four quarters together. That made a 12 x 16 inch enlargement. So I bought a canvas close to that size.
I then covered my canvas with carbon paper and taped the Xerox blowup over the canvas. Next, I used a pen to trace over the outline of buildings, people, trees, cars and other objects from the enlarged illustration onto my canvas. No need to trace every single detail. Just enough to give you the right placement of objects on your canvas.

The above image shows the canvas with the finished tracing. The next step is to begin painting. Start at the top and background and work your way down and out to the foreground.
The above image shows how the painting is progressing. You can see the starry sky and some of the buildings. The middle and foreground still need a lot of work, and appear muddled because of some objects being over painted.
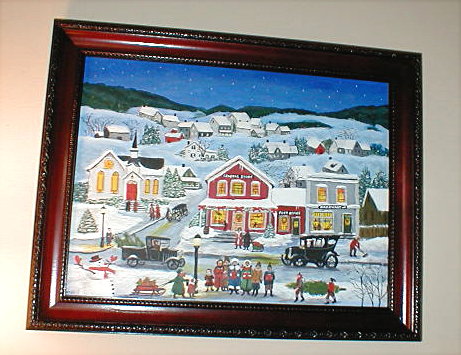
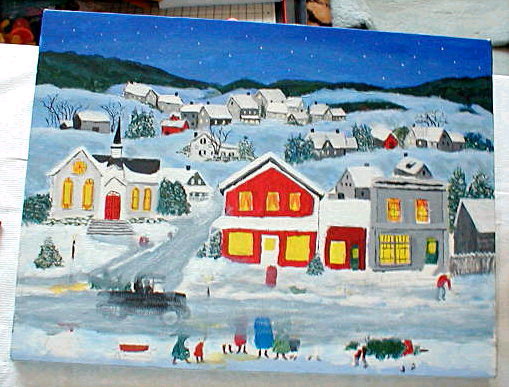
Finally, above is the finished painting.
My method will help you compose your painting. But only the proper use of brushes and paints will enable you create a beautiful finished work of art. Again, that takes skill in color mixing and painting technique.
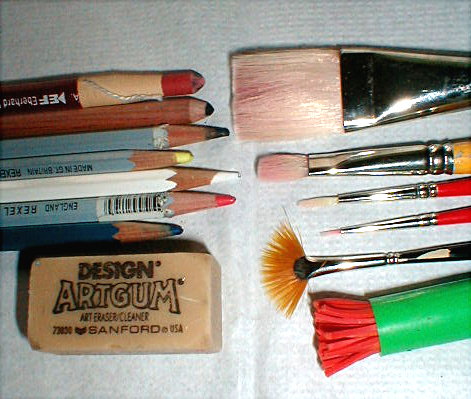
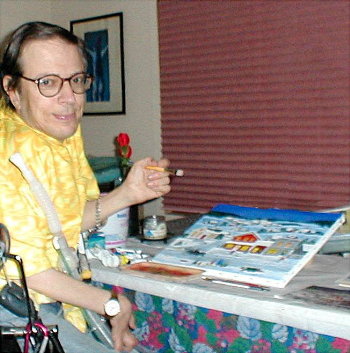
On the right side of the above image, you can see some of the brushes I used for this painting and others. The bottom brush, with the green handle and red rubber "bristles," is called a Funny brush. I use it for painting leaves. The fan-shaped brush is also excellent for painting trees and grass. To the left of the brushes, you can see my eraser and watercolor pencils. The "pencil" at the top is actually an eraser.
Following, is a little more of The Bob Mauro Method of painting:
COURAGE
You need the courage to take chances on canvas or on paper. You need to be brave enough to attempt something bold in your painting. Don't be afraid to "destroy" your painting by a "wrong" or "misplaced" brush stroke. You probably won't destroy anything, but instead will add just what it needs, or you'll discover something new in your work.
CREATIVITY
You have to have an imagination. You need to have the ability to visualize in your mind what you want to put on canvas or on paper.
INNOVATIVE
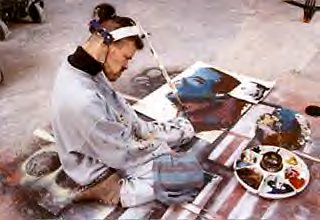
You need to come up with new ways to do things. Paint any way you can: with your hand, with a brush held in your mouth or one mounted on a head stick, as Dan Keplinger, the subject of HBO's "King Gimp," does. (Keplinger has severe CP.)
PATIENCE
You need to be able to take the time and exert effort to plan out and create what you want to eventually end up on your paper or canvas. Mistakes are just bumps on the road to knowing how to do something. Some artists complete a work in one sitting. There is no need to do that. Take your time. I work in small steps, thinking out my next step and how I will accomplish it before I even open up a tube of paint.
CONFIDENCE
You need to believe in yourself. You need to trust your abilities. If you really want to become an artist, you can. The ability to create photographic paintings is not necessary. The ability to create something pleasing to the eye of the beholder and to yourself is all that is important. Art and beauty are, after all, in the eye of the beholder.
TOOLS
You'll need to learn what tools to use and how to use them. You'll need to learn how to mix the colors necessary to create the impressions and images you want. Again, a color wheel will help you do that. And by using RED, YELLOW, BLUE, BLACK, WHITE, RAW SIENNA and BURNT UMBER, you can mix just about any color you'll ever need.
Another skill you'll need to develop is just what brush to use and how to use it. Cheap brushes are useless.
I started painting while I was flat on my back after a spinal fusion in 1960, but seriously in 1968. Corra Sanders and Mrs. Gould, my home instruction art teachers, in 1960-61, from New York City's Board of Education, had me doing watercolors from my bed. Then when I started college, in 1967, I discovered the Impressionists.
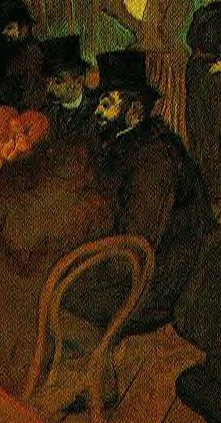
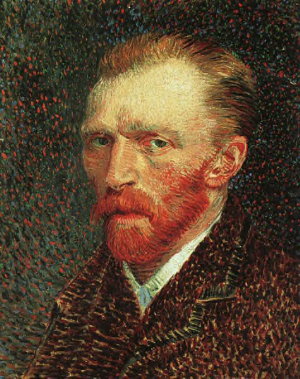
Physically disabled artists like Toulouse-Latrec (above) and mentally disabled ones like Vincent Van Gogh (below) made me feel maybe I could paint too.
In 1968 I bought a set of oils, an easel, and some brushes. I tried everything from landscapes to abstracts. My main problem was sitting up long enough to complete a painting. I couldn't. So I painted for ten or twenty minutes at a time. I retouched and over painted a lot.
In those days, I had a small studio in my parents' basement. Then we moved. No more basement. No more studio. So I stopped painting.
In the Fall of 2000 I saw the documentary "King Gimp" on HBO. It was about, Dan Keplinger, a severely disabled man. Despite his Cerebral Palsy, Keplinger is an artist, a painter. He so fired me up, I went out and bought a set of watercolors. I had no desire to try oil painting again. Too messy and much too smelly. And now that I needed a ventilator to breathe, I certainly didn't want to be inhaling fumes from turpentine, even the odorless kind. But watercolors have no smell and are easier to clean up after using.
So in September of 2000, after not painting for nearly thirty years, I started creating landscapes, nudes, and seascapes. I even did a Day-Glow watercolor of a wheelchair basketball player based on a photo I had taken thirty-three years earlier at Hofstra University. How do I paint? Read on.
I can only sit up at my work table for ten or twenty minutes at a time. So I do all my watercolors in stages. First I find something I want to paint. This can be a beautiful landscape or a colorful photograph in a travel magazine. If the scene I want to paint is one I see in nature, I'll take a photograph of it.
Next, I'll decide what size canvas or paper I want to work on. Usually this ends up being 8 x 10 inches, at least for watercolors. I then scale up the photo in my photo copier/Xerox machine. I then place that enlargement over my 140-pound cold press watercolor paper and trace the outline to get the proper proportions, pushing hard with a ballpoint pen. This outline is embossed by the pen point into the paper. On canvas or canvas board, you'll need to use carbon paper, as mentioned at the beginning of this page.
If, for example, I use a canvas of 16 x 20 inches, I'll just scale up the images. In other words, if the horizon line is at 2" in a 4 x 6 inch photo, in my 16 x 20 inch canvas, the horizon line will be at 8".
Normal Rockwell would often take 35 mm slides of a scene he wanted to paint. He'd then project the slide onto his canvas. Finally, he'd trace the outline of the projected subject or scene with a soft charcoal liner onto his canvas. Then Rockwell would start to paint.
You can even use carbon paper to transfer an image you'd like to paint onto a small canvas or onto watercolor paper. Once the tracing is done, you are ready to paint.
You'll need some watercolors, brushes, and watercolor pencils. These are best to start with before trying more expensive oils or acrylics. My watercolor set cost $1.59. It's simply a set of children's watercolors. But my brushes range in price from $5 to nearly $15 each.
Purchase several brushes, such as a 1-inch flat brush for skies, a No. 3 fan brush for trees, and a No. 3 pointy brush for lines. Rigers and script/liner brushes are excellent for creating tree trunks and branches, and for signing your name to the finished painting. You might want to buy some Funny brushes to paint leaves. These are fun to work with.
Get a pad of at least 140-pound cold press watercolor paper. Once you have these essentials, you're ready to begin.
You should always begin your painting with the lightest colors, working your way from top to bottom, background to foreground.
I do the sky first with a little blue and lots of water. If it's a seascape, the ocean or lake comes next.
To do a sky, pre-wet your paper with your brush then apply just a tiny bit of blue to the wet paper, making a very realistic sky. The part of the sky closest to the horizon should be lighter than the upper part of the sky.
Whenever you paint, remember: you want to work from top to bottom, background to foreground, always doing the lightest colors first.
Once my sky and sea are finished, I'll block in the mountains, trees, and a lighthouse if there's one. Finer detail can be sketched in later with watercolor pencils or fine brushes.
One watercolor hint: If you intend to paint something like trees in the foreground, you might want to use a product called Frisket.
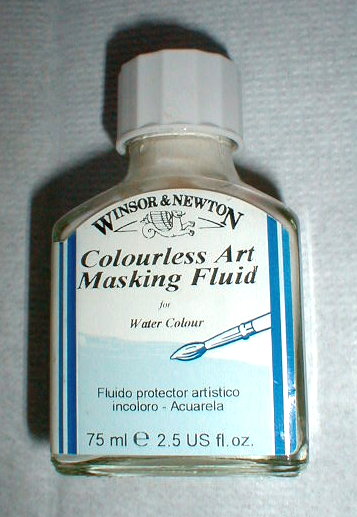
The above image shows this liquid latex masking agent I use. Before you use any watercolors to do your sky or anything else, you might want to use Frisket to paint in your trees, especially the trunks and some branches. Let the Frisket dry. Then paint in your sea and sky. When they are finished, use a rubber eraser to gently rub off the Frisket. You'll have clean white paper underneath. Now paint in your tree trunks and branches. You'll be able to do so without mixing tree color with your background sky color, for example.
Fine details can be filled in with watercolor pencils. Grass, leaves, building outlines, ship's rigging are all easy to do with watercolor pencils.
To save money, I paint on paper which will fit a standard size mat. When you frame watercolors, you want to mat them. In art stores an 11 x 14 inch mat with a 7.5 x 9.5 inch opening can cost $3. The frame, with glass, can cost over $15. But if you go to Wal-Mart, you can get the frame with glass and mat for $5! So most of my watercolors are done on 8 x 10 inch, 140-pound, cold press watercolor paper. The extra half inch of paper is covered by the mat when the painting is framed.
Watercolors are the easiest medium to work with if you're disabled. Watercolor painting, however, as an art, is more difficult than oil or acrylic painting. Why? It's very difficult to correct mistakes when you are doing a watercolor. But there are no sickening fumes -- or big messes to clean up after.
If you want to work with something like oil, but without the mess, try working with acrylics. These are water-based paints, and they're very easy to clean off brushes after you've finished a session. And, once again, no ugly smells. Moreover, acrylics dry fast, unlike oils.
One thing I learned about painting, it is extremely therapeutic and highly relaxing. Your disability won't limit you. Only your imagination will. And best of all, painting is a lot of fun! Hey, you might even make a little money selling your work. I have.
If you'd like to learn more about how to paint, in New York City and Long Island tune to WLIW PBS channel 21 each weekday from 2 to 3 p.m. Every Monday through Friday, from 2 to 2:30 p.m. (except during fund raising weeks) you'll get to watch a helpful lesson in watercolor, acrylic, or oil painting given by a different artist. From 2:30 to 3, Bob Ross will teach you his unique and easy oil painting technique.
These artists will also tell you about their books, painting supplies and web sites.
Great Art Web Sites:
Frank Clarke's Watercolor Simply Painting Web
Jerry Yarnell's School of Fine Art
Bob Ross (Oil Painting)
Watercolor
Painting
S. Scheewe (all about
painting, books, brushes, etc.)
Some great books on how to paint are:
The Best of the Joy of Painting by Bob Ross, $16 on
Amazon.com
Painting with Watercolors, Oils and Acrylics by H.
Harrison, $9.95
Enjoy Acrylics by Susan Scheewe $12.95