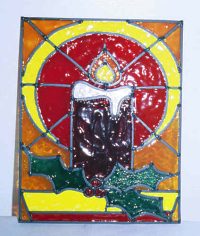
Materials:
- styrene blank (8" x 10")
- instant lead lines
- liquid leading
- stained glass paints: red, orange, yellow, amber, green, pearl
white
- scissors
- tape
- craft knife
Instructions:
- Click
here to print out the pattern.
- Tape the pattern to your flat working surface.
- Place the styrene blank over top of the pattern.
- Peel instant lead lines from their backing and place them along
all the lines in the pattern except the outlines of the holly
berries. You will have to cut the lead lines to size using scissors
and/or a craft knife. Lead lines can be placed along all of the
curved pattern lines (except the holly berries). Just bend them
gently as you place them. Be careful not to stretch the lead lines
as you place them. If they stretch, they'll try to bounce back after
they've been placed and may ruin your outline. Don't forget to
outline the outer edges of the pattern, too.
- Use the liquid leading to trace the outlines of the holly berries.
- Now, apply a dot of leading wherever the instant lead lines meet.
This will make the project look more like real stained glass and it
will fill in any gaps between the instant leading lines.
- Allow the liquid leading to dry for 24 hours.
- Using your stained glass paints, paint the project according to
the pattern. Follow product directions for applying paint. Work from
the inner part of the pattern to the outer part.
- Allow paint to dry for 24 hours (or as directed on product
packaging).
- You can prop your finished project in a window sill. If you want
to hang the project, heat a large paper clip with a lighter and use
the hot clip to poke holes at the top of the project. make one hole
in each corner. Make sure you wear oven mits when heating the paper
clip. Hang the project using fishing line or decorative Christmas
ribbon.
|