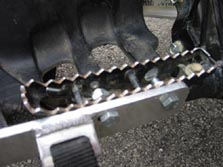
Sharpened Pegs- I sharpened my pegs because they give you a better grip on the pegs in all conditions, and when your racing, being able to keep your feet planted is a big advantage. It was actually a very easy mod to do, all I had to do was take a medium cross-cut wood file and start shaving away at the natural angle of the pegs. It took maybe 45 minutes on a rainy day, and the results were phenomenal. Out on the track, I could lean harder into turns without having my foot slip off the peg, and I didn't have to worry about it sliding off as much on jumps and bumps. This is definitely worth the small amount of time it takes to do, and when they become dull again, it only takes about 10 minutes to bring them back to their original state.
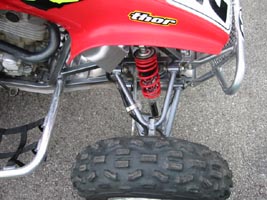
Race-Cut Fenders- Race-cut fenders are a double-edged sword. One the one side, they allow you to see much better when you launch off jumps and go into turns, as well as letting you see exactly where your front tires are going into that first bottleneck turn after the holeshot. On the other side, in muddy conditions, you tend to get covered in mud much more than if you had fenders, and sometimes, rocks can kick up at you, and there's no fender there to stop them. I decided to cut them mainly for the better view when you launch off jumps, and I havn't looked back since.
I started the process by making a couple different lines on the fenders with perminant marker to see where I wanted to cut them. The marker will rub off with a little laquer thinner or naptha, so there's no need to worry about the marker staying on there after you make the final cut. If you can't decide on a line that you want to cut, start with the outside one first, and work your way in until you find one you do like. I used a jig saw with a fine-toothed blade on it to cut the plastic, and it seemed to work pretty well. You could also use a hacksaw blade with a tape handle if you don't have access to a jig saw. Once you find a line that you like, rub off the rest of the marker lines as described above. Now it's time to take a medium cross-cut file and smooth out the edges. Just run the file along the big burrs, sandpaper will do all the detail work. Once you've de-burred the plastic, take a 120 grit sandpaper and smooth out the edge even more. The final touch should be sanding the edge with a 2000 grit sandpaper, which will make the edge look almost factory.
I love my cut fenders, and probably couldn't stand riding a quad without them now. I would suggest this mod to motocross racers or duners only, since on the trails, fenders protect you from sticks and mud.
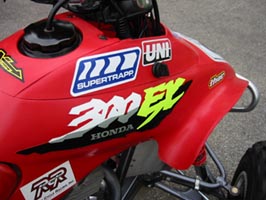
Re-located key- When I got my Renthal bars, it required me to remove that ugle plastic piece from the handlebars, and with it the reverse and neutral lights and the key. The lights I could do without, in fact, I was glad to simplify the wiring system up there, but the key I couldn't leave off. I decided to drill a hole in the side cowling of the quad to hold the key instead of buying a different handlbar plastic to hold the key. I found a hole-drilling bit that was the same diameter of the origional hole that held the key, and the I just drilled where I though the key would look good. I had to slightly notch the hole with a file to make the key fit, but after that, if fit perfect. It almost looks factory now. This is a great place to put the key if you have aftermarket bars and don't want to go without your key, and I would suggest it to everyone. |