CAIAPÓ
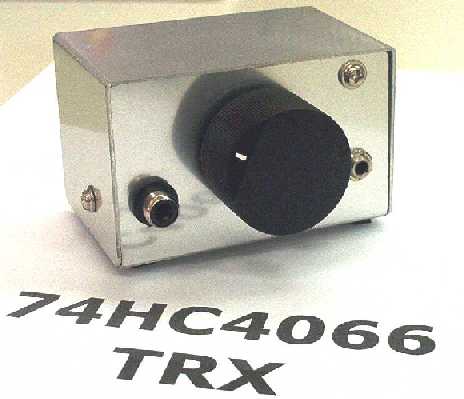
TRX 40m - Rx DC - Tx 1W - VXO 6990 -7080kHz
Following the experimentation with the 74HC4066 chip we decided to build a transceiver based in the receiver described here in this page.
Once more we look up the articles of our friend and namesake PA2OHH Onno, and we observed that it will not be so difficult...
In the last circuit with the 74HC4066 working as mixer, buffer and oscillator VXO, there was yet a surplus gate with no use. We use this gate as a driver for a BD139-16, exactly like Onno did in his projects.
This circuit can be refined a lot yet, as in the tests we got even a power output of 3 Watts, but as we hadn’t stabilized the power supply to the VXO... the TX chirped...
As we already had boxed the rig we had to adapt the regulator and the transmitting power went to 1Watt.
This transceiver surprised us for the simplicity of its building and adjustment, not to speak about its performance and the reports.
Seeing the output signal with an oscilloscope we see a perfect senoidal wave ... so it justify the received reports.
We worked several brazilian states, especially PY6 and PY7, always with compliments about the signal quality.
Because of the low cost and simplicity of construction, we recommend the novices to mount this project.
Schematic
The TX power depends of the 560 Ohms resistor value connected to the pin 3 of the 74HC4066, when the value of that resistor be lower, the power will be bigger. The lowest value for the resistor is limited by the gate maximum dissipation power of the 74HC4066 which is 100 milliwatts so it is good not to lower it a lot. In the circuit we have two adjustments, one is necessary and the other is alternative.
In the front end – pass band filter the trimmer must be adjusted to the biggest intensity of the received signal, with the ear-meter if no oscilloscope...
Another adjustment would be in the working frequency, which can be limited in the lower limit augmenting the capacitance in less than 10pF in parallel with the varicap diode. Now a covering widening can be obtained increasing the 15mH inductor value.

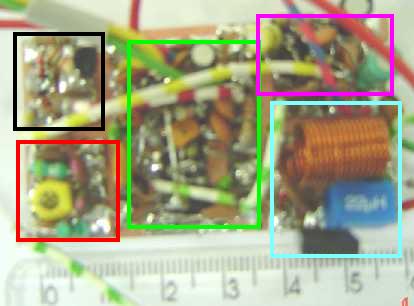
Black - key TR red front-end
green 74HC4066 mixer/VXO/buffer/driver
purple Audio amplifier
blue BD139 PA
Just over to the right side we mount the 7808 regulator
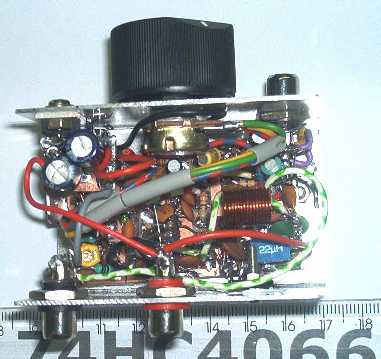
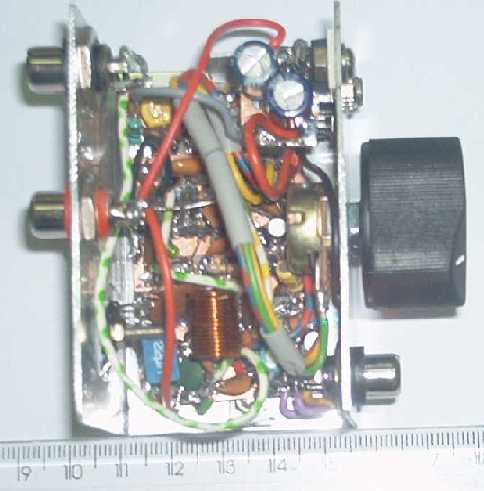
The modules are soldered on an unetched pcb serving as a ground plane or ground bus. A good ground is fundamental in RF homebrewing.
Size and mounting of the 74HC4066 module board suggestion – with pins up - dead bug.
schematic with the islands numbered in red
In the mounting process the line +X stood on the air, held by the 1K, 2K2 and 1K resistors, ending in the B+ island
In this figure we see the interconnection in blue between the 5, 6 and 11 pins
We also see that the 1, 7 and 10
We wish good luck to everybody who try to mount this project and we will be QRV for any question or doubt about the rig, its building or parts acquisition.
73 de PY2OHH Miguel
[email protected]
CAIAPÓ
TRX 40m - Rx DC - Tx 1W - VXO 6990 -7080kHz
Dando continuidade aos estudos com o circuito integrado 74HC4066 resolvemos montar um transceptor a partir do receptor descrito aqui na home.
Mais uma vez consultamos os artigos do nosso amigo e xará o PA2OHH Onno, e observamos que não seria assim tão complicado.
No último circuito com o 74HC4066 atuando como mixer, buffer e oscilador VXO havia ainda restado uma porta sem uso. Usamos esta porta como driver para um BD139-16 exatamente como o Onno fez nos seus projetos.
Este circuito ainda pode ser muito trabalhado pois nos testes conseguimos até uma potência de 3 Watts de saída, mas como não havíamos regulado a tensão de alimentação do VXO ... e o TX piava...
Como já havíamos encaixotado o TRX tivemos que adaptar o regulador e a potência de transmissão ficou em 1Watt.
Este transceptor nos surpreendeu pela simplicidade de montagem e dos ajustes sem falar no rendimento e nas reportagens.
Monitorando o sinal de saída com um osciloscópio observamos uma onda senoidal perfeita ... o que justifica as reportagens recebidas.
Trabalhamos vários estados brasileiros, destacando PY6 e PR7 sempre com elogios a qualidade do sinal.
Devido ao baixo custo e a simplicidade de construção recomendamos aos novatos que montem este projeto.
Esquema
A potência do Tx depende do valor do resistor de 560 Ohms ligado ao pino 3 do 74HC4066, quanto menor o valor do resistor maior será a potência, o menor valor do resistor é limitado pela potência máxima de dissipação de uma porta do 74HC4066 que é de 100 miliwatts. Portando é bom não forçar muito.
No circuito temos dois ajustes um necessário e o outro como alternativo.
No front end - filtro passa faixa o trimmer deve ser ajustado para a maior intensidade do sinal na recepção, no ouvidômetro (ear-meter) mesmo.
Outro ajuste seria na freqüência de trabalho que pode ser limitada na parte inferior acrescentado um capacitor menor que 10pF em paralelo com o varicap. Agora uma ampliação de cobertura pode ser obtida aumentando o valor do indutor de 15µH .
preto - chave TR vermelho front-end
verde 74HC4066 mixer/VXO/buffer/driver
lilás amplificador de AF
azul BD139 PA
Em cima a direita montamos o regulador 7808
Os módulos são soldados em uma placa de circuito impresso que serve como um plano terra ou linha bus de terra. Um terra forte é fundamental em montagens de RF.
Sugestão de tamanho e montagem da placa do modulo 74HC4066 - com pernas para cima - dead bug.
esquema com as ilhas numeradas em vermelho
Na montagem a linha +X ficou suspensa, sustentada pelos resistores de 1k , 2k2 e 1K terminando na ilha B
Nesta figura notamos a interconexão em azul dos pinos 5,6 e 11.
Vemos também que os pinos 1, 7 e 5 são dobrados e conectados a terra.
A todos que pretenderem montar desejamos boa sorte e caso tiverem qualquer dúvida quer de projeto, montagem ou aquisição de material, estaremos QRV.
73 de PY2OHH Miguel