| Decorative Wheel Covers Page 2 |
 |
 |
 |
 |
 |
 |
 |
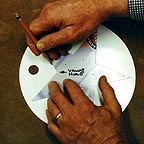
| Using the template, trace the star pattern onto the painted disk. Use the hub cut-out metal disk taped to the pattern to center it on the white painted disk. Note orientation of stem hole to star pattern. |
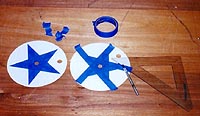
| Using low-stick masking tape, (it just happens to be blue) mask the edges of the star then trim with a craft knife and straightedge. The white star is being masked. |
| After spray painting the unmasked portion of the wheel cover blue, peel back the masking tape to reveal the white star underneath!. |
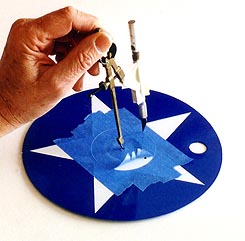
| Tape from the backside, the metal hub cut-out disk so you can establish a center point. Then mask the center area as shown. Replace the compass' pencil with a craft knife, cut a circle & remove the masking tape. Mask the remainder of the wheel cover with newspaper, paint the center red then remove the masking material. |
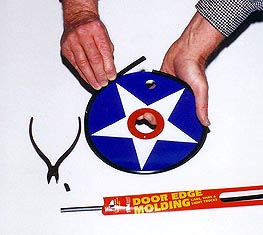
| Self-adhering door edging purchased from Auto Zone is perfect for making a neatly trimmed edge for the wheel cover. |
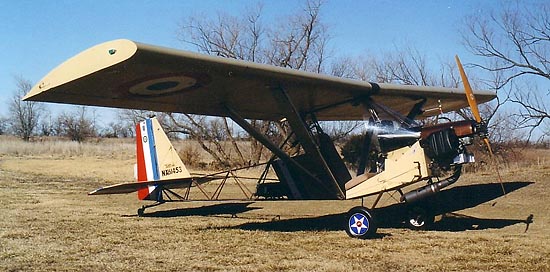
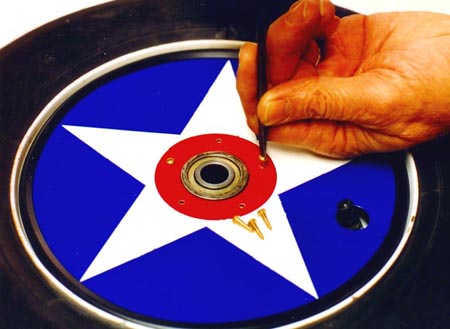
| Brass wood screws are used to secure the decorative wheel cover to the wood backup ring glued to the wheel's hub. Looks pretty neat eh? |
| Install the wheel on the plane and secure either with a self-locking nut or a decorative acorn nut secured with Locktite. *** Go fly! *** |
| #8 Tracing |
| #9 Masking Star |
| #10 Remove Masking |
| #11 Center Circle |
| #12 Applying Edging |
| #13 Final Assembly |
| #14 ALL DONE! |