 >
>My almost free home made Solar Box cooker and Solar Can Cooker
For informational use only
Summer 2003 to Summer 2004
As you read through this article, especially if you are an English teacher, you will undoubtedly see a great many errors, run on sentences etc.. Also, occasionally, I tend to get off the beaten track, so if I do, feel free to move on and skip my ramblings. I write as I talk so bear with me. Any questions I will be more more than happy to answer if I can. Just email me [email protected].
Photos are below.
Thanks.
Now I don’t profess to be an expert, near expert, or, even close to an expert or any kind of authority on solar cooking and building, but, through trial and error, and, lots of research, I have created a solar box cooker based on a french design and a solar can cooker, you heard right, a can, that work pretty efficiently here in upstate New York (midway between NYC and Albany). We are at: Longitude 74.303457 Latitude 41.793866.
This cooker works on gathering light directly into the top of the box and uses no reflectors.
And the best part of all, the food will absolutely NOT burn no matter how long you leave it in there. A box cooker works on the same principle as a crock pot or slow cooker pot (verbage depending where in the country you are from) you plug in the wall. It maintains a constant temp well above 160 degrees depending on how well you constructed the cooker (as long as you leave the top on while it’s cooking).
Back in the 70’s I had a piqued interest in Mother Earth and Mother Nature, and, as would have it, time went on, things got faster paced and that ideology pretty much fell by the wayside, until early 2002. Yes, you are probably guilty of that too!
Now that I am in my mid 40’s and things are slowing down a bit (at my own decision), I decided to re-visit things I have placed on the back burner and my first endeavor was my box cooker.
Since I do 98% of the cooking in the household (4 kids left, a dog, my wife and misc. kids friends), coming home from work, getting dinner ready (even with the prep work done beforehand per the "experts"), there was a lot of wasted time and physical energy as well as electric energy getting dinner on the table. So, my thoughts turned to a maid, (forget that idea), a genie, (scratch that one too).
One day while toddling around in my garage I stumbled on an old ragged eared, chipmunk chewed copy of Mother Earth News, my former bible of the back to nature movement. Right smack on the front cover was an article on solar cooking and oven construction. Feverishly, I dug through the pages and found most unreadable (thanks to the chipmunk who must have had a comfy nest) but with my trusty p.c. found many a website and learned the difference between box cookers, ovens and whole slew of other types of solar cookers. What to make, what doesn’t work for food, what foods to cook, what not to try cause it won’t work, etc., well, you can see from the links I will place on this page over time and some pretty strange but very tasty recipes (yes even stuffed salami slices!).
My cooker Materials list
2 cardboard boxes one slightly smaller that the other and large enough to hold your cooking pot(s) FREE from supermarket
Black Tempera paint big bottle (poster paint) $2.00 +tax at a dollar store
School glue (non-toxic)big bottle $2.00 +tax at a dollar store
Newspaper FREE
Piece of glass larger than the outside (larger) box. FREE (someone tossed it out)
Scissors or box cutter (band aids optional)
Optional
is an oven thermometer to check the temp of the inside of the cooker. FREE box at a yard saleOptional
Felt door weather strippingOptional
Oven bag (read on)**Note make certain the materials you are using are non-toxic since there will be a constant supply of heat here and vapors given off could get into your food. Bad move folks.
Building the cooker
My first successful endeavor (let’s skip over the boo-boos for now which I will nonchalantly outline as the article goes on) was 2 cardboard boxes from a local supermarket. One 24"long X 18"wide X 12"high (a fruit box) and one about 1 ½" smaller all around, and, it’s not too critical if the measurements are not exactly even all the way around (a water bottle box). The box needs to be able to fit your cooking utensils. So, work backwards when doing this. Boxes with corrugated weave in between the walls are what’s needed, not shirt boxes. You know, the kind the super markets get their stuff in before they put it on the shelves. If you look at the top of the box when you cut the tops off you will see a weave or honeycomb of cardboard between the inside and outside walls. The boxes will be nested (one placed inside the other) so the inner box will probably need to be trimmed, but, don’t cut until you read this entire article).
I started with 2 bottles of black Tempera paint and 2 bottles of school glue (non-toxic), you know the kind you ate in school when you were a kid and suffered no ill effects and dripped all over the place like pancake syrup. The mix was ½ paint and 1/2 glue (close enough) and I painted the inside and outside of both boxes and let dry. (Note, any materials used should be non-toxic, stay away from plastics etc.). This part cost me a total of $4.32 from a local Dollar store.
Lots of newspaper, not glossy magazine ads but plain old black and white newspaper (most newspaper ink is mostly hydrolyzed protein and earth friendly and non-toxic, so I have been reading, so don’t sweat it, if in doubt, check with whatever company puts out the paper you intend to use). I have read articles on using standard house insulation but have not tried it. (See below for 2004 update)
Line the bottom of the larger box 6 sheets of flat newspaper.
Crumple a whole bunch of newspaper and lay it on top of the flat sheets (this will provide a decent thermal layer when the box heats up).
(Hope you didn’t cut the small box yet!!)
Place the smaller box inside the first box so both openings face up.
Trim the inner box so the top is even with the outer box.
Crumple newspaper and jam them fairly tight between the side walls of the 2 boxes and fill it up just a bit beyond the top of the boxes. I found it easier to roll the paper and twist it and lay it in there.
Take a pane of glass larger than the 2 boxes (an old storm door window someone was throwing out works here for me, no cracks and this one was thermal pane but single pane will work also) and place it on top. Make sure you have a seal all the way around on the top so the glass lays flat on the edge of the inner box, newspaper and outer box. If not, trim the boxes, crush the newspaper as needed. You want a flat seal all the way around to keep the heat in. This is where the felt door weather stripping comes in. If you can’t get the cuts right use the school glue you have left over and glue the weather stripping to the top edges of the boxes to keep the heat in.
You are done. It ain’t rocket science!
Now, cooking vessels are critical.
Black or dark, not shiny, are best. Shiny anything (aluminum foil, pots etc. reflect heat and you don’t want that). Clear glass or dark glass (amber not purple or red) is good as well as the speckled black or dark blue "camping" pots and pans. A lid is preferable also. A glass lid is good if you want to watch the food (it won’t burn anyway).
Thin walled pots as opposed to cast iron or real thick pots work best. Crocks (glazed or unglazed) are another waste of time and food. The reasoning is thick or cast iron takes most of the heat and does not transfer it to the food (trust me on this one, quite a few pieces of meat went in the trash by not listening to the people who know).
My additions, but not needed, to my box cooker in an attempt to increase efficiency was a cake cooling rack under the cooking pot to keep heat transfer from the pot to the box to a minimum and a black roasting pan under the rack to attract and keep more heat. The black roasting pan is used (I leave it in all the time) when I use a glass roasting dish for pork chops and chicken, etc..
I also experimented with various cooking pots and settled on a black 12" pot with a glass lid and steamer rack inside (yard sale $1.00). A piece of aluminum foil in the vent hole in the glass lid to close it off and we are off!
Another quick and painless non cleaning method was the use of an oven bag to place the food in inside the pot. That worked fairly well also.
The concept behind the cooker is the same as a crock pot or slow cooker. Keep the heat in and concentrated. The sun is pretty hot when concentrated and if the cooker is well insulated, it will perform well.
I have made 5 pound roasts, pork chops, chicken, hamburgers, meatloaf (that’s a toughie but do-able ), chile and stews in my cooker.
The consistency is the same as what comes out of a crock pot or slow cooking oven. You DO NOT add water. As long as you leave the top on the cooker you are golden!
If you want fats to drip away from the meats, place them on a rack in your pot.
If you want the crunchy effect from a broiler or a barbecued flavor, (o.k., here’s where you cheat a bit), place the meat under your conventional broiler or on your grill the night before or before you put it in the cooker to crisp up or hit it with a propane torch (but don’t cook it, just let it get crunchy) and them place in the cooker. The meats will be fork tender and get even more tender as you leave them in longer.
My cooker in dead summer maintained a constant temperature of 220 degrees F and in spring and now in early fall, keeps a constant temperature of 180 F degrees on full sun days. A little cloud cover every once in a while never hurt.
Use gloves when removing your pans!!! That stuff will be hot!!!
Sunlight needs to be focused on the top of the box so align the box so it gets the most sunlight at all times. Tilt the box if you need to.
Now that the sun is getting lower in the sky, I use a mirror behind the box and on the sides of the box to concentrate the sunlight inside the box. It is leaning against the box and focusing the light inside the box.
You want to get the most light in the box as you can.
I place the cooker and contents out in the morning before I leave (0700 hrs.) and when I get home at 1700 hrs. it is ready.
A glimmer of sunlight in the box starts the temp to rise and from there on it’s a cake walk. A suggestion, check your weather forecast for the next day before placing your cooker outside. A time or two of not checking when you walk out and it’s sunny and it turns to rain or intense clouds an hour or two after you leave will teach you a lesson to check. The cooker will also work on partially sunny days although cooking times will be longer.
I have found that in summer, a 5 pound roast is done in 4 hours. Late spring and now takes about 5-6 hours.
Cut up chicken, 4 pound average, cooks better in spring and fall than a whole chicken which can be done in the summer.
Most canned and frozen vegetables need to be heated through just like in diners (you don’t think they really cook the veggies now do you?? That’s what steam tables are for). Chuck them in frozen or not.
Fresh veggies take longer than canned or frozen. Usually the same time it takes to cook a roast. Cut them in smaller pieces, especially potatoes, or any root vegetable, cut them THIN or really small chunks (you’ll learn what works).
If you do corned beef and cabbage, add caraway seeds to keep the sulfur smell down from the cabbage, you don’t need many.
Don’t cook anything that needs water to cook, like rice. Good luck. I have had some success with parboiled rice products in summer. I cannot get the temp of water covered rice to boiling.
Dried beans and grains that need to soak can be given water, barley works well. Experiment with these and whatever else you feel ambitious with trying.
Season your meats anyway you want. Season your veggies too.
Remember that the more bulk in the box (food) the longer it takes the heat to build and maintain itself.
Start small and work your way up.
Water can be heated (with modified versions of the cooker below) and on occasion boiled in the cooker. Once you add a food item to it, the temp comes down and, "Houston, we have a problem".
Whew, tired yet?? Wait til you get your first meal out of the box. You will be checking, rechecking and double checking it as it cooks. Relax. During the spring and fall you will need to readjust the box to follow the sun occasionally.
It’ll be o.k. As long as the sun is in the box, it’s cooking.
Never try to cook anything that is going bad or is spoiling, meats, anything. Bad food is bad food and there’s no sense cooking something that is going to make you sick or worse!
Don’t be discouraged when you build your cooker, Refining and personal preferences will always be there.
As time goes on I will be adding more to this page. (08/07/04 see the pics below!!)
Here are some of the links I promised.
http://solarcooking.org/ http://ashokk_3.tripod.com/ http://www.angelfire.com/80s/shobhapardeshi/ParvatiCooker.html http://teacher.scholastic.com/scholasticnews/indepth/summer/solarcooker.htm http://www.cc.jyu.fi/~hvirtane/cooker/This information is from my own experiences and the author is not responsible for any boo-boos you may make.
If you want to try out what is on the page, be my guest. Keep in mind all this material is copyrighted tho.
Comments or suggestions feel free to email me at [email protected]
Thanks for stopping by! Here come the photos!!!!
< >
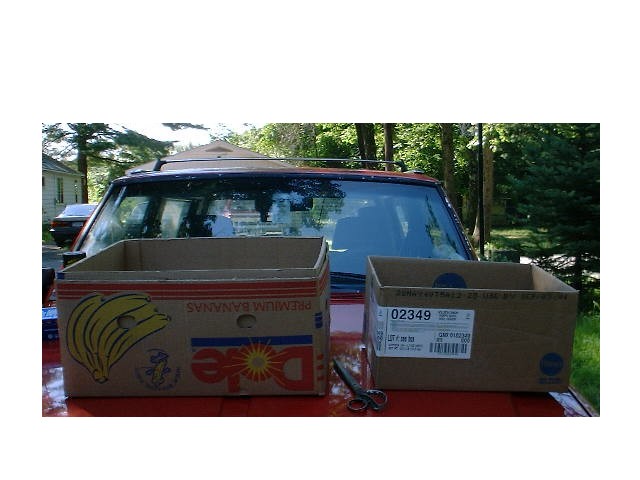
2 boxes one smaller than the other. Notice the scissors, you will most probably have to trim the top of the smaller box, or if it is too small, add crumpled newspaper in the bottom of the large box to raise the level of the smaller so the top of the smaller and the large box are even. Corrugated walls in the boxes work best to help create dead air space.
< >
>
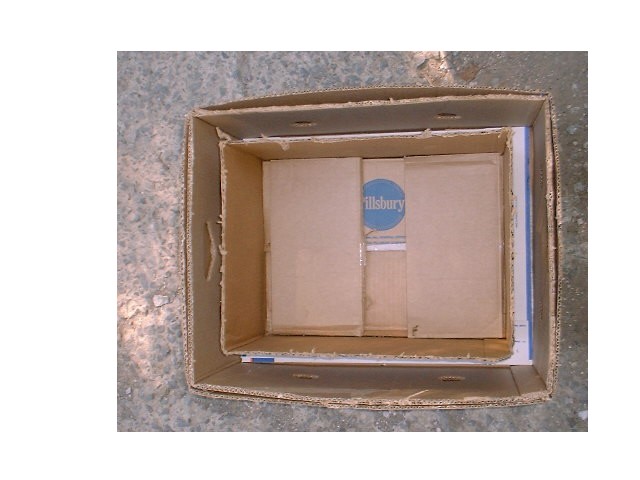
This is how they should fit.
< >
>
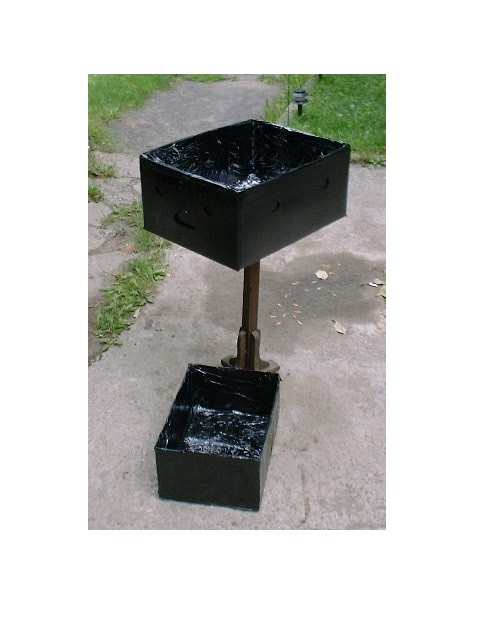
After trimming spray paint with a non-toxic black paint inside and out. If you can’t find any use ½ Tempera poster paint and ½ school glue. Mix thoroughly and paint, let dry completely.
< >
>
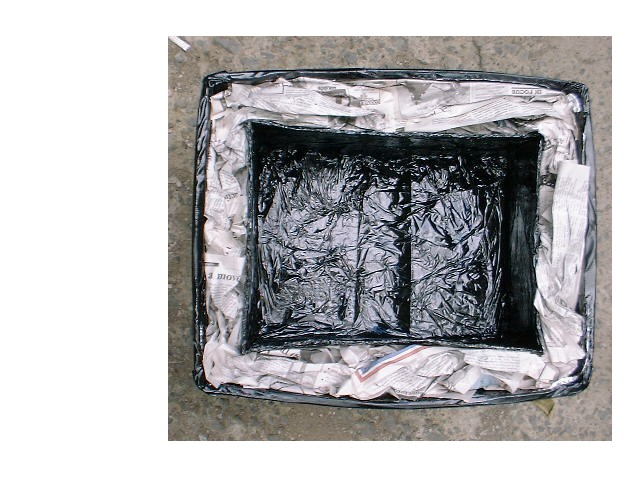
Place the smaller box in the larger box and add crumpled newspaper in the sides and bottom if necessary. This will create the dead air space needed to trap the hot air. Paint the top the newspaper black if you wish.
< >
>
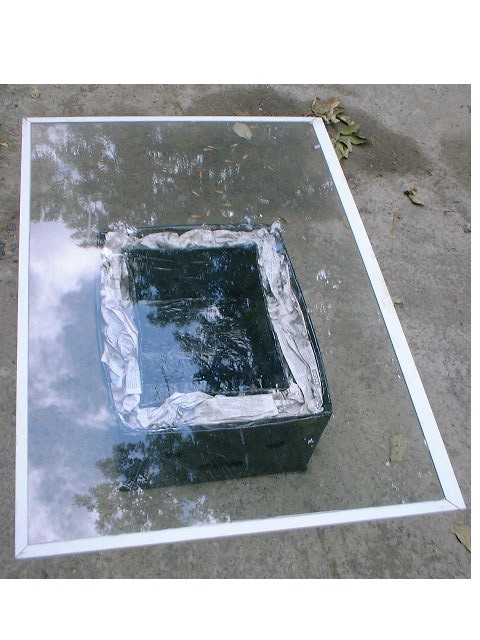
A discarded insulated storm door window sits squarely on the top of the cooker. Place a thin walled black pot with a glass lid or the matching lid inside the box with the food and let sit in the sun with the sun beating down directly on the glass and into the box. Angle the box facing south to allow the maximum sunlight in the box. Make sure you have a solid seal between the glass and boxes. If not use thin weatherstripping on the box.
Using an oven thermometer in the box will allow you to monitor the temperature in the box.
Just like cooking in a crock pot. No water, no stirring.
I have placed a 5 lb. pot roast in the cooker at 9 a.m. and have had it ready at 4 p.m. With veggies and potatoes. You will find potatoes need to be cut in thin slices and given room to cook. Whole potatoes I have not had very good luck with. Veggies in with the meat turn out great. Pasta is another toughie.
If you like the seared effect on a roast then sear it before you put it in. If you like crispy chicken skin, put it under the broiler to crisp it up and then put it in.
****Note:
The latest endeavor has been to line both boxes with aluminum foil inside and out and paint over the top of the foil. Assemble as usual with the newspaper and this cooker has reached temps ranging from
210 degrees F in the late spring and early fall to 225 degrees F in the dead of summer.
Another experiment was to use the aluminum foil and substitute housing insulation for the newspaper, seal the insulation between the 2 boxes with Duct tape and this cooker has reached temps of 220 degrees F in late spring and early fall to 240 degrees in the dead of summer.
If you want to use the cooker earlier or later in the year, make sure you block the wind front the sides of the box. You will also need to tilt the box at a steeper angle due to the sun being lower in the sky or configure a mirrored surface to draw the sunlight into the box. This is a bit tricky and you do lose some of the power of the sun.
I am experimenting with other materials and types of cookers using items from a car tire tube to a records storage box. Stay tuned!I am having trouble with the can cooker beyond summer so I am working on that and hopefully will have a resolution soon. After all, you can't call fall and winter in on a moments notice.
Food network watch out! Well, maybe not just yet!
Peace and have fun!