These are the steps I take to making a avatar sticker if you know of any shortcuts please feel free to use them .. This is merely a guide I will number the steps as I go to make it a bit easier to follow..
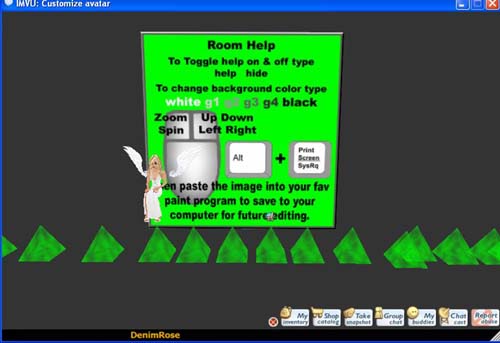
1. First you need to take a snap shot of your Avatar this can be done several ways. You can use your 3D chat window or if your really keen buy a Interactive screen shot room you will want to make the room as big as you can to fit your screen.
2. Now strike a pose . And when you get your desired effect press print screen. And paste it into your program either paint or Adobe Photoshop
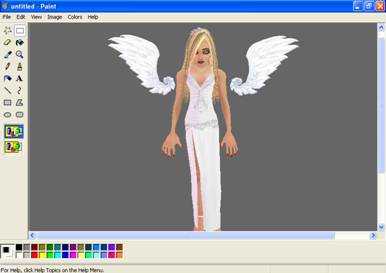
3. If you use ms paint to paste your print screen you will need to save it as a jpg file.. I personally prefer using ms paint because it uses less resources than Adobe Photoshop to run. Click on file, save as then name it making sure you select Jpg file in the
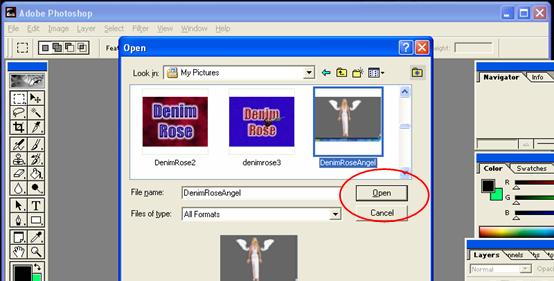
4. Once you have saved the file open your image in Adobe Photoshop by clicking file open and browsing for your avatar image
5. Crop your Image by selecting the rectangular marquee tool press ctrl + c on your keyboard this will copy the cropped area then select file new photoshop automatically resizes the new box to fit the cropped area make sure you have selected transparent in the contents buttons. When you have a new box FYI this screen is grey and white checks paste your cropped image by pressing ctrl + v
6. Use your magic wand to highlight the background then delete it if you ever make a mistake you can always press edit, step backwards
7. To add writing Select layer then new layer, then select the T button and then click on the image you can move this writing anywhere once you have typed what you want Select each letter with the wand "to select multiple letters hold shift down while clicking each letter" and use the filters to change the effect. once you have reached your desired effect click on file save as name your sticker and save it as a PNG file.
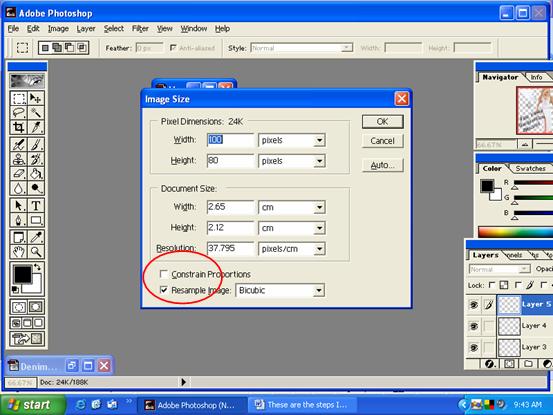
Once you have saved your sticker you need to make a thumb nail version for the catalogue page you can do this by selecting Image / Image size / then typing in 100 pixels high 80 pixels wide you will have to un tick the box that says constrain proportions save this image as a jpg file.
Close Photoshop. Now you're ready to submit your sticker 8. Click the following link it will take you to the sticker submission page .
http://admin.imvu.com/catalog/admin/web_submit_product_new.php?type=sticker&products_id=82642
9. now you have to fill in all the information on the submission page
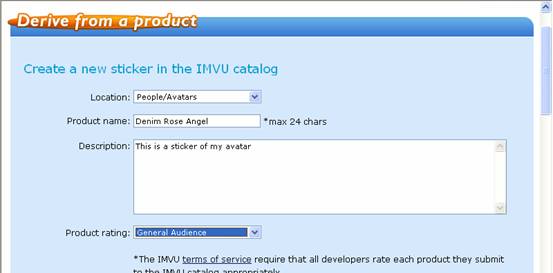
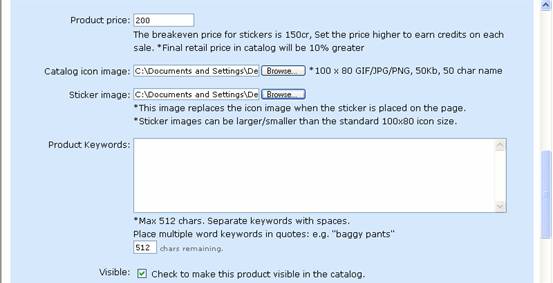
Please note that the catalogue Icon is the 100 x 80 Jpg image and the Sticker Image it your PNG file Once you have filled in all the information press the submit button . CAUTION when pressing submit only do this once as sometimes it may take a while to load and by pressing it more than once will submit it several times thus wasting credits ..

This is also where you will find the submission charge this is how much it will cost you to place your item in the catalogue for sale .
PLEASE NOTE UNLIKE OTHER ITEM YOU MAKE STICKERS TO NOT APPEAR AUTOMATICALLY IN YOUR INVENTORY LIST OR YOUR STICKER LIST . YOU HAVE TO PURCHASE YOUR STICKER.
Happy sticker making!!!
Below is the finished sticker