Dropping a 1976 Cat 22 "Swing Keel" / Centerboard
Notice: this temporary page is not approved by the family web designer!!
New Page 10/10/04
It was time to begin work on our 2-week-old purchase. The
paint and the official keel-dropping video had arrived, and the recommended
supplies and equipment were all made or bought.
Like many of you sailors, I've served my time as an SKOB
(Smartest Kid On the Block), and I even invented my present occupation,
so for a change I decided to see if I could purely follow directions without
innovating anything.
I almost made it. Here are a few select shots that might
interest potential swing-keel do-it-yourselfers.
-
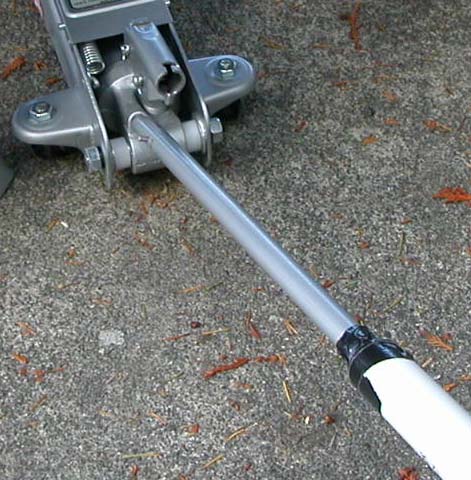
Improving the jack a-la
Possum Lodge: To make sure I could work the jack without being underneath
the boat, I made a handle extension using some of the 1" tubing recommended
for rolling the keel carriage at the end of the operation. Naturally I
fastened it with some of The Handyman's Secret Weapon, duct tape.
-
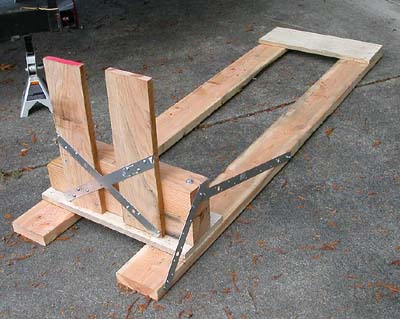
The infamous keel sled. Nothing
original here, it's built entirely per the video instructions. --OOPS!
I accidentally added some long lag screws to the rear blocking stack (nearest
the camera) and substituted poplar boards for the nominal 3/4" plywood
cross members.
-
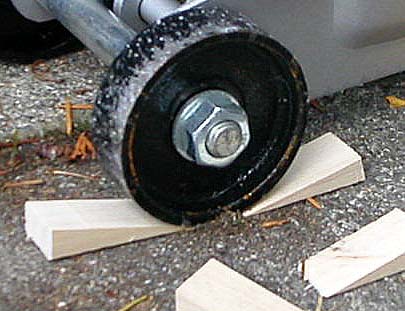
Micro-chocks. This is where I
went totally off track and began wildly innovating. The hydraulic floor
jack we bought has small wheels. After a quick test-lift, the jack appeared
too likely to scoot out of position. I cut up a set of micro-chocks for blocking the jack into position. It really
seemed to help.
-
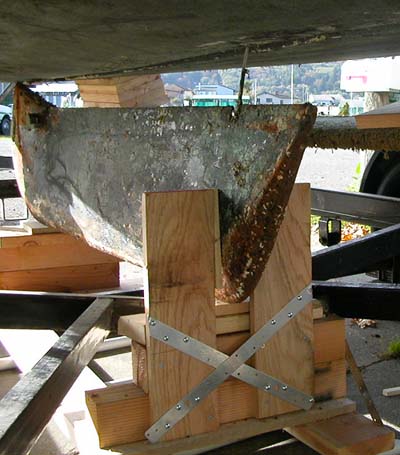
It's a Beautiful Baby Keel!!
Thanks to any relevant gods and previous owners of this boat, the keel
hanger bracket bolts were not at all stuck or welded in place. They unscrewed
in a casual 20 minutes of backing each one out a few ratchets, then going
to the next, etc. till the keel gracefully settled the half inch down onto
the sled. We then went back to raising the boat till it was 4 layers of
2x10" above the bunkers both fore and aft.
-
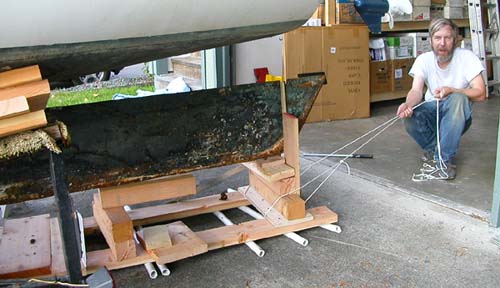
A Moving Keel Stops for No Slave.
I'm seen at left pulling the sledge. Not shown behind keel, Yoshebell retrieves
pvc pipe "Pharoah Rollers."
-
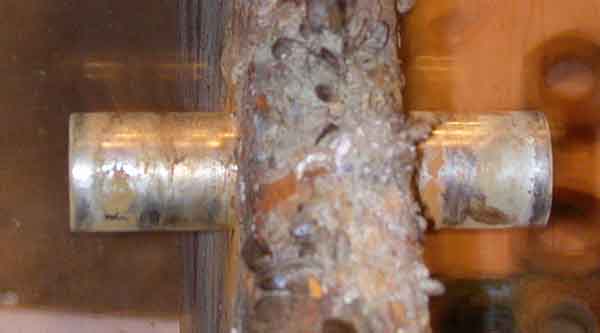
Another stroke of good luck! The
heavy pivot pins shown out of focus in the foreground, the hanger
and the lifting wire connection are all in excellent condition. The pin
is full thickness, completely round, no sign of corrosion. Some previous
owner had fitted nylon pin bushings and pads for the top of the keel to
eliminate "clunking." One pad had fallen off and the bushings have compressed
out of round, a trivial upgrade matter.
We found the whole procedure very straightforward. Partly
this is due to being beyond our teen years and therefore low-energy enough
to be patient. We spent about 3 hours very gradually jacking up the boat,
lowering the keel and putting everything away, with lots of breaks and
a dog walk along the way.
Our boat is firm enough that we seem to need only 4 rather
than 6 sets of blocking pads. This will make sanding and bottom painting
just that much easier with fewer obstacles to work around.
The only problem we noticed was that the hydraulic jack
has a release that can drop too fast for comfort. There is an activation
screw that's turned clockwise to make the jack lift up. When turned back,
it doesn't make the jack work in reverse--it completely releases the jack
and can drop the boat with a scary "thunk." During the test lifting I saw
that if the activation screw is backed very slowly, there comes
a point where the load is very gradually and gracefully lowered.
Otherwise, this would have been almost boring except for
a bit of Puget Sound sun peeking through the clouds and mist midway through
the afternoon. It's also extremely motivating to realize that sailing season
begins whenever the keel and bottom are painted--no matter what month of
the year.
More to Follow 10/10/04