|
Please do not place this tutorial on any
other site, or claim them as your own. Thank You
Sea Shell Dingbat
Written By MJessup
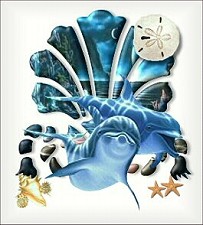
This is what we will be making
You will need this zip for this tutorial
It includes the font you will need.

Open a New Image 400 X 400, Transparent.
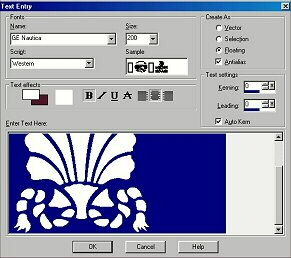
Go to your text tool, click on it,
your text screen will pop up.
Find your GE_Nautical Dingbat,Settings are,
Size set to 200. Floating, and Antialias checked.
Type the letter "f" lower case.
this is what you should have...
then click Ok. Now your image should look like this...
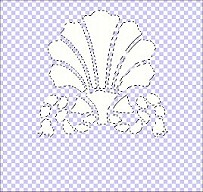
Leave the ants marching,
Find a Picture you want to use to fill the "Shell" with.
I have choosen this one for mine

With My Picture active, Go to Edit>Copy.
Then go back to your shell image, and activate it.
Then Edit>Paste into selection.
This is mine now

On My Picture above i have already Beveled it,
and added a drop shadow,
thats why it looks a little different than yours will.
But now if you want, Go to Image~Effects~Inner Bevel
I had my Settings set to this
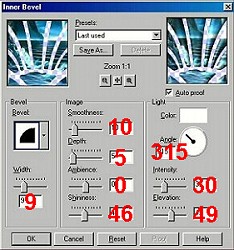
Once you get the desired Effect, then Click Ok.
Now go to Selections~Select none.
Then go to Layers~Merge~Merge All.
Now it's time to Decorate it, I used some Dolphin Tubes,
and Seashells for mine.
Once your Done Decorating it, then go to your Selection tool,
click on it. Go back to your image and make a
selection around your shell then go to Image~Crop
to Selection to get rid of any unwanted
extra space outside your tag.
Thats it..Your Done, you can finish it off by any method
you chose, making the whole Tag buttonized, etc.
Then Just Name It, then Save It.
Most of all Have fun.
To return to Tutorial Index Page
please click below.

To return to Kitty's main page
please click the lil girl below.

|

