|
Please feel free to give this tutorial a try.
Only thing I ask is that you do not take it
and place it on another site or claim it as your own.
Thank You
By SwtKitty99 aka Chelle
Images have been resized for faster loading time
Supplies Needed: Psp 6 or 7
I wrote this using 7
No outside plugins needed
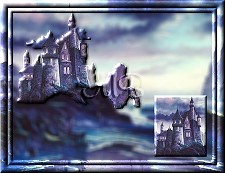
This is the image I will be using, I do not know
the creator of this picture, if it is yours or know who's
it is please contact me. Thank You
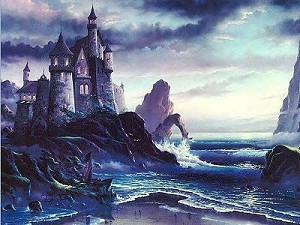
Open a picture of your choice in psp.
While holding down the shift key click on D 2 times.
Two copies of the picture should open. Close the original
so that you do not loose it. Set 1 of the duplicates to
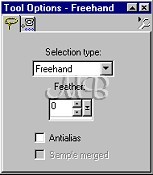
the side/minimize it for later use. Now select your lasso
tool: settings are as below
On the copy of the image you have not minimized
select a portion of the picture that you want to stand out.
I am choosing the castle. With the lasso tool draw around
that portion of the picture. This does not have to be perfect.
Note: Youn can not stop drawing around the object until you
circle all the way around to the point you started at.
If you do not like what you have selected just go to
selections/select none and begin again.
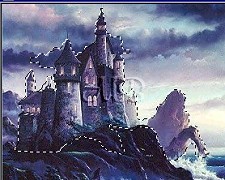
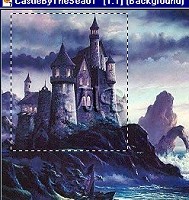
Once you have finished drawing around your selected area
you should have ants marching around it like this.
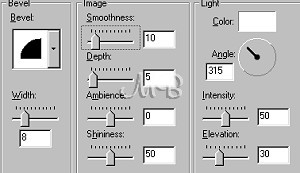
Now go to effects/3D/Inner Bevel and apply the
following settings, or play with it till you find
something you like
Don't deselect yet. Go to Selections/Invert.
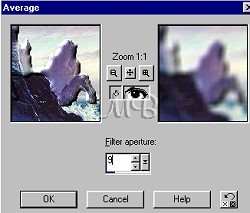
Next Effects/Blur/Average and these are the settings
I am using, or you can play till you get something you like.
Now go to selections/select all, then
selections/modify/contract and usually I use a setting
of 15, but the part of the picture I chose is close to the
edge so I will use a setting of 10. This again is up to you.
Once you have contracted the selection go to selections/invert.
Now set this to the side for a second and get the other image
you minimized earlier. Be sure it is your active image and
go to edit/copy. Minimize it again for a minute and go back
to the image your have been working on. Go to
edit/paste/into selection. Now apply the same inner bevel
that we used earlier. Now be sure your background color is
white and go to image/add border Settings are
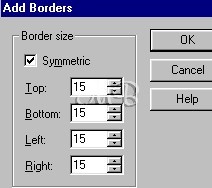
Now get your magic wand: Settings are
Match Mode: RGB Value, Tolerance 0, Feather 0, Sample
Merge not checked.
Click on the white border you just added
You should have ants marching around it, if the selection cuts
into your 1st beveled frame dont panick, go to selections
select none. Now go to selections/select all.
Next selections/modify/contract by 15, after applying this go to
selections/invert. You should now have this
Go to edit/paste/into selection 1 more time, then
again apply the same inner bevel.
Go to Selections/select none to deselect.
Now 1 more time to back to the other image. Select your
selection tool, the settings I am using are: Selection
Type: Rectangle, Feather 0, Antialias Not Checked.
Note: These are the settings I am using, remember you want
this to be your own. You do not have to use the selection
type rectangle, you can use ellipse, circle, triangle,
whatever you want :)
Now when you have your settings the way you want draw
around the same portion of the image you selected
earlier like this
Apply the same inner bevel we have been using.
Go to edit/copy.
Now go back to the image we have been working on and go to
edit/paste/as new layer.
Ok almost done :)
We want to resize the image we just pasted, so go to
image/resize and here are the settings I will use.
Note: You may also want to play with the size of this.
Depending on your picture you may want it smaller or larger.
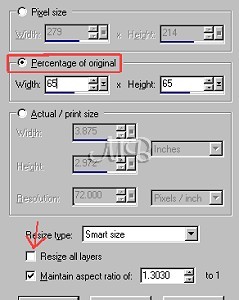
After you apply the resize dont forget to go to effects/sharpen 1 time.
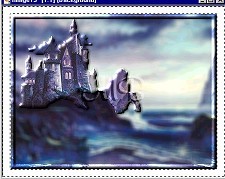
Now with your mover tool move this image to a corner of
your image like this
Now go to Layers/Merge/All Flatten
Now you are done unless you would like to add to this :)
Hope you like, have fun and enjoy.
(((((Hugs Chelle)))))
To return to the tutorial index please click below.

To return to main page please click below.

Copyright � Jan.2002 Chelle
|

